
Happy February, Dynamos!
About six weeks ago, Mims decided she wanted a dramatic new haircut (first graders are funny!). Her stylist auntie cut her hair over the winter break so that she could have an awesome "reveal" on the first day back to class. It was adorable.
I like it because her new short style makes it easy for her to do her own hair, freeing me up considerably in the mornings! She likes to wear headbands, since her new style doesn't tuck back quite as easily as before, and she doesn't like her hair in her face while she's at school. Easy peasy! The only thing is, the plastic kind give her headaches, so we have to get her the soft stretchy kind. And anyone who has bought the soft stretchy kind of headbands know that those things are pricey, even for the plain, boring headbands! Don't even get me started on the glitter ribbon ones that I paid $15 bucks for (designer headbands are a RACKET! LOL!!).
So I started making her headbands from those inkle bands I wove last month. Cute and cheap! I wanted to make her some crochet headbands too, but the headbands I have made in the past always stretch out and become useless after a couple of uses. It got me to thinking, though. What if I could make the crochet part less stretchy, like a ribbon?
And the Basic Striped Headband was born! Ta-da!
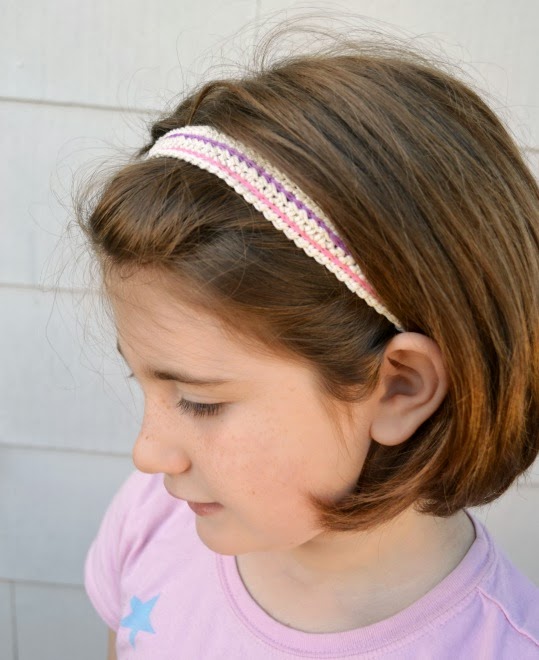
By crocheting along the length (instead of short, stretchy rows across the width), and then adding stabilizing (and decorative!) slip stitches between the rows, the crochet fabric loses it's stretchability and becomes a perfect headband ribbon. Then add some soft elastic and VOILA! A headband that will keep your hair out of your face all day long, without giving you a headache!
BASIC STRIPED HEADBAND
(The crocheted ribbon is about 16" long, so the finished headband will fit 20"-22" heads. My 6-year-old daughter and I can both wear these.)
Supplies:
Patons Grace 100% Mercerized Cotton in Natural - approximately 20 yards (or other light weight yarn)
2 colors of embroidery floss or craft thread - approximately 4 yards each
Size D crochet hook
Scissors
Yarn needle
1/2" knit elastic - approximately 4" per headband
Sewing thread
Sewing machine (or needle to hand sew)
Straight pins
Using yarn, ch 86
R1: sc in 2nd ch from hook, sc in each chain across (85 st)
R2: ch 1, 20 sc, 45 hdc, 20 sc (85 st)
R3: ch 1, sc in each st across (85 st)
Fasten off.
To add the slip stitch stripes, use the floss to crochet into the holes between rows.
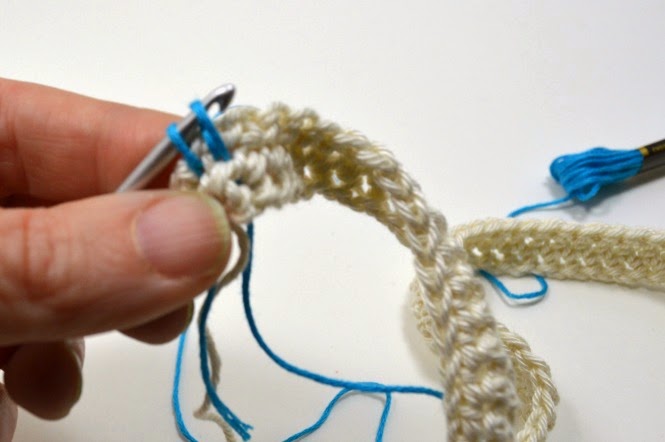
Using your first color, and starting at the end of the strip, pull a loop through the first hole between Row 1 and Row 2. The pull a second loop through the next hole.
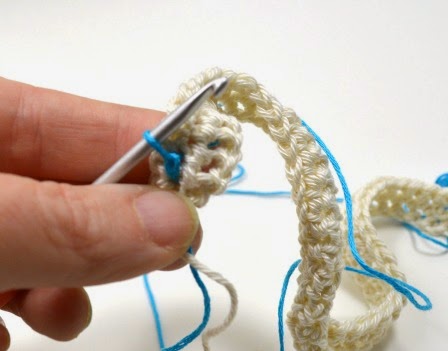
Pull the second loop through the first loop to create the slip stitch. Keep slip stitching until you reach the end of the piece. Then use your second floss color to slip stitch into the holes between Row 2 and Row 3.
Weave in all of the ends.

They don't take very long, so go ahead a make a whole bunch of them while you're at it!
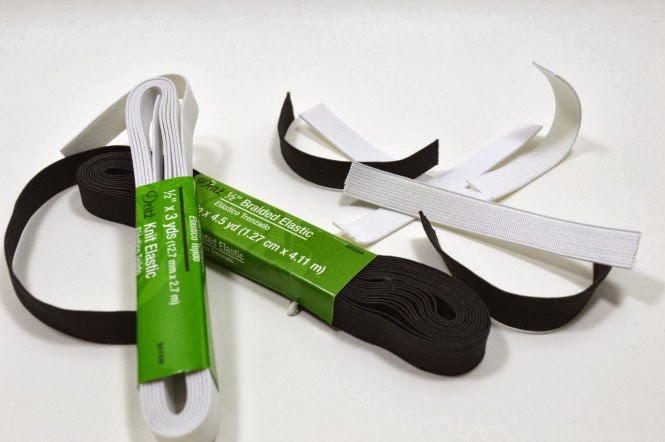
Cut your elastic strips four inches long!
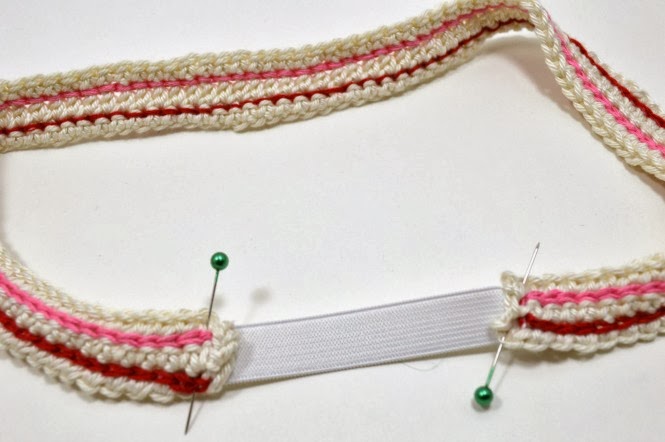
Pin your headband to the elastic, making sure that it's not twisted. Try it on (don't poke yourself!) to make sure it's a good fit. Adjust the elastic if necessary.
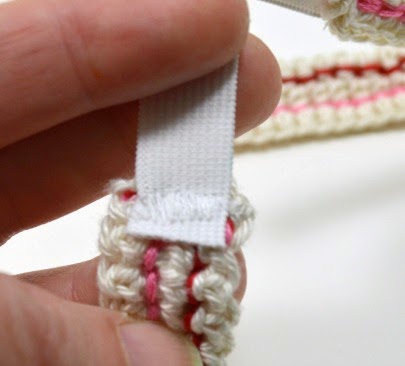
Sew the elastic to the crochet ribbon! I used a lot of zig-zag stitches with my machine, but you could easily hand sew it into place. Trim the ends of the elastic if needed so that they lie flat against the crochet part of the headband.

Admire your handiwork! Well done! Aren't we going to look adorable at the gym tomorrow? Oh who am I kidding? The kid working the register at Target is going to be impressed I'm sure, even if he doesn't actually say anything beyond, "Here's your change, ma'am."
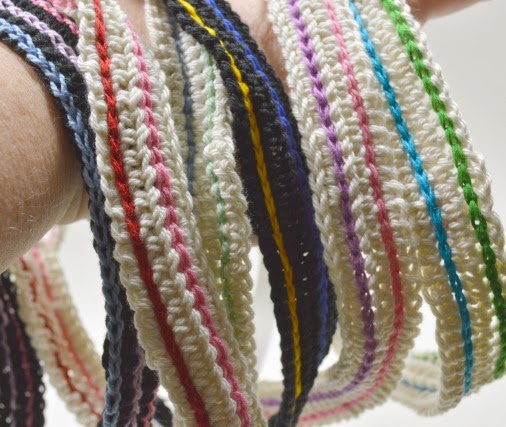
Now, go finish up the other headbands while you're on a roll. When you're done, you can put them all on your wrist and swing them around because it's fun. Or is that just me? It's just me? Okay, I'm weird.
One more thing...
My daughter has gotten really into Legos lately. She got an awesome Rapunzel set for Christmas that had a blue "jewel" (ie: clear blue lego head) in the set. Her dad suggested that she should use it as a ghost face. She said no, she wanted to use it as a water tank.
We had no idea what she was talking about until she created THIS SCENE:
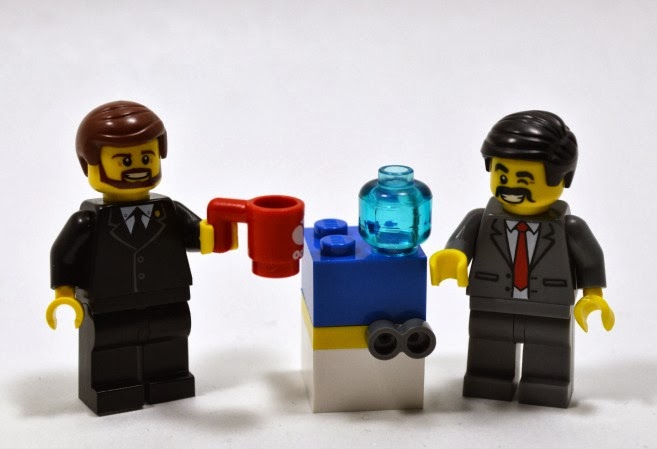
Ba-hahahaha!!! My kid is weird too! Happy Monday!
xoxo
xoxo

Love the haircut! Mimsy looks adorable! The hairbands look so comfy! I'm with Mimsy, the plastic ones hurt my head too!
ReplyDeleteI made one using a hair elastic which I attached to each end with single crochet stitches across (it works beautifully and NO sewing needed)
ReplyDeleteGosh I can't wait to make one for myself. Need that so much coz I'm going for my delivery soon. N my hair is driving me crazy..
ReplyDeleteWow! Just found your pattern. Lovely and looks so easy. Can't wait to try it out. Thanks for sharing it! BTW... I don't think your kid is weird. Okay, maybe in a funny, creative way.... Lol! So, welcome to the world of creative weirdos! We must stick together. Safety in numbers.... Lol
ReplyDeleteI love the lego scene... my kid is way too much into legos.. he lives in Lego land and I feel like hes going to turn into a lego lol
ReplyDeleteThanks for sharing this wonderful post. It's really very interesting to read. Homeopathy is one of the best solution for an hair fall treatment.
ReplyDelete"This post has inspired me to explore this topic further. Keep up the fantastic work!. I just wanna share something, Over the years, I have tried various anti-dandruff shampoos to find the one that suits me best
ReplyDeleteWhere can I buy this headband for my kids? Pool Screening Riverview FL
ReplyDelete