Google+

Tuesday, January 29, 2013

Capri Sun Magazine Bag

**Um, good evening Dynamos!  I am writing this from my deathbed sickbed, where I just noticed that this post (which was supposed to go up during recycling week) somehow got saved as a DRAFT instead of published.  Crazy.  So I'm putting it up tonight with a little update on my slowly recovering health.  Let this be a cautionary tale to you all, GET YOUR FLU SHOT NEXT FALL!!!!   It's been a week and a half, and it's turned into a flu/bronchitis hybrid that's nasty and viral (meaning: no antibiotics to save me!).  I spend about 20 hours a day asleep, and the other 4 I spend coughing.  I wouldn't wish it on my worst enemy.  I can see small improvements though, and I am optimistically hoping that I'll be back to normal by the weekend... Or at least as normal as I've ever been... :)  Love, love, love to you all! xo Jaime**

If you read THIS post, you already know that Capri Sun pouches go directly into landfills when you throw them away (even if you put them in the recycle bin).  If you don't believe me, they even tell you on the Kraft Foods website (Capri Sun's parent company) that the Capri Sun packaging isn't recyclable in any facility (check it out for yourself HERE).

But, that doesn't mean that we can't recycle the pouches ourselves!  We can use those sturdy, awesome, never-will-decompose-in-our-lifetime pouches to make some pretty cool stuff!

I already made a cool little camera case (that doubles as a phone case/keychain wallet), which got me thinking about beachy vacations and pool parties.  I love relaxing by the pool especially when I can take magazine and stretch out in a lounge chair (and Jake is watches our kid). LOL!!!


I made this magazine bag just for those great days!  It's not a purely crochet bag, but if you're cool with a little bit of sewing in addition to the crochet, it's a quick and easy project. And, since the pouches are waterproof, it'll protect your magazines from splashes! Unless, of course, you get pushed in...

Capri Sun Magazine Bag
Supplies:
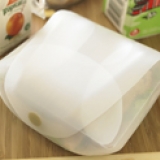
15 Capri Sun pouches
Wonder Clips (by Clover.  Optional, but you can't use pins to hold the pouches together with pins because they make holes in the plastic)
Sewing Machine
1/8" hole punch (it's half the size of a normal hole punch. I picked up mine for $5 at a craft store)
Small amount of worsted weight yarn in 2 colors (I used Red Heart Soft in Turquoise and White)
Size G crochet hook
Yarn needle
Scissors

Arrange six of the pouches into two rows of three pouches.  Sew them together with your sewing machine using a zig-zag stitch.  I sewed all of the vertical seams first, and then sewed a single horizontal seam to stitch the two rows together. Do it again, so that you now have two sheets of six pouches each.  This is the front and the back of the bag.


Cut the remaining three pouches in half (up the center).  Sew two of the strips together along the short side, using the picture above as a guide.  Repeat two more times, so that you have three long strips.


Use the Wonder Clips to attach one of the long strips to the bottom of the front of your bag.  Sew it in place.  Use the clips to attach the back of the bag to the other side of the strip.  Sew it in place.  The bottom is done!  Now let's sew in the side panels!


Use the Wonder Clips to attach the side panels (long strips) to the front, back and bottom of the bag.  The big trick to doing this quickly (and neatly!) is to line up the top of the side panel with the top of the front and bag and clip into place.  Then move down the side of the bag, clipping it in place as you go.  When you get to the bottom, there might be a little excess, but you can trim it off (if necessary) after you sew the side panel in place.  Use a zig-zag stitch to sew the side into the bag.  Repeat on the other side. Trim off all excess thread tails!

Using your 1/8" hole punch, punch 70 holes (as evenly spaced as possible) across the top edge of your bag.  This works out to 10 holes in each whole Capri Sun pouch, and 5 in each half-pouch (on the sides).
Crochet Bag Top
R1: attach turquoise yarn in the center hole of one of the side panels.  ch 1, sc in each punched hole along the top edge of the bag, sl st to first st to close round (70 st)
R2: change to white yarn, ch 1, sc in each st around, sl st to first st to close round (70 st)
R3: change to turquoise yarn, ch 1, sc in each st around, sl st to first st to close round (70 st)
Fasten off.  Weave in ends.

Crochet Bag Strap
*carry non-working yarn up the side of the piece as you go to avoid having to weave in 70 loose ends (which would make this strap unbearably tedious to complete)**
using turquoise yarn, ch 11
R1: hdc in 3rd ch from hook, hdc in each ch across (9 st)
R2: ch 2, hdc in each st across (9 st)
R3: change to white yarn, ch 2, hdc in each st across (9 st)
R4: ch 2, hdc in each st across (9 st)

R5: change to turquoise yarn, ch 2, hdc in each st across (9 st)
R6: ch 2, hdc in each st across (9 st)
R7-70: repeat Rows 3-6 sixteen times (9 st)
Fold bag strap in half, longways (make sure the side that you carried the yarn along is facing the inside of the strap piece).
R71: ch 1, sc along the long open edge of the strap, catching stitches from both sides to crochet the strip closed (approximately 100 stitches), sc 4 stitches along the short edge at the bottom, and then sc along the other long side of the strap (work directly into the stitches, approximately 100 stitches)
Fasten off.  Weave in ends.


Attach bag strap to the crocheted top edge of the bag at the side panels.  Using turqouise yarn, stitch it in place.  Weave in ends.


You're all done!  Fill your cool new bag with magazines, sunscreen and Nalgene water bottle (Reusable and BPA free!  Score!) and take it to the pool!  You'll be soaking up compliments while you soak up the rays!

xoxo

If you'd like to see more recycling with crochet projects, check out the January 2013 section of my Free Crochet Patterns page.

Wednesday, January 23, 2013

Hello, Dianne! Take a look at these swatches!

Ahahaha!  I watched Sleepless in Seattle last month and that line has been stuck in my head ever since.  It was too perfect not to use. I love Rob Reiner so much.

Okay, I did have a point (before Rob Reiner so carelessly derailed my thought process).  I've gotten behind on my crochet degree.  I got knocked down a little after that first review, and my grandma got super sick, and it was so easy to convince myself that my education was less important than the other things in my life.  And once I could rationalize it in my head, it was easy to let other things take priority over my swatches as well.

In fact, I cut back on my blog posts last month in an effort to give myself more time to work on my class.  Yet, somehow, I managed to get through December AND January without working on a single swatch.

So, I hauled out all of my class materials and went over them last night.  I have 38 swatches and 4 projects to get done, plus the report on the crochet that I saw in the Fisher Museum of Art at USC.

I had finished my first hairpin lace swatches, but I'm just not happy with them and I want to do them over.  Jake bought me a new hairpin lace tool, since I found the larger frame I was using to be difficult to handle.  I'm hoping that that's what was causing my unhappiness with hairpin lace making.

I've decided to send a set of 10 swatches this time, and work on one of the projects while I wait for them to be graded and returned.  I've got to make a garment with sleeves for one of my projects.  I was thinking of making a baby sweater, since my sister is pregnant right now and I'd love to make something really special for my future-niece.  I have to use a pattern that I must send with the finished garment for judging/grading, so there will be no "winging it" with this one.  Which means I'm now on the hunt for a challenging, showstopping baby sweater.  I'm open to suggestions.  Does anyone have a favorite pattern?

On a completely different subject, I have been crazy sick (read: 102 degree fever sick) over the last few days.  I caught Mims's super cold, and I've done virtually nothing except sleep (and cough, and blow my nose) for the last 4 days.  I think I've lost 6 pounds so far... Ugh, worst weight loss plan ever.  I'm slowly starting to get through all of the comments, emails and FB messages.  If I haven't gotten to yours yet, I promise I'm getting there soon.

xoxo


Saturday, January 19, 2013

Recycled Project Round-up

I try to keep this blog to mostly crochet (or crochet adjacent) projects, but sometimes I can't help myself, I have to post non-crochet stuff because it's just too awesome.

I've spent the last week fully immersed in recycling creativity, and while I love the projects that I came up with, there are a ton of projects that other people have made that are so awesome they needed to be shared.  There's been such a cool vibe around here this week, I knew you guys would be into it!

I loved these recycled cereal box projects over at One Good Thing by Jillee.  I especially loved the pencil box project, since I think it would just make the coolest hook case.  I want to make a bunch of them!!!

This reusable lunch container is made out of a gallon milk jug!  How rad is that?!  I am so completely in love with this project!  You can check it out over at Spoonful.


This one is for my beautiful friend Teeni!  I loved what Kate over at Zmombie did when she discovered that her K-Cups weren't recyclable... I'm planning to start some gourd seeds next month in mine... 

Okay, so I can't post a picture of this next project because it's all linked up in one long tutorial, but it's soooo cool, you've got to go check it out.  It's a plastic soda bottle that someone turned into a vase.  Gorgeous.  The site is in Chinese, but the pictures don't need captions.  Great tutorial for a really beautiful project.  It would be a cool way to deliver flowers from your garden...

I know that you can buy pencils really cheaply, but I adored this project over at Share Your EcoIdeas! Mims and I can't wait to try making our own!  How rad would it be to be out at the park and to pull out a sketchbook and a homemade pencil and start sketching?! If you do this, you have to send me one!  I am sooo into it!!! (okay, you don't actually have to, but it would be a generous gesture, and giving really IS better than receiving...)

Okay, so that's all the awesome I have for you right now.  I've got a major craft fail to share later, but I forgot that we've got theater tickets today, so I might not get to it until tomorrow.   Also, I had one more thing that I feel like I need to say before I wrap up this week...

** Caution: Eco-Rant Ahead!  I needed to say it, but that doesn't mean that you have to read it.  I love you either way. **

One last thing:  There is a fine line between recycling to make the planet a better place, and recycling out of a massive crushing guilt that you're killing the planet because your drink straw doesn't decompose.  You know I love you, and you know I love our world, but I have a dining room filled with literal garbage right now that I was using as art supplies.  I can't live like that on a normal, every day basis.  I'm going to have to put most of it in our recycle bin, and I'm also going to have to be okay that some of it is going to go into the trash can.  I know that I've dramatically cut down my plastics consumption lately, because I'm now aware of all of the packaging that products/food/daily-life comes in.  I am making different (better, informed) choices for myself and our planet, and I'm not going to let myself become overwhelmed by guilt fear anger shame anything that I've done/not done in the past that I can't un-do/do now.  

It's such a slippery slope, this eco-thinking, because it's not just you. Or me. It's manufacturers who should know better (I'm looking at you, Kraft Foods, purveyor of Capri Sun pouches).  It's convenient meals, and convenient bags to carry the meals home in.  It's plastic wrapping on paper towels. It's restaurants that serve meals in styrofoam.  It's not any one person's fault.  We all work hard.  Very, very hard. The convenience of being able to pop a plastic tray into the microwave and have dinner in 4 minutes is sometimes the difference between me and insanity.  There is a high cost of cooking every meal from scratch, and that cost is time, and sometimes that price is too high.  We have to cut ourselves some slack, and allow ourselves to be flawed, imperfect, and still consider ourselves a good person. Some of you may want to argue with me about this, and that's okay, I'd love to throw this up for discussion.

This week has been eye-opening for me, and I'm excited and thrilled to discover new ways that I can use things that I already have, but I'm not going to have a melt down if my sister surprises me with an ice-blended chai tea in a plastic to-go cup.  I'll enjoy the surprise, and recycle what I can.  Because I'm flawed, imperfect, and I'm a good person.

xoxo 

Friday, January 18, 2013

Fused Plastic Messenger Bag

I made a fused plastic and nylon yarn messenger bag last summer to carry all of my stuff at a craft fair.  It was really fun to make, but there were some design problems with it.  Fused plastic is really lightweight. Nylon yarn is deceptively heavy. If you machine sew fused plastic with a straight stitch, you create a perforated seam that tears out fairly easily when pulled on.  Nylon embellishments will pull on any edge they're attached to.  And one day at the craft fair was enough for the sides of that bag to become compromised.  That is a TERRIBLE feature in a lovingly handcrafted bag. 

So I've improved it!  This version is never going to fall apart on you.  You'll have to take a pair of scissors to it to get it to tear.  I've made it convertible, so you can carry it as a messenger bag, or a shoulder bag.  It is not as fancy as the other version, but I will tell you how you can add decorative elements to make it as fancy as you like.  For now, though, I'm going to show you how I made the basic bag.


Fused Plastic Convertible Messenger Bag
approximately 14" wide by 12" high
Supplies:
3 sheets of fused plastic (9 plastic grocery bags)
approximately 40 yards of plarn (5 plastic grocery bags)
Size N crochet hook
2 large dog leash clips (I found them in the purse-making section of my local craft store)
14" non-separating sport zipper
Wonder Clips (by Clover.  They're optional, but you can't use straight pins to hold the fused plastic together because it makes holes that can't be repaired.  The Wonder Clips hold the pieces together without making holes.  If you think you're going to do a lot of work with plastic, they are well worth the purchase)
Sewing machine and thread 
Scissors

Side Tab
(make 2)
Using the plarn and N hook, ch 11
R1: sc in 2nd ch from hook, sc in each ch across (10 st)
R2-3: ch 1, sc in each st across (10 st)
Don't fasten off.


Slide one of the dog leash clips onto the strip, and fold strip in half, matching the short ends.  Crochet the ends together, using 4 sc stitches.  Fasten off.  Don't weave in the ends.  Tie the starting and finishing ends together in a knot.   Trim the ends if desired.


Strap
ch 76
R1: sc in 2nd ch from hook, sc in each ch across (75 st)
R2: ch 1, sc in each st across (75)
Fasten off.

Making the bag
Cut two of the fused plastic sheets to make two 15" x 13" rectangles.  These will be the main body of your bag.  The 15" sides will be the top and bottom.  Determine how you'd like your bag to look by experimenting with which side of the fused plastic (more ink showing through, or less ink showing) and which direction you'd like the writing/logos to be facing.

Take the piece that you'd like to use as the front of your bag.  Line the zipper up with the top edge, making sure that the plastic sheet overlaps the fabric side of the zipper.  Clip the zipper in place.  Sew the zipper to the top edge of the plastic sheet, using a wide zig-zag stitch.

Repeat on the other side of the zipper to attach the back of the bag. You may to unzip the zipper so that you can clip it in place along the center section of the zipper.


Cut a 13" x 10" rectangle out of the last piece of fused plastic.  *All of the scraps can be recycled anywhere that you recycle plastic bags*

This piece will become the front flap of the bag, so it's is a perfect opportunity for you to use a piece of fused plastic that you really like the logo on, or one that you've added words to.


Clip the front flap to the back of the bag, approximately 1" below the zipper.  Sew in place, using a wide zig-zag stitch.


Now it's time to put the bag together!  Grab your side tabs and Wonder Clips!


Fold the bag together, right sides facing.  Clip the sides together, matching the lower corners (because we're working with fused plastic, and not fabric, this may be challenging, even if the rectangles were exactly the same size to begin with.  Adding the zipper may have thrown things off a little).

Sandwich the side tabs in between the two layers of plastic, making sure that the clip end is in and the crocheted end sticks out slightly.  Place it as near the top of the bag as possible, right up next to the zipper.  Open up the zipper at least half way across the bag, so that you will eventually be able to turn the bag right side out again. :D


Using a wide zig-zag stitch, sew all the way around the bag. Be very, very careful not to catch the front flap in your seam!

While it is still wrong sides out, flatten the lower corners into triangles.  Make a mark across the triangles where it measures 2" across.


This is the only time it's okay to use a straight stitch on this bag: sew across the mark you just made. Snip the excess plastic off to neaten the edge.


Now you can turn it right side out!  If you caught the front flap in one of your seams, carefully cut it away from the seam, and it should still look all right.  You can now attach the strap to the side flaps, by clipping through the stitches at the end of the strap.  This makes it incredibly adjustable!

Full Length strap
Or, if you'd like to use your bag as a shoulder bag, you can clip both ends into one clip, and then loop the center of the strap through the other clip.  Convertible awesomeness!!


You may want to round the corners of your front flap at this point, like I did.  You can use the edge of a plate to help make that curve perfect, or you can just wing it.  It's completely up to you.  If you would like to add a crochet edge to the front flap, I would highly recommend using the technique I used in THIS post to add the crocheted flap.  I would also suggest that if you'd like to add crochet embellishments, like flowers, to the front flap, don't sew them on.  Put a pin on the back and use that to attach them.  Yes, it will make small holes, but you will be able to see right away if they're going to catch on things as you go about your day (and those tiny holes can be patched by fusing on another piece of plastic over the top).

Okay, Dynamos!  Tomorrow I've got the greatest recycling round-up for you!  Plus, I'll show you the stuff I tried that didn't work.  LOL!!  It's been a crazy week, thanks for recycling with me.  We really can make our world a better place with crochet!!

xoxo

If you'd like to see more recycling with crochet projects, you can check out the January 2013 section of my Free Crochet Patterns page.

The Pool Party Backpack

No recycling week would be complete without addressing the big net/mesh bags that onions and potatoes come in (also oranges, and sometimes apples).  It's very hard to tell which bags can be recycled, and which ones can't.  The bags that look like fishing net are not recyclable, but some of the woven plastic bags can be recycled (depending on the facilities in your area).

Does that sound confusing to you too? I don't know which kind of bags are which.  Besides, there are no guarantees that my local recycle pick-up will take the bags that I've got, even if they're the 'right' kind.  For me, the best way that I can think of to deal with net bag produce bag issue is to turn it into something else so that we recycle it ourselves at home! Win for the environment, win for us!

Mims adores the pool at my sister's house.  She became a little waterbug last summer when she learned how to swim.  She will do anything (chores, eat cooked veggies, practice reading) to get to go swimming.  It's been a little too cold lately to go swimming, but I wanted to be ready for the next time the weather heats up!  I had an onion bag just waiting to be turned into something amazing, so I've made Mims a Pool Party Backpack!


Pool Party Backpack
supplies:
Mesh produce bag (onions, sweet potatoes, any 10 pound produce bag will work)
Approximately 40 yards of plarn (plastic yarn - you'll need about 5 grocery bags to make it - Check out THIS post on how to make it!)
Size N crochet hook
Scissors


Snip the top off the bag above the label  (or approximately 12" above the bottom seam of the bag). Attach the plarn at the side seam of the bag.


Bag Top:
R1:ch 1, sc 46 stitches evenly around the cut edge of the bag (or however many stitches you need to get all the way around the bag - just make sure it's a multiple of 2), sl st to first sc to close round (46 st)
R2-4: ch 1, sc in each st around, sl st to first sc to close round (46 st)
R5: ch 3 (counts as first dc and ch 1), skip next st, (dc in next st, ch 1, skip next st) 22 times, sl st to first sc to close round (46 st)
R6: ch 1, 2 sc in each ch 1 space around, sl st to first sc to close round (46 st)
Fasten off. You can weave in the end at this point, if you want, but I really like leaving the cut plastic ends to poke out.  To me, it looks more obviously recycled, handmade, and awesome with the pokey bits, but it's a matter of personal preference.


Bag Straps:
(make 2)
 Chain until the piece measures 48" long.  Fasten off.


Starting at a side seam, weave the first strap through the holes in Row 5.  Adjust the strap ends so that they are even. Weave the second strap through the holes in Row 5, starting at the opposite side seam.  Adjust the 2nd strap ends so that they're even too!


Tie the strap ends that are sticking out to the right side to the bottom right corner of the bag (just poke the strap through the mesh and tie in a square knot).  Repeat on the left side with the remaining strap ends (poking through the bag at the bottom left corner).

The backpack is complete!  Tug the straps to tighten the bag at the top.  Tug the top of the bag to open it again!


Mims is doesn't want to give it back.  I think I'll let her play with it, since she made a very convincing argument that the mesh backpack was perfect for carrying around her stuffed animals (Princess Pugsley and Charlie today) because they could see out while she carried them around.  How can you argue with that?!  You can't!  I never knew that recycling could be so cute!!

xoxo

If you'd like to see more recycling with crochet, visit the January 2013 section of my Free Crochet Patterns page.

Thursday, January 17, 2013

How to make Plarn!

I thought it would be fun to make a tutorial collage!


Update 3 hours later: Um, so the writing on that turned out really small, didn't it?!  If you click on the tute it pops up in another window where it's slightly enlarged (you can enlarge it more, if you press CTRL +).  But, for convenience, I'm going to post the full sized pictures and expanded descriptions below:


 1. Cut the handles and bottom seam off your plastic bag


2. Fold the bag up to make it easier to cut


3. Cut the bag up into 1" strips (you should be able to get 16 pieces out of one bag)


4. Open up all of your strips.  Choose one of them to be your base strip


5. Slide a second strip over your base strip


6. Slide the end of the second strip through the loop that you made in step 5


7. Gently tug on the two strips to slowly tighten the knot


 8.  Give it one last tug to tighten the knot.  The second strip now becomes the new base strip so that you can start the process over again!  Keep looping and knotting until you've use up all of your strips!

9. Roll your new Plarn (plastic yarn!) into a big ball.  One grocery bag will make approximately 8.5 yards of yarn! 

Sometimes the strips break (even if you tug gently), or they start out broken because there was a tear in the bag.  That's okay!  Just tie the cut ends in a knot and use it like a regular strip!  I actually like these 'imperfect' strips, because the little pokey ends give the crochet piece a handmade, obviously-recycled look that I find very appealing.   Of course, it's a matter of personal taste, so if that look would bother you, you can just recycle the broken strips when you recycle the handles and bottom seams that you cut off the grocery bag in the first step.

xoxo

If you'd like to see more recycling with crochet projects, check out the January 2013 section of my Free Crochet Patterns page.

Capri Sun Camera Case

Did you know that Capri Sun pouches aren't recyclable?!  They're made of aluminum and plastic, and there just isn't a convenient way of separating the two materials in a recycling facility. Unfortunately, this means that if you toss a used Capri Sun pouch in your recycling bin, it will be picked out of the plastic bottles, and tossed in a landfill.  Even worse, they don't biodegrade.  Every pouch that goes into a landfill will reside there for the rest of eternity, or at least until my Dad's super volcano erupts...

Lucky for us, we can recycle them ourselves!  So don't throw them away!  Let's make something awesome instead!  How about a cool little camera case?  Sound good?  Let's do it!


First off, we have to have a discussion about cleaning Capri Sun pouches.  I grabbed a whole slew of them at Mims's school right before their winter break (it was at the holiday party, and the other volunteering moms looked at me like I was nuts, fishing the pouches out of the trash.  It's lucky Mims is only five right now, my behavior is going to be MORTIFYING to a nine-year-old...).  Cleaning the pouches isn't that hard, but you can't just squeeze out the juice and move on (okay, you CAN, but your pouches will get nasty and smell. Gross.).  So snip open the bottom of the pouch, all the way across. If you have a dishwasher, rinse out the pouches in the sink, and then stand them up in the racks of your dishwasher and run the machine!  Sanitized!  (No worries, hand washers, you can wash the pouches in hot soapy water and they will get nice and clean too.  It's just less labor intensive in a dishwasher.)


Once the pouches are dry, we can move on to the next step: Make Something Awesome!

This little pouch makes me think of vacations at the beach.  It's just the right size to hold my camera to protect it from getting splashed, or covered in sand, while we search for shells and driftwood.  (It is also the perfect size to protect my phone, some cash and a couple of cards, if I leave the camera behind!).  The best part?  No one will know you've got anything valuable in it!  I mean, come on, who would hide anything in a kid's juice pouch?! 

Capri Sun Camera Case Key Chain 
(heh, try saying that 3 times fast!)
Supplies:
2 Capri Sun Pouches
9" (or longer) zipper
Very small amount of worsted weight yarn
Size G crochet hook
1" key ring
Sewing machine
Scissors
Yarn needle
Wonder Clips (by Clover.  Optional, but you can't use pins to hold the pouches together because they make holes in the plastic.)


Key Ring Tab
ch 13
R1: sc in 2nd ch from hook, sc in each ch across (12 st)
R2-3: ch 1, sc in each st across (12 st)
Fasten off, leaving a long tail for sewing.  Weave in other end.
Slide key ring onto the tab.  Fold tab in half and sew short ends together. Weave in tail end. 


Line the zipper up with one of the long sides of a Capri Sun pouch.  Using the sewing machine, sew the zipper in place.


Repeat on the other side.


Fold the two Capri Sun pouches together.  Clip them in place.  Slide the key ring tab in between the  pouches, near the top, next to the zipper tab. Using a straight stitch, and a 1/4" seam allowance, stitch the pouches together, making sure to catch the key ring tab in the seam. Stop before you sew across the zipper at the other end of the pouch (this will allow the zipper to open beyond the pouch, giving you more access and room to squeeze stuff in your finished case!)


Zipper Cap
ch 5
R1: sc in 2nd ch from hook, sc in each ch across (4 st)
R2-7: ch 1, sc in each st across (4 st)
Fasten off. Weave in ends.

Make sure that your zipper is all zipped up!  Snip off the end of the zipper 1 1/2" from the end of the pouch.


 Fold the zipper cap around the cut end and clip in place with Wonder Clips.  


Sew the zipper cap to the end of the zipper.


Now you can zip and unzip the pouch to your heart's content!  Attach it to your keys (or vacation back pack) with pride!  You've just protected Mother Earth!


xoxo

If you would like to see more recycling with crochet projects, please visit the January 2013 section of my Free Crochet Patterns page.


Related Posts Plugin for WordPress, Blogger...