Google+
Showing posts with label Glasses. Show all posts

Friday, July 27, 2012

Purse Frame Project

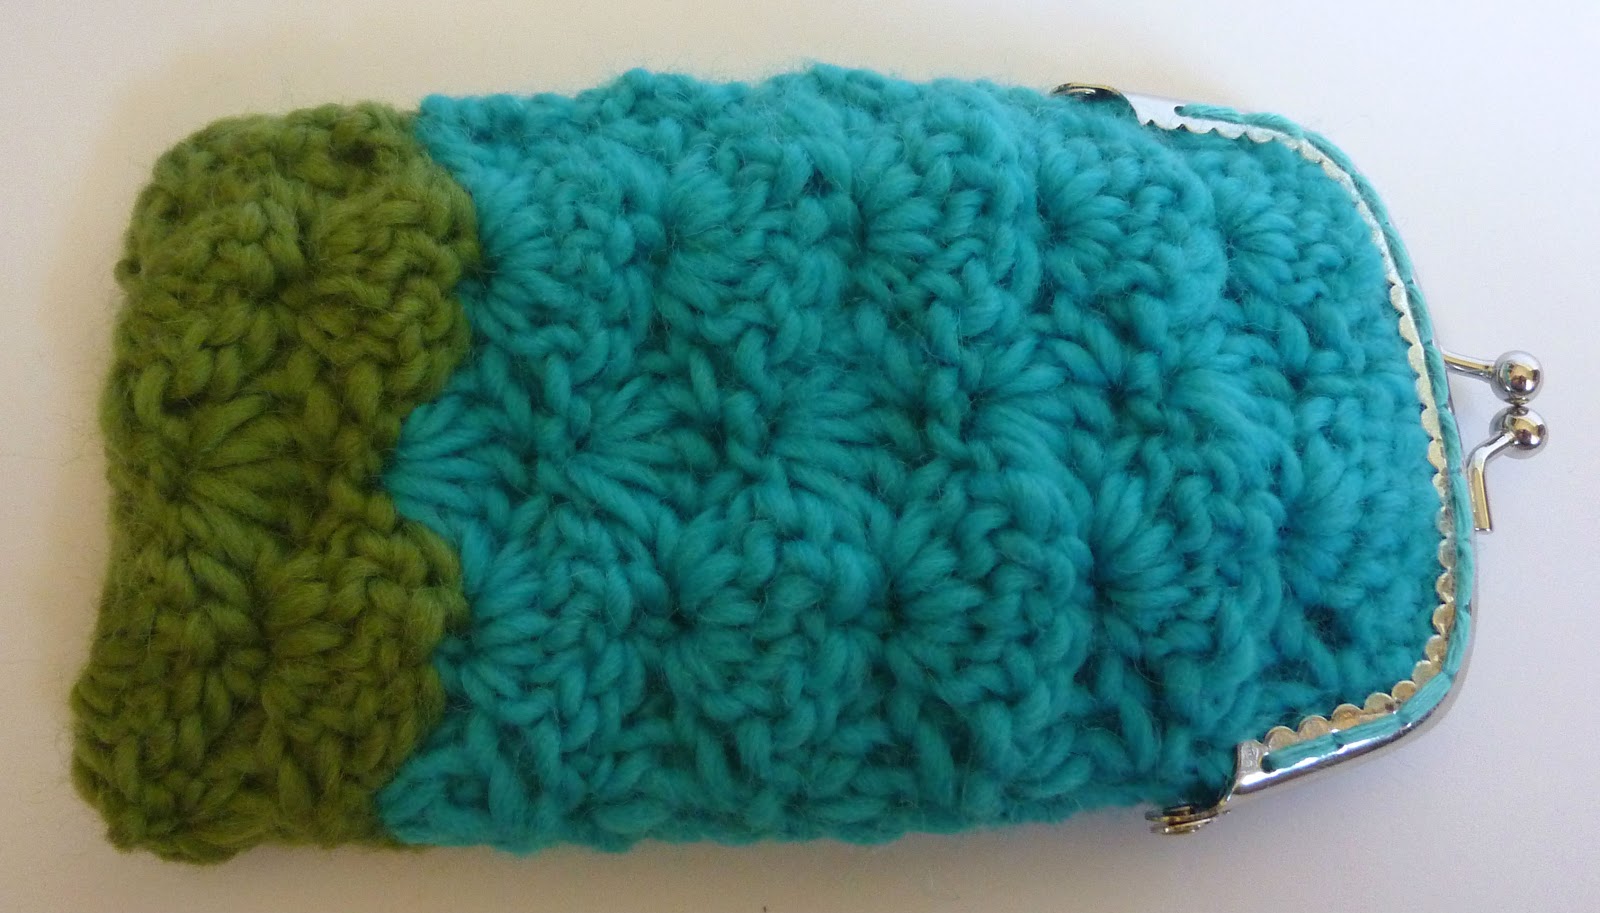
My friend E had a purse frame she wanted to make into the top of a case for her sunglasses.  I'd never worked with a purse frame, but I had seen them in craft stores and I was intrigued.  I had to try working with one myself!  So, inspired by E's project, I've made a sunglasses case.


I think that the ball-topped purse frames are adorably old-fashioned.  I wanted to use a sweet stitch that would add to the nostalgia for this project, so I've used a shell stitch.  (also, I'm on a shell stitch kick...)
This pattern would make a terrible coin purse.  The stitch is too loose and the coins would stretch it out horribly.  If you want to make a purse that would hold your crochet hooks or scissors, you need to line it.  Lining this bag would be super simple, since it's essentially a big rectangle.  I found it unnecessary, since I'm just going to use it for my sunglasses which I wrap with a microfiber cloth anyway.  If you've got sunglasses with small, pokey ear pieces I think I'd go ahead and line it.

I need to get on my soap box for a mome, if you'll bear with me, and snark at the Everything Mary company that sells the purse components at craft stores.  There is so little information on the packaging that I've had to measure the frame myself, all the package says is "silver purse frame." Lame.  Also, the website sucks.  There is a pitifully small amount of information on how to use their products (none in the packaging, btw) so I had to search for information from the crafty-blogger world.  Thank God for crafty bloggers.  Amen.  Okay, back to the post...

Old-Fashioned Spectacle Case (aka: The Purse-Frame Sunglasses Case)
Supplies:
Approx. 55 yards of worsted weight yarn (I used Stitch Nation by Debbie Stoller's Full O' Sheep in Aquamarine and Thyme)
Size G hook
3 1/2" Purse Frame (I used an Everything Mary purse frame I picked up at Joann's)
Embroidery thread to match yarn
Yarn needle, tapestry needle

ch 14
R1: sc in back loop of 2nd ch from hook, sc in the back loop of each ch across (13 st)
R2: ch 1, sc in first st, (skip 2 st, 5 dc in next st, skip 2 st, sc in next st) 2 times (13 st)
R3: ch 3 (counts as first dc), 2 dc in first st, skip 2 st, sc in next st, skip 2 st, 5 dc in next st, skip 2 st, sc in next st, skip 2 st, 3 dc in last st (13 st)
R4-28: repeat rows 2-3, ending on a row 2 row (13 st)
R29: ch 1, sc in each st across (13 st)
Fasten off.  Weave in ends.

** If you would like a color blocked case, do R1-11 in main color, R12-18 in contrast color, and R19-29 in main color.


There is more than one way to sew your case into the frame, but this is the method that I used:
I fit one of the short ends of my finished strip into the purse frame.  I loaded my tapestry needle with embroidery floss and pulled it through the 2nd hole of the frame.

I then sewed in through the first hole, and came back out through the 3rd hole...
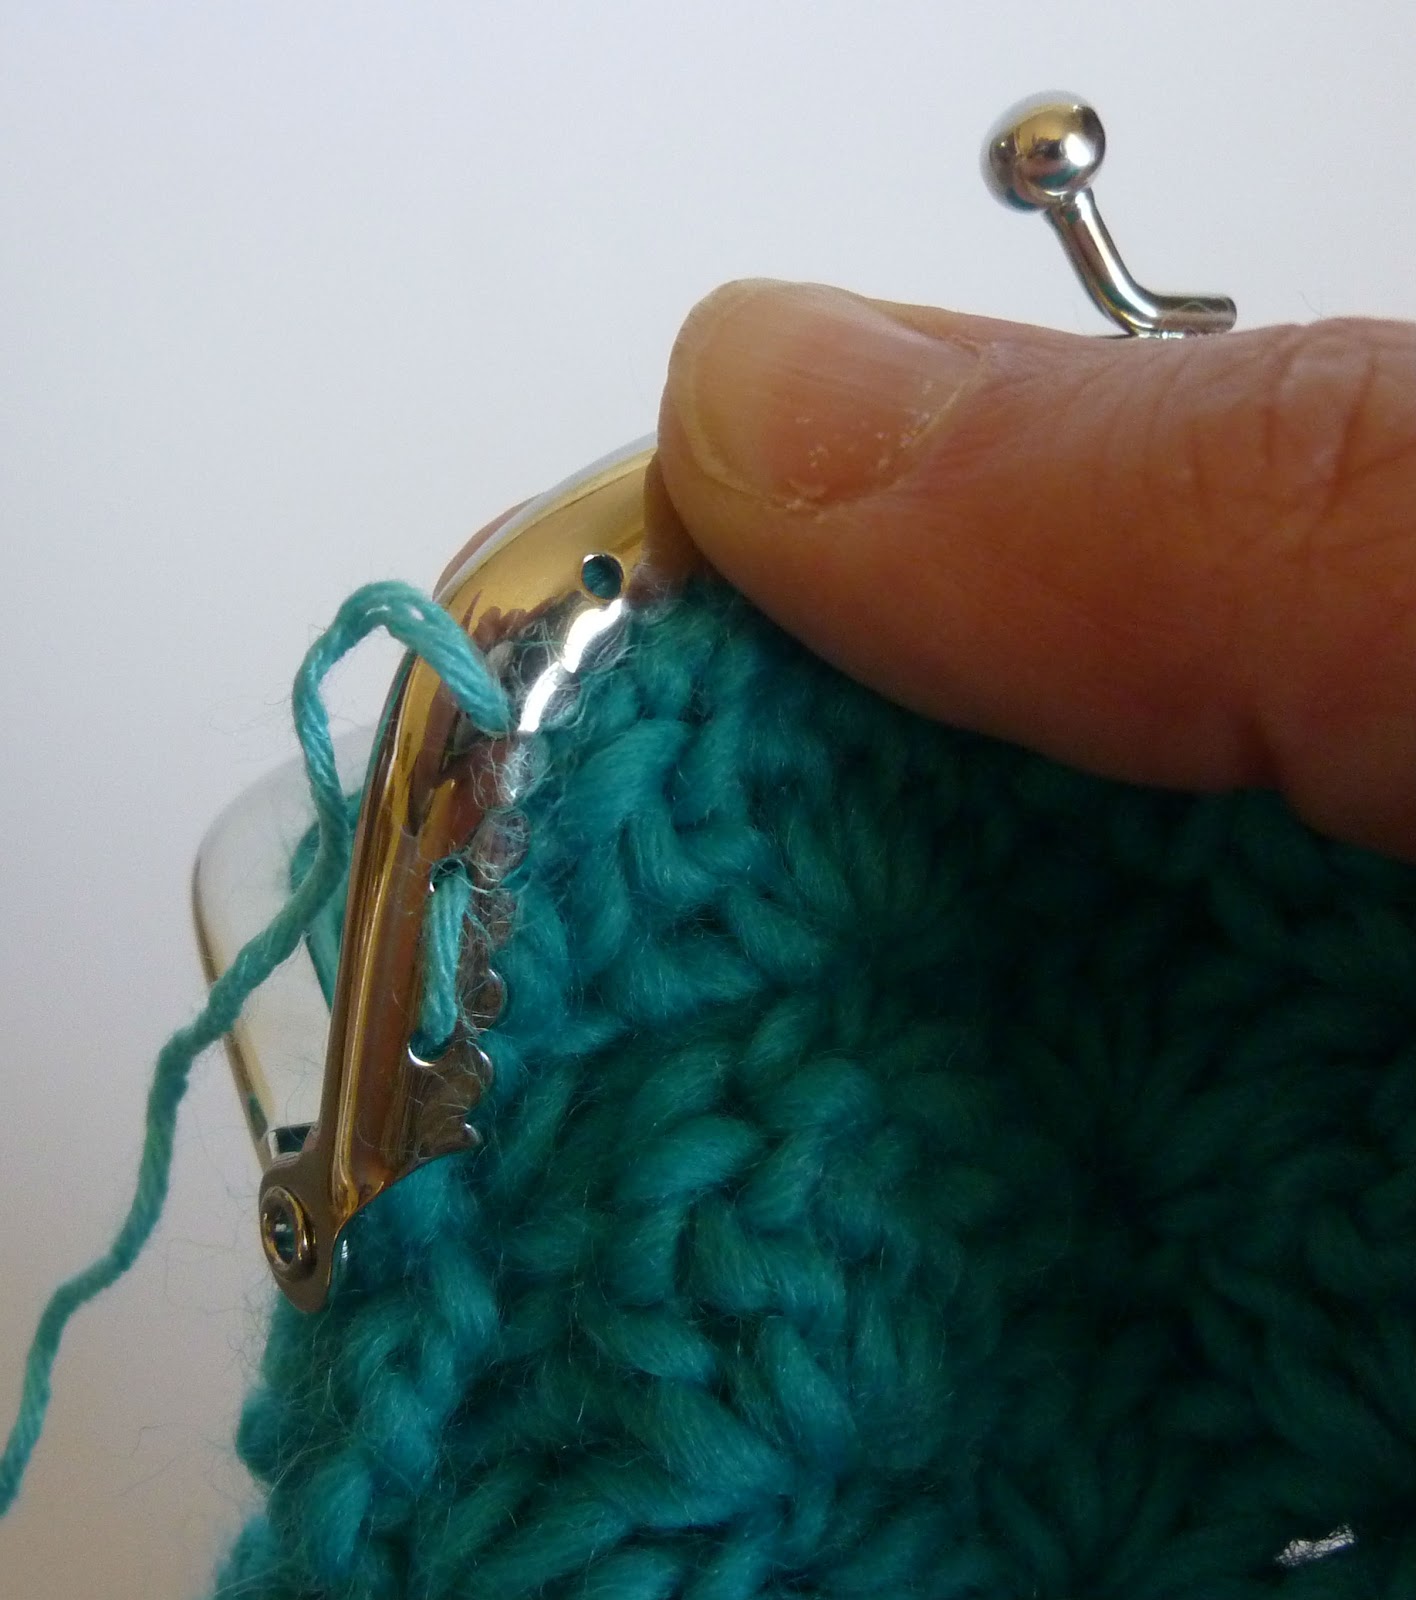
Then I sewed in to the 2nd hole, in a backstitch-type sewing pattern.  I followed this pattern all the way to the end of the purse frame.

This is what it looked like when I finished.  I wove the floss ends in, and then stitched in the other side the same way.
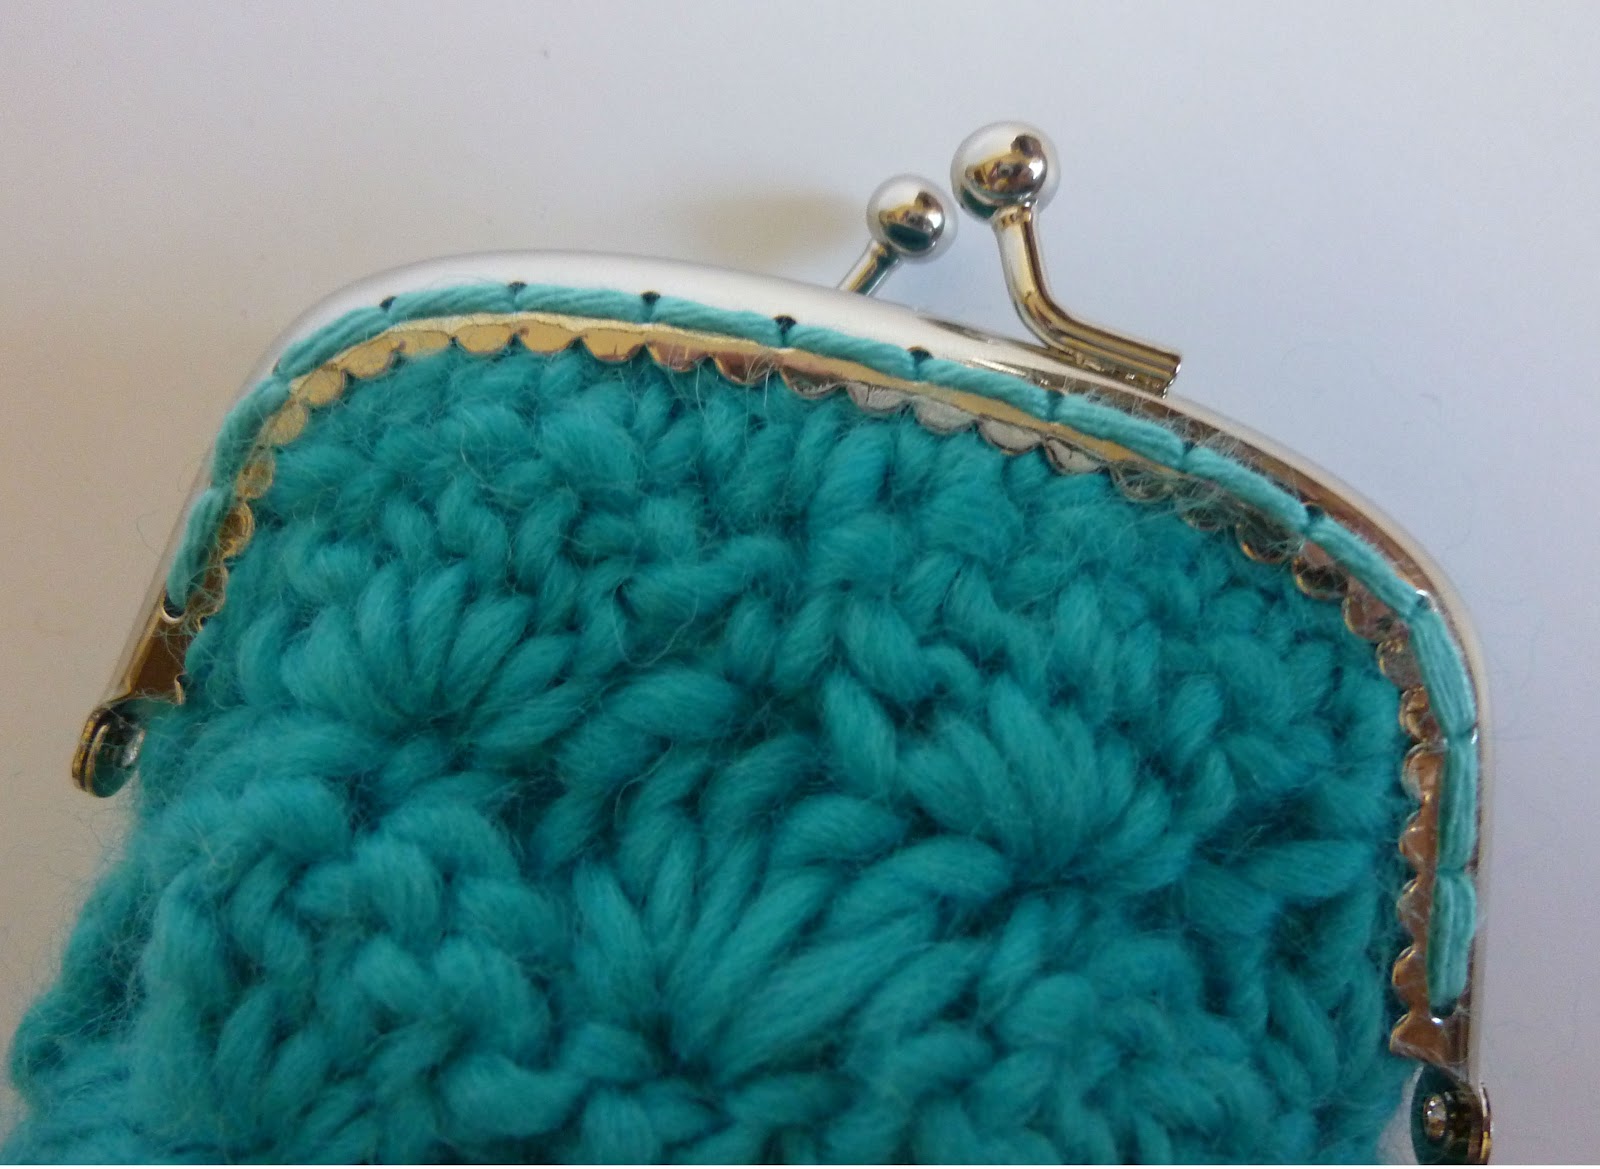
After both ends were sewn into the purse frame, I whipstitched the sides of my case together, using yarn and the yarn needle.  I matched the yarn colors when the colors changed on the bag.

I designed this case for my (currently misplaced) smaller sunglasses.  The sunglasses in the picture are a HUGE pair... I'm not so crazy about how they fit in the case...

The purse frame edges poking out like that really, really bothered me.  I wasn't sure if my normal, smaller glasses would cause the same sharp pokey edges, but since it bothered me so much, I thought I would just tack them to the sides of the bag.

I just put a couple of stitches with the yarn through the hinges of the frame and attached them to the bag.  I am much happier with how this looks!

I hope this was helpful!  It was super quick to make, and it was fun to try something new.  Have a Happy Friday Dynamos!

xoxo

update 8.7.12:  Mucho mucho thanks to E for pattern testing and finding 2(!) mistakes on R3.  The pattern is correct now... xo

Friday, June 29, 2012

Summer Stripes...

I was working on this striped bag, thinking that it would be perfect for pretty much everything I want to do this summer.  It's completely made of cotton, and it's not so big that I feel like I'm going to give myself back problems if a quick trip to Target ends up in a crazy adventure at Disneyland, or the beach, or detours into a fishing trip.
It measures 14" across, 8" high, and 5" deep.  The strap drop is 14".

I was almost done with it, and then I sold it.  Crazy!  My sister was watching me finish up the strap and then offered me designer-purse money for it.  She could buy Coach for the price she offered me.  She is a handbag snob.  That was when I knew that I should write it up as a pattern.  The purse is really that cute.

Hmm... Guess I'm going to have to make another one for my summer adventures... LOL!!!!


(Do you need one for your summer adventures?  The pattern is available on Craftsy and Ravelry, for the bargain price of a single buck.  Designer bags have never been more affordable!)

I wanted to throw in a little cute bonus for her, so I made a matching case for her sunglasses and iPhone.
I thought you might enjoy the bonus too! Here's the pattern:

Summer Stripes Cell Phone/Sunglasses Case
Finished measurements: 6.75" x 4.5"

Supplies:

100% Cotton Worsted Weight Yarn, approx. 40 yards (I used Bernat Handicrafter 100% Cotton yarn in Strawberry and Mango) or any other worsted weight yarn
Size G crochet hook
Yarn needle
Sewing needle
Scissors

Main Case:
Stripes are created by changing color every two rows.  This gives a bolder stripe, and it allows you to work continuously without having to cut your yarn when you switch color.  You can just carry the yarn up the side of the work as you go.  You will only have to weave in four ends on the main piece if you use two colors.
Or, alternately, you can make the case from a single color.


ch 16
R1: sc in 2nd ch from hook, sc in each ch sp across, ch 1, turn (15 st)
R2-49: sc in each sc across, ch 1, turn (15 st)
R50: sc in each sc across.
Fasten off, weave in ends.

Front Pocket:
Continue in stripe pattern, beginning with the color that you started the main case with.

ch 16
R1: sc in 2nd ch from hook, sc in each ch sp across, ch 1, turn (15 st)
R2-19: sc in each sc across, ch 1, turn (15 st)
R20: sc in each sc across.
Fasten off, weave in ends.

Sew the stitch loops of  R20 of the Front pocket to R14 of the Main Case piece, matching the stripes.

Single crochet both sides of the case closed, using one stitch per each row, going through all three layers when  necessary.   Fasten off.  Weave in ends.  Enjoy your new double pocketed case!!


You could even use it to hold two pairs of sunglasses!

*ed. side note:  In an effort to show you how useful the Cell Phone/Sunglasses Case is, I have shown it with my sunglasses and phone sticking out of it.  In reality, the sunglasses and phone tuck neatly inside the case, so they won't get scratched and beat up while they're being carried around.  I just wanted to clarify, in case anyone was wondering why you would only want to protect ONE of the lenses of your pricey sunglasses... ;D


xoxo

Monday, May 14, 2012

Crocheting a Necklace

I wear glasses.  I wear reading glasses and I wear sunglasses.  I lose my glasses a lot.  There seems to be an direct correlation between how much money I spend and the likelihood of me losing the glasses. The really expensive ones sometimes get lost on the way out of the mall... Sigh...

But, seriously, I misplace my glasses a lot.  But I don't really care for the long lanyard with a loop glasses holders that are out there, so that wasn't really an option for me.  What I really wanted was something that was so pretty, no one would ever suspect that (in the privacy of my own home) I sometimes loop my glasses through it for safekeeping.

I had picked up some plastic cabone rings the last time that I was at the craft store, and I was excited to experiment with them. The 3/4" size seemed a perfect fit for my project.

On my first try, I experimented with a crochet/macrame combo using the cabone rings and some hemp cord. It looked exactly like I had wanted, but it was a little scratchy, and I didn't like the sliding closure I put in the back.

So, I got out my trusty size 3 crochet cotton and re-made it.  This time I just crocheted long ties, so I could adjust the length each time I wear it with a simple knot.

I really like how it turned out.  I was showing them to my mom, and she insisted that I sit down and make one for her immediately. If you need one right away, I will give you my (very simple, very minimal) instructions.

The (Glasses Holding, shhh!) Necklace
approx. 25" long
Supplies:
Size 3 Crochet Cotton in the color of your choice, or a fine hemp cord if that's more your style
Size D crochet hook
One 3/4" plastic cabone ring
Four 1/2" plastic cabone rings
Sharp yarn needle

Okay, so there's not an exact way to do this.  Grab the big cabone ring.  It's going to be your center.  Sc over the plastic.  It will take between 25 and 30 sc stitches to go around.  When you can't squeeze any more stitches on, sc the last st to the first st.  Cut the yarn at this point and weave the end in.

Sc the same way around all four of the smaller cabone rings.  They will take about 15 sc stitches.  After you sc the ring of stiches together, leave a longish tail for attaching them together.  Use the picture for reference.  Use two of the rings to make a Mickey-Mouse-ish shape, then attach the others on the outside so that no one else notices that you're wearing a Disney icon. Weave in all those ends, please!

Now that you have your center piece complete, attach the yarn on one side (it doesn't matter which, you'll do the other side as soon as this side is done) and chain 71.  
R1: starting in 2nd ch from the hook, sl st across all 70 ch spaces.
Fasten off.  Leave a tail and weave it into the ring to secure the side piece.
Repeat on the other side.

If my instructions have scared you, I want to reassure you that once you get going, it is the simplest project in the world.  The hardest part is weaving the ends in, and that's just basic sewing.  If you're on the fence, I say go for it!

Okay, so me and my glasses are off for the day! I hope you have a good day too, dear Dynamos!
xoxo

Related Posts Plugin for WordPress, Blogger...