Despite the crazy hot weather, I've been festooning my abode with pun'kins! Every year I make Jake buy me these insanely expensive fairy tale pumpkins (as opposed to the much more reasonably priced carving pumpkins) to decorate the house. I rationalize it by saying that if we buy them in September I can leave them out until the day after Thanksgiving and we're set for our entire fall decorating scheme.
However, this year I've decided to crochet my own pumpkins! For a girl that is used to paying $15 each for the real-life suckers, this is quite a steal, since I was able to make 2 pumpkins from one skein of Super Saver. Plus, I can snuggle with them on the couch, which real pumpkins don't enjoy very much.
I saw some gorgeous blue pumpkins on Pinterest (don't you just adore Pinterest?! I'm on there, like, 18 times a day. Pinterest is my Facebook... but I digress...) so I had to make myself a blue pumpkin too. It's a little darker than a real life blue pumpkin, but I'm claiming creative license here and adoring it anyway.

I'm really happy with the way that the stem of these pumpkins turned out. It's hollow, so you can bend it and it stays in place. So cool! The ridges make it look like a real pumpkin stem, which makes me giddy every time I look at them. I was able to do it by using front-post half-double crochet, which I abbreviated to fphdc (so when you see it in the pattern, that's what I'm talking about).
If you'd like to make one (or twelve) too, here's how I made mine:
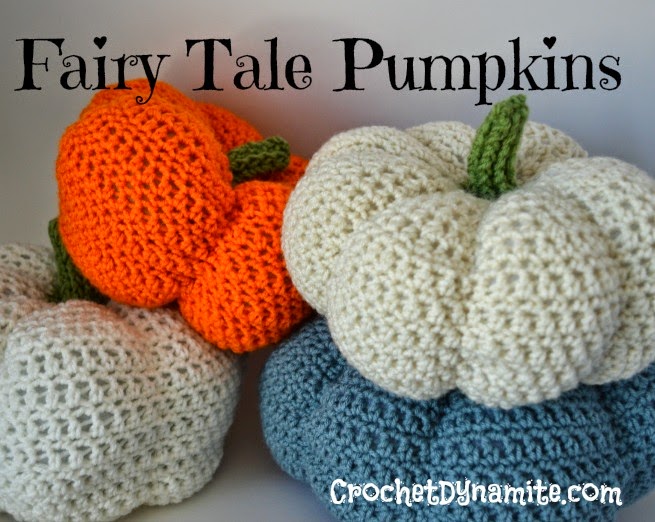
FAIRY TALE PUMPKIN
(to make one 9" pumpkin)
Supplies:
180 yards of worsted weight yarn for pumpkin body (for my pumpkins, I used Red Heart Super Saver in Soft White, Aran, and Pumpkin, and Caron One Pound in Azure for the blue pumpkin)
Small amount of green for pumpkin stem (I used Red Heart Super Saver in Tea Leaf)
Size J crochet hook
Polyester Fiberfill Stuffing - I used approximately 10 ounces
Yarn needle
(use main body color)
R1: 9 hdc in a magic loop, pull loop tight, sl st to first hdc to close round. ch 1 (9 st)
R2: 2 hdc in each hdc, sl st to first hdc to close round, ch 1 (18 hdc)
R3: (2 hdc in first st, hdc in next st) 9 times, sl st to first hdc to close round, ch 1 (27 st)
R4: 2 hdc, (2 hdc in next st, hdc in next 2 st) 8 times, 2 hsc in the next st, sl st to first hdc to close round, ch 1 (36 st)
R5: (2 hdc in first st, hdc in next 3 st) 9 times, sl st to first hdc to close round, ch 1 (45 st)
R6: 2 hdc, (2 hdc in first st, hdc in next 4 st) 8 times, 2 hdc in next st, 2 hdc, sl st to first hdc to close round, ch 1 (54 st)
R7: (2 hdc in first st, hdc in next 5 st) 9 times, sl st to first hdc to close round, ch 1 (63 st)
R8: (2 hdc in first st, hdc in next 6 st) 9 times, sl st to first hdc to close round, ch 1 (72 st)
R9: sc in each st around, sl st to first sc to close round, ch 1 (72 st)
R10: hdc in each st around, sl st to first sc to close round, ch 1 (72 st)
R11-26: repeat rows 9 and 10 (72 st)
R27: (hdc 2 st tog, hdc in next 6 st) 9 times, sl st to first hdc to close round, ch 1 (63 st)
R28: (hdc 2 st tog, hdc in next 5 st) 9 times, sl st to first hdc to close round, ch 1 (54 st)
R29: (hdc 2 st tog, hdc in next 4 st) 9 times, sl st to first hdc to close round, ch 1 (45 st)
R30: (hdc 2 st tog, hdc in next 3 st) 9 times, sl st to first hdc to close round, ch 1 (36 st)
R31: (hdc 2 st tog, hdc in next 2 st) 9 times, sl st to first hdc to close round, ch 1 (27 st)
R32: (hdc 2 st tog, hdc in next 1 st) 9 times, sl st to first hdc to close round, ch 1 (18 st)
Fasten off, leave a long tail (like 2 yards)
Stuff the pumpkin! Stuff it very full, it will look lumpy and not very good at this point, but that's okay! Just make sure it's stuffed very tightly.
Attach stem yarn anywhere along the edge of R32, ch 1
R33: (hdc 2 st tog) 9 times, sl st to first hdc to close round, ch 1 (9 st)
R34-41: fphdc in each st around, sl st to first hdc to close round, ch 1 (9 st)
R42: fphdc in each st around, sl st to first hdc to close round (9 st)
Fasten off, leaving a 18" tail.
Using yarn needle and stem yarn, whipstitch top of stem closed. Fasten off and weave in end.

To make the ridges in the pumpkin I used a big yarn needle (trust me on this one, you need a big needle for this, the little ones will get lost in all the fiberfill). I threaded the tail end of Round 32, and poked my needle straight through the center, from the edge of the stem out through the bottom hole of Round 1.

Then I used a running stitch and wove the thread in a (mostly) straight line back up to the stem.

I pulled the thread snugly to create the side indentation, and made a little invisible knot at the base of the stem to hold the tension. Then I poked my needle back through the center and did the whole process again on the opposite side. At this point, it's going to look like a crocheted booty. Yes, I'm an emotional 3rd grader, because it makes me laugh.

Then I made indentations to create quarters. Then I made an indentation between each of those lines, ending with eight plump ridges.

I pulled my yarn through the center of the pumpkin one last time and fastened it off at the bottom of the pumpkin, weaving in my remaining tail.

xoxo