Google+

Monday, December 31, 2012

Top 10 of 2012~ Ta-dah!!

So, inspired by all of the other crafty bloggers in the world, I'm going to share my top 10 posts from 2012, you know, in case you might have missed one and will feel left out if we all show up and talk about it and you don't know what we're talking about.  See, I'm thoughtful like that.

Top 10 Posts of 2012: in order of Awesomeness 
(as determined by your pageviews!  Democracy in action!)


1. The Hook makes the Project (project: Jaime's Butterflies)
The project based on a crochet butterfly from my childhood is the number one most-viewed post of the year.  It's also the post that inspired my friend Kristy to find a way to used crochet projects into her work with childhood cancer patients and the homeless/motel families in Orange County.  I have been overwhelmed by the generosity of people all over the world who have made incredible crocheted donations to help us as we try to make the world a better place with crochet.  Thank you!  We love you all!

2. Make a Hat Day (project: Dynamite Beret)
I love this beret so much! In fact, I loved it so much that I put it on the cover of my very first book, Crochet Dynamite: Fancy Schmancy (available in the Kindle Store on Amazon.com.  Software for your computer/tablet/smartphone is FREE!).  It looks soooo good on everyone!

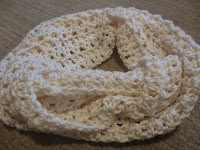
3. Boho Hairstyle (project: Boho Headwrap - multi-stripe)
I had seen so many scarf-based head wraps all over Pinterest that I got all inspired to make a crochet wrap for Mims and me.  This was my first experience using Mims as a model, and she was delightful until I accidentally bobby-pinned her in the scalp.  Then the photo shoot was much less fun.  She still likes wearing the headwrap though, but as a headband now.


4. Better Than a Sock Bun (project: Bun Shaper)
This came out of my love of crazy colored hair.  I love my completely unnatural pink/red hair, but it's hard to find styling aids that 'blend' in and look, um, natural... I know how it sounds, just let me have this.  So when my bright pink bun was looking a little wimpy, I created this add-in to boost the oomph of my little bun so that it would be as dramatic and impressive as my personality! LOL!!!

5. Monster Beanie (project: Newborn Little Monster Beanie)
Jake's cousin Ro was having a baby shower, and I wanted to put a handmade present in with the stuff that I had picked out from her registry.  Her baby, A, was due at the end of September, so I knew that he'd need a cozy hat for most of October whenever they left the house, so I created this Little Monster beanie to make Halloween Month more fun.  It did!  He even wore it as part of his Halloween costume!

6. Lipbalm Keychain (project: The Lipbalm Keychain - Quick and Easy)
My sister-in-law S, not to be confused with my sister S, had a cute sewn lipbalm keychain that she carries everywhere.  It had a zipper and was completely adorable.  I wanted to see if I could make a crochet version that would be just as cute and functional.  Turns out, it looked better (and worked better!) without the zipper!  And now that I've been using mine for 6 months, I don't know how I lived without it!  It's a must-have!


7. The London Crochet Bag (project: London Crochet Bag)
This is the first project that I made that went viral.  It showed up everywhere!  There was a while where I couldn't go on Pinterest without seeing it several times as I scrolled through the DIY & Craft section.  This pattern's success was what really gave me the confidence to keep designing and creating and building Crochet Dynamite.  It also inspired the Tardis Bag, which is so awesome that I believe The Doctor himself would approve!


8. Life at the Old Farmhouse (project: Kitchen Door Bumper)
Okay, if I'm completely honest, I made this project because I was annoyed.  I saw this cute idea three or four different places but as a sewn project.  Of course it's a great idea and I would have wanted to make a crochet version anyway, but one of the versions that I saw (that looked just like all of the other sewn versions, btw) had a threatening note attached to the picture, claiming legal action if anyone 'stole' their idea.  How do you steal an idea that's been around for decades?  We had bumpers on the doors when I was a kid.   Of course, my crochet version looks NOTHING like that person's sewn version,  but it still makes me happy every time I see it.  I'm perverse that way...

9. Star Spangled Everything (project: Star Amigurumi)
I like a project that you can use lots of different ways.  A multi-tasking project, if you will.  Something that is fast and easy, but still impresses the heck out of all of your friends.  This is one of those projects.  Mims still wears them in her hair!

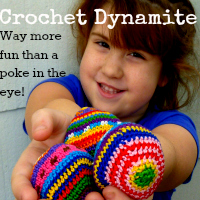
10. Gratitude Stones (pattern: Gratitude 'Stones')
This project came out a very bad week, in a very challenging year.  In fact, it was one of those weeks where it was hard to remember that good things happen too.  I had watched a documentary about the positive things that happen when you focus on the positive things in your life, and I thought it was worth a try.  I'm glad I did, because when I started carrying this little beanbag around with me, it reminded me to be grateful  for what was going right in my life.  And somehow, the stuff that was going wrong didn't seem so bad.

Okay, so there you've got it!  The Top 10 of 2012!  Had you seen them all?  Did YOUR fave make the list?

I hope you all have a fun and safe New Year's Eve and I'll see you next year!

xo Jaime


Saturday, December 29, 2012

Button Swap! Are you in??!

So some of you who follow the Crochet Dynamite page on Facebook might have seen a post I did last night about adding advertising to my site.  I've been reluctant to do it, honestly, since I didn't want to bombard you lovely Dynamos with ads that are obnoxious and irrelevant.  But it has occurred to me that some of you lovely Dynamos have lovely businesses and you might like a place to promote them!  Especially if that price was so good you couldn't NOT do it!!!

That post promted a very long online chat with my good friend Aunty Teeni, of MadCrochetLab.com, about where this site is going, and what my plans for the future are.  Do you have your 5 year goals written out?  Yeah, me neither.  But I'm going to make a resolution to do it next year...  Anyway, back to my point, after talking with her about my future plans, I'm pretty sure that advertising will make it's way onto my site in the future sometime, but not right now.

Why? Because I thought of something better, of course!!!


For the month of January, let's have a button swap!  Grab my button from the sidebar over there and put it on your site, then come back and tell me about it.  I'll go grab your button and add it to Crochet Dynamite.  Sounds fun, right?!  Free advertising for both of us!  Besides, it's only for a month.  And if we really love it we can keep the button love goin' on and on!

Anyone want in?!

If you don't have a button on your site already, it's really easy to make one yourself!  I used THIS tutorial from Code it Pretty.  It was simple and fast and I was able to make it work, which is 100% better than all of the other tutorials that I tried (and failed at!).

Ideas? Opinions? Anyone done this before?  I'm still learning, so any/ALL feedback you can give me would be amazing.

Okay, I'm off to enjoy my cold and rainy Saturday.  Hope your weather is nicer than mine is, and that a stranger tells you you're pretty today!

xoxo

Thursday, December 27, 2012

A search for a simple cowl


I got the most wonderful letter last night from my friend Darlene asking me about easy cowl patterns.  She was working on some scarves for the homeless outreach program that I am a part of, and wanted to make some simple cowls to add to her donation.  Woo hoo!!!    Awesome, I'm all over that.  Since I don't have any cowl patterns on my site, I told her that I'd look around and see what there was out there.

**First of all, the simplest and easiest cowl pattern in the world is just sc-ing the last row of a long scarf to the first row and making a long circle that can wrap multiple times around your neck.  Easy peasy, works with any pattern, and it's awesome for balancing that warmth to choking ratio that tight things around the neck sometimes get.  That's just a tip from your old pal Jaime...**

I love this Hour and a Half cowl at NaturallyCaron. It works so quickly because you use four strands of worsted weight yarn at a time and a U hook!  Awesome!  It's only 22 stitches per row!


Stephanie at The Crimson Owl made the most beautiful convertible cowl that has a hood!  She designed it for a beginner class that she taught, so you know it's easy, but it's so awesome EVERYONE (even advanced and adventurous crocheters) is going to want to make one!!!


Liz at Crochet In Color accidentally made this gorgeous chunky-yarn cowl instead of the poncho she started!  Her story is cute, and the cowl is amazing, and very easy and looks like it would work up quickly.  

Jay over at Jay's Boutique Blog has this delightful Light n Lacy Cowl pattern.  She uses my awesome stitch the scarf together at the ends technique (see guys, it's really a thing!). And since it doesn't even use a whole skein of yarn, you know it's going to be quick to finish!


Bernat.com has some awesome free cowl patterns.  My favorites were this too-cute buttoning baby cowl:


So now that I've spent the last hour looking at cowls I'm all inspired to make one of my own.  Hmm.  There will be a Dynamite Cowl coming soon...  But in the mean time, do you have a favorite cowl pattern that you always use?  I know there are a ton of patterns out there that I didn't see on my shallow Pinterest search...  Feel like sharing? 

xo Jaime

Tuesday, December 25, 2012

Holiday Greetings


Okay, so imagine that I had remembered that I needed to make holiday cards, had sent them to a printer, and got them addressed and mailed in enough time that they arrived in your mailbox this morning (I know there's no mail service today, but play along).  Now look at the picture again.  Ah, fills you with the warm glow of knowing that you're loved by all of us over here, doesn't it?  Yeah, that was what I hoped!

I'm going to go play with all my new toys now!!!  Have a really special day!

xoxo

Monday, December 24, 2012

5 hour stocking and tinsel purse

Okay, so I am the first one to tell you that I'm a little disorganized.  I'm a creative-type, not an everything-in-it's-place-type (I know that it's possible for some people to be both, but I am not). So I have no idea where I put our Christmas stockings from last year.  I know, I know, they should have been with all of our ornaments and decorations, but they weren't.  I was going to buy Mims a new stocking just to have it done and not have to worry about it, but when I went to the store I just couldn't bring myself to pay $25 for it, especially since I was just being lazy.


I found THIS pattern over at RedHeart.com that I really liked, so I grabbed my hook and 2 skeins of yarn and streamed a documentary on Netflix.  I wasn't done with the stocking when the documentary finished, so I put on another one.  And then I watched a movie.  5 hours later, the stocking was done.  It wasn't quick, but it was easy and it turned out really cute.  I added a butterfly that I made with an I hook and worsted weight yarn.  

That got me in a crafty Christmas mood.  I saw THIS post over at Aunt Peaches (it's the Citizen Kane of craft blogs... Which I am so jealous of.  I think I'm the Breakfast Club of crochet blogs... Milk WILL be made available...).  It's a tinsel purse.  It's sparkly and fabulous, and I desperately needed one.  Mine cost $2, because I got clearance Target tinsel instead of dollar store tinsel, but it was worth the buck to me to not have to go to another busy store...  I grabbed a purse that I hadn't used in almost 2 years (see, disorganization in action!  A normal person would have donated/discarded it by now.) and my trusty hot glue gun and decorated away!  I added a Holiday Gift Bow for extra beauty.

This picture doesn't do the purse justice.  It's so blindingly sparkly, one might call it Disco-Ball-esque! 
And last (and least, because alas, it didn't include crochet) I made some Reindeer bottles for the carolers that came to visit us this year.  They appreciated not having to eat another giant plate of cookies, and I appreciated that I could get them done in less than an hour with materials I had in my craft stash!  Win, win!


What kind of crafty fun are your guys up to today?

xoxo

Friday, December 21, 2012

A Gift of Love

You guys have heard me talk about the awesome work that my friend Kristy does with homeless/motel family outreach, and you know that I collect crochet donations for her program.  Well, she came by the other day to pick up several boxes of donations (once again, THANK YOU!  She is always so grateful and amazed at the love and compassion and generosity that you've shared with us this year!) and mentioned that there just weren't enough masculine items to keep up with the amount of men that needed assistance.  She wondered if there was a very simple, very plain, very basic scarf that could be made in 'boy' colors so that she would have something to offer to them.

Of course I can do that!  I made a bunch for her, and (if you're interested) you can too!

Super Simple Men's Scarf
approximately 4" x 50"
Supplies:
Super bulky weight yarn - approximately 80 yards (I used Lion Brand Hometown USA 100% acrylic super bulky weight yarn)
Size N crochet hook
Scissors
Yarn needle

ch 10
R1: dc in 3rd ch from hook, dc in each ch across (8 st)
R2-54? (just go to the end of the skein!): ch 2 (counts as first st), skip 1 st,  dc in each st across (8 st)
Fasten off.  Weave in ends. Mail it to me at:

Jaime Maraia
13210 Harbor Blvd. #371
Garden Grove, CA 92843

...that last part was completely optional! LOL!!

You can also make the scarf with 2 strands of worsted weight yarn:


While Kristy was here we got to talking about the other things that she was trying to get donations for too.  Toothbrushes and toothpaste, deodorant, coats, hats, sleeping bags, and my personal favorite, hand warmers!  Did you know that you can pick up a box of 40 pairs of hand warmers (80 total warmers!) for less than $20?!  Each warmer provides 7 hours of warmth in a sleeping bag, and that might mean the difference between a miserable night, and a good one.  It was too awesome, I had to get her a box!


If you're interested, THESE hand warmers at Walmart.com are cheap and can make a real difference in someone's life.  You can send them to me at the address above, or you can even have them sent to the Westminster, CA store!  Free shipping for you, and she'll be so happy to pick them up! You can ship them in care of Kristy Belton Bleau (you can leave a comment or shoot me an email so I can let her know to look for them!).

I hope I tell you all enough just how much your support and love means to me.  I am so grateful for all of you lovely people who have become more than mere readers or followers, but true friends.  I am sitting here getting all nostalgic and sappy (as this time of year tends to encourage), and just felt like I needed to say it.  You are special, kind, wonderful, beautiful and perfect just exactly the way that you are.  And I love you!

Yes, even you.

xoxo

Oooh!  Today is your last chance to enter my Facebook contest to win a Princess Leia Headphone Beanie (just the beanie and headphones, not the iPod)!


Go HERE to enter! (It's super easy, 'Like' Crochet Dynamite and leave a 2 word comment on the picture!) I'll be using Random.org to pick a winner tomorrow at noon PST!  Spread the word to your sci-fi-lovin' friends, it'll bring you good luck! ;D
Update 12/23/12: Thank you so much to everyone who entered!  The giveaway is now closed and a winner has been chosen. If you'd like to get blog updates, random pictures, and chat directly with me, join me on Facebook by clicking the LIKE button over in the right hand side bar.  xo Jaime

Tuesday, December 18, 2012

A Gift Fit for a Space Princess!

I am a nerd.  Yup, I'm a comic-book-reading, Sci-Fi lovin', super geek.  Give me a hobbit, some elves, and a dragon and I am IN! A movie about a team of super heros that have to save the planet from aliens? Pass the popcorn because I'm there!! Give me an intergalactic space battle that will determine the fate of mankind and I'm a happy girl! I love it all!


My love of Sci-Fi started when I was two and saw Star Wars.  That year I demanded a Princess Leia costume for Halloween.  My great-aunts thought it was cute, because (to them) I looked like a nun...

So when I got it in my head that I needed to make a beanie that would house some headphone speakers (my earbuds are just killing me these days, and I don't like how the pinchy-headband part of regular headphones gives me a headache), I thought it would be a perfect opportunity to embrace my inner geek.  That, and without the Princess Leia buns the hat kinda made me look like a 1960's astronaut... LOL!!!

So, if you'd like an awesome hat that looks like everyone's favorite Space Princess, or you'd like a super cool hat that is a self-contained music system, read on:


Princess Leia's Headphone Beanie
(Alderaan Edition, 'cause it rocked! Um, before it blew up...)
Supplies:
Basic Beanie
2 Large Inner Pockets
1 Small Inner Pocket
2 Leia Buns
Brown Felt - 1/4 yard (or you could use poly-fil if you've already got a bunch of it laying around)
Headphones that you are willing to take apart (don't use your $90 headphones that you love.  I picked up a pair on Amazon for less than $5 (Panasonic RP-HT21) that are amazing.   They  come apart easily and sound fantastic to my non-professional-musician ears.)
iPod Nano (optional, but it will allow you to have a completely self-contained system!  So, like, don't buy one just for this, but if you've got a micro-mp3 player by all means grab it and let's get goin'!)


Basic Beanie
to fit an average-to-large adult woman's head
**I have a large head.  I made this to fit me.  If you've got a smaller head, I would highly recommend you leave off the last increase (R12) when you make the beanie.**
Supplies:
Worsted weight yarn - about 175 yards (I used Caron 100% acrylic worsted weight yarn in Chocolate)
Size H crochet hook
Scissors
Yarn needle

R1: make 10 sc in a magic loop, pull the loop tight and sl st to the first sc to close round (10 st)
R2: ch 1, 2 sc in each st around, sl st to the first sc to close round (20 st)
R3: ch 1, sc in each st around, sl st to the first sc to close round (20 st)
R4: ch 1, (2 sc in next st, sc) 10 times, sl st to the first sc to close round (30 st)
R5: ch 1, sc in each st around, sl st to the first sc to close round (30 st)
R6: ch 1, (2 sc in next st, 2 sc) 10 times, sl st to the first sc to close round (40 st)
R7: ch 1, sc in each st around, sl st to the first sc to close round (40 st)
R8: ch 1, (2 sc in next st, 3 sc) 10 times, sl st to the first sc to close round (50 st)
R9: ch 1, sc in each st around, sl st to the first sc to close round (50 st)
R10: ch 1, (2 sc in next st, 4 sc) 10 times, sl st to the first sc to close round (60 st)
R11: ch 1, sc in each st around, sl st to the first sc to close round (60 st)
R12: ch 1, (2 sc in next st, 5 sc) 10 times, sl st to the first sc to close round (70 st)
R13-26 (or until the hat reaches 8.25" from center of crown to bottom edge): ch 1, sc in each st around, sl st to the first sc to close round (70 st)
R27: ch 2, (fpdc, bpdc) 35 times, sl st to first dc to close round (70 st)
Fasten off.  Weave in ends.

Large Inner Pocket
approximately 2 1/2 " x 3 1/4"
Supplies:
Worsted weight yarn - small amount (I used Caron 100% acrylic worsted weight yarn in Chocolate)
Size H crochet hook
Scissors
Yarn needle

(Make 2)
ch 9
R1: sc in 2nd ch from hook, sc in each ch across (8 st)
R2-11: ch 1, sc in each st across (8 st)
Fasten off.  Leave a long tail for sewing on later.

Small Inner Pocket
approximately 2 1/2 " x 1 3/4"
Supplies:
Worsted weight yarn - small amount (I used Caron 100% acrylic worsted weight yarn in Chocolate)
Size H crochet hook
Scissors
Yarn needle

ch 9
R1: sc in 2nd ch from hook, sc in each ch across (8 st)
R2-7: ch 1, sc in each st across (8 st)
Fasten off.  Leave a long tail for sewing on later.


Leia Buns
approximately 4" across
Supplies:
Worsted weight yarn - small amount (I used Caron 100% acrylic worsted weight yarn in Chocolate)
Size H crochet hook
Scissors
Yarn needle

(Make 2)
R1: make 10 sc in a magic loop, pull the loop tight and sl st to the first sc to close round (10 st)
R2: ch 1, 2 sc in each st around, sl st to the first sc to close round (20 st)
R3: ch 1, sc in each st around, sl st to the first sc to close round (20 st)
R4: ch 1, (2 sc in next st, sc) 10 times, sl st to the first sc to close round (30 st)
R5: ch 1, sc in each st around, sl st to the first sc to close round (30 st)
R6: ch 1, (2 sc in next st, 2 sc) 10 times, sl st to the first sc to close round (40 st)
R7: ch 1, sc in each st around, sl st to the first sc to close round (40 st)
R8: ch 1, (2 sc in next st, 3 sc) 10 times, sl st to the first sc to close round (50 st)
R9: ch 1, sc in each st around, sl st to the first sc to close round (50 st)
R10: ch 1, (sc next 2 st tog, 3 sc) 10 times, sl st to the first sc to close round (40 st)
R11: ch 1, (sc next 2 st tog) 20 times, sl st to the first sc to close round (20 st)
R12: ch 1, (sc next 2 st tog) 10 times, sl st to the first sc to close round (10 st)
Fasten off.  Weave in ends.


So get the beanie, 2 large inner pockets, and small inner pocket together.  Find the center of the back of the hat and pin the small inner pocket right in the center.


Sew along the bottom edge of the pocket (the one at the bottom edge of the beanie).  Sew up the two sides to finish the back pocket.


Now, try the beanie on and put pins into the hat directly over where your ears are.  Take the hat off and use the marks as a guide where to place the large inner flaps.  The marks are going to be where you want the speakers to go (eventually) so center the flaps over the mark so that there will be room for them to go.


Stitch the large inner flaps into place, using the picture above as a guide.  You want to leave the back end of the pocket open, not the top.


These are the headphones that I used.


The headband part of them pops off very easily. It won't damage the speakers in any way to remove that part.


This is what it will look like when you get the headband part removed.


Tuck the speakers into the large inner pockets.


 I left the cord bundled up so that it tucked easily into the small back pocket.


I actually used the twist tie holding the cord  to attach the bundle of cord in place in the pocket.


If you try it on right now, it's going to look a little weird.  I mean, the headphone speakers will show through the beanie, and make it bump out.  It's okay though, because we're going to hide the bumps under the Leia buns! (Please pardon the picture. I was the only one home at the time that could take it, so I had to use the dining room mirror... LOL!!!)


Okay, so you're going to now cut out the felt centers for the buns.  I used the finished bun as a guide and cut out 4 layers of felt for each side.


Tuck the felt inside the bun to give it a more filled out look. You can use a little bit of fiberfill instead, if that's what you've got! :D


Stitch the buns in place over the speaker bumps (don't catch the pocket in your stitches, you might want to remove the speakers later if you need to wash the beanie).  I plugged the speakers into my iPod Nano and clipped it onto the front of the back pocket.  That way I can start my playlist and put it on and I'm good to go.  I like that it's easily accessible in case I need to skip a song. I can just reach back and double tap the large button on the side.


 Put it on and enjoy!
(My dad was working as my photographer this day, but he kept making me laugh!  This was the best one of the pictures! LOL!)

xoxo

Hey!  Want to win one for a Princess Leia hat yourself? Hat and speakers only, not the iPod (sorry!).  Enter my giveaway celebrating 600 Facebook Likers HERE!
Update 12/23/12:  Thank you so much to everyone who entered!  The giveaway is now closed and a winner has been chosen.  xo Jaime

Thursday, December 13, 2012

A Gift of Metal & Thread

So, the latest copy of In Style magazine was pretty good.  Of course, I could hardly contain my glee I flipped past a page and discovered that the embellished bracelets that have been popular in French Vogue were now everywhere!  Yippee!!  'Cause, you know, we can do that ourselves!

I am speaking from a place of fashion authority, as the author of Amazon Kindle's #1 best selling fashion book, Crochet Dynamite: Gifts for Your Besties.  BAAA-hahahahaha!!!  How in world did that happen?!  My sincere appologies to #4 Tim Gunn...

Anyway, I had to make one for myself.


And then I had to do some more research.  I discovered something very interesting.  Aurelie Bidermann's Do Brazil line of jewelry is stunning.  It's also very, very pricey.  Have you seen it?

Go check out the line HERE
The clasp is a paper clip.  It's a $300 bracelet with a paper clip clasp.  My mom assures me that she would be furious if she spent $300 on a bracelet and it closed with office supplies, but it's grown on me, and now I'm digging it.  The bracelet above is clearly made with a braid, and not crochet, but I'm not super crazy about making exact rip-off copies of anyone else's work, and besides, I couldn't find that exact bracelet anyway, so I've done my own thing on this one.  Think of it as a tribute, and knock $50 off the price tag... ;D

I made 2 versions of this bracelet, a charm bracelet version, and a paper clip version.  Your friends will think you're so posh!!  My mom will think you're crazy for buying a paper clip bracelet...

Metal & Thread Mash-Up Charm Bracelet 
mine was about 7 1/2" long
Supplies:
Charm Bracelet (I got mine at Joann's in the jewelry making section)
Craft Cord (sometimes called Craft Thread.  It's like embroidery floss that doesn't split apart, and it's sold next to the embroidery floss in big bulk packs.  You could also use embroidery floss, or size 3 crochet thread.) I used 5 strands at a time for this project.
Size C crochet hook
Fabri-tac fabric glue (or other fabric glue)
Scissors
Jewelry pliers (optional, but helpful)


These bracelets are meant to sit a little more snugly than most charm bracelets do, so I took two links out of the bracelet chain using my jewelry pliers.  This isn't completely necessary, if you don't want to do this step.

Pick out the 5 colors that you're going to use for your bracelet.  I made this one in shades of purple, because I have a friend who's got a birthday coming up that loves purple.  (No worries, Crafty Pals, she's a Top Tier Handmade Gift Appreciator!)


I began by pulling a loop through the first link of the bracelet, and chaining 2.  Then I put 2 sc in each link across the top edge of the bracelet.  I think you can see in the picture that I alternated which way I held the links as I went, so that the bracelet wouldn't spiral when I was done.  So one link came to the front, the next link I brought up behind the first link, the third link I brought up in front of the second link.  It gives a little bit of a ripple to the bracelet, if you look closely.  When you get to the end, pull the loop through to finish the end.  Leave a 3" tail (just to be safe).


Now, pull out a 6" (or so) length of the threads.  Using your hook, pull one end of this strand through the ch 2 space at the front of your row of stitches.  Pull the end up so that the strand is centered.  This is going to bulk up the tassel that goes at the end of each side of your bracelet.   Wrap a few of the threads around the whole bundle of craft cord and knot it.  Put a few drops of Fabri-Tac on the knot to keep it from coming loose.


Repeat on the other side.  Trim the tassels to approximately 1" long.


Wrap it up and give it to a friend that you love for her birthday because she's awesome (not just because she wrote a beautiful review of your latest book on Amazon, but also because she's incredibly kind and generous too)!
...I'm pretty sure she's going to read this, so I'll leave it at that... Cough, Nyan has a package coming in the mail, Cough...


Metal & Thread Mash-Up Paper Clip Bracelet
Supplies:
Package of chain (I know, that's weird, but what are you supposed to call it?  It was a 42" length of chain, but the bracelet pattern doesn't require it to be that long, so I don't want to force you to buy the exact same thing as I did, especially since you only need about 7" of it...) I got mine at Joann's, but I've seen it in Michaels...
Paper Clips (I used 1" paper clips, but this could look really cool with one of those Jumbo clips)
Craft Cord (see above!)
Size C crochet hook
Scissors
Fabri-Tac fabric glue
Jewelry pliers *optional, sort of.  It would be hard to do this without pliers of some sort, but if you've got a pair that aren't specifically for jewelry you can totally use them for this, and just toss any links that get too damaged in the un-linking process.  DO NOT try to use your teeth to open the links, you will chip a tooth... Or, at least, that's how I chipped a tooth about 8 years ago...)


You don't have to separate the entire length of chain into bracelets, you can just use what you need and save the rest for something else, if you'd prefer.  I was going to make a lot of presents, so I split mine up right away.  I got 5 adult sized bracelets, and one smaller bracelet for Mims.


Attach your very clever closure.


Now, follow the instructions exactly the same way as for the charm bracelet version!   I made this one for my mom because it will make her laugh every time she wears it.


You're all done!  Package them up in cute little gift baggies and tie them with ribbon!

xoxo


Psst!  You want to make gift baggies with me?

No Crochet Tulle Gift Baggie
Approximately 4"x 2"x 6" (or as high as you want, it's adjustable)
Supplies:
6" wide roll of tulle netting (in the wedding section at craft stores.  I got mine 50% off at Hobby Lobby...)
Sewing Thread
Sewing machine (or sewing needle, but it will take much longer by hand)
Card stock
Hot Glue Gun (and glue sticks)
Scissors
Ruler
Pencil


Start by sewing two 36" strips of tulle together along the long sides with a 1/4" seam.  This will make a 36" tube.  Turn it inside out, so that the seams are on the inside of the tube.  Cut the tube into 9" lengths, or whatever length you prefer.

Heat up your glue gun.

Cut your card stock into 4"x2" rectangles.  You need 2 for each baggie.


Slip one of the card stock rectangles into the bottom of a tulle tube.  Make sure that the tulle comes up evenly on each side and wraps across the rectangle to meet (mostly) in the center.


Squeeze a bunch of hot glue on the tulle and card stock.


Slap another rectangle of card stock over the glue to make a tulle/glue sandwich.  Add more glue to the corners to make sure that they're really stuck together.


Drop in a gorgeous handmade bracelet and tie with a ribbon!  These baggies also look amazing holding pairs of Semi-Handmade Gloves...  
Related Posts Plugin for WordPress, Blogger...