Google+

Friday, February 28, 2014

Birthday Princess Headband

I made a birthday crown headband for Mims's seventh birthday.  It was adorable, and totally appropriate to wear to school, as opposed to the giant birthday tiara that I wanted to get her.  Teachers tend to frown on that type of distraction in class. LOL!

Mims is now SEVEN!!!!  
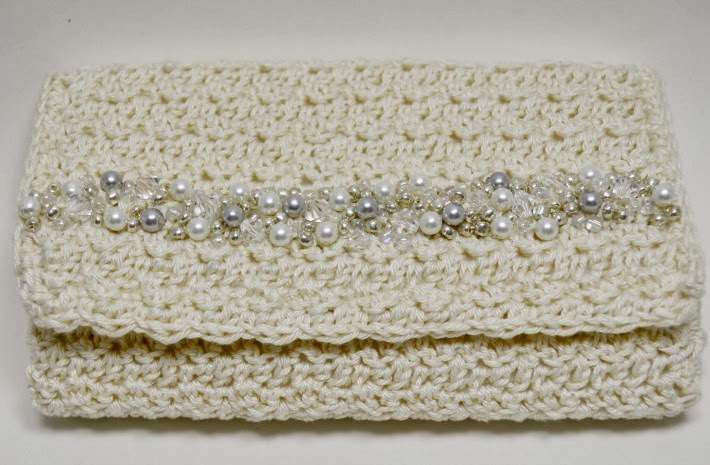
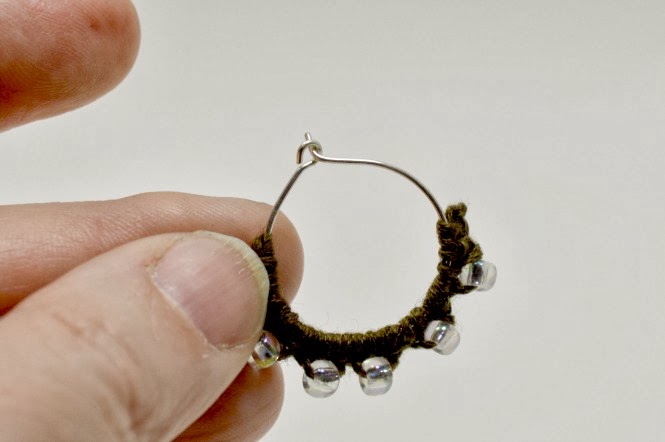
I used my recent headband discovery (you know, the one where I found a way to keep them from stretching out until they were too big to actually hold hair back) to add some structure to the crocheted part, which had the added bonus of making it even more sparkly, and your crochet expert friends will never be able to figure out how you made it.

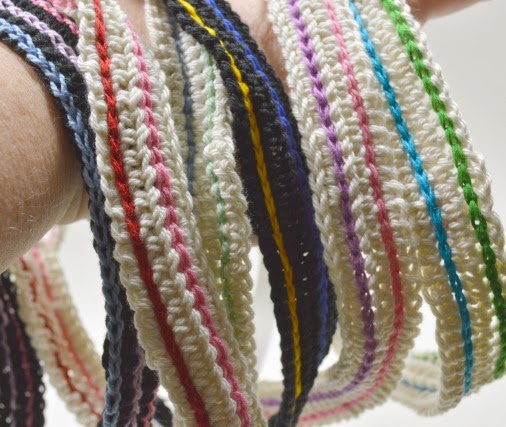
The other thing that I think is super cool is that it only takes about 25 yards of yarn to make them, so for the price of one skein of yarn you could whip up a batch of headbands for all of the girls coming to the birthday sleepover. Very cheap, very cool party favors!!! 

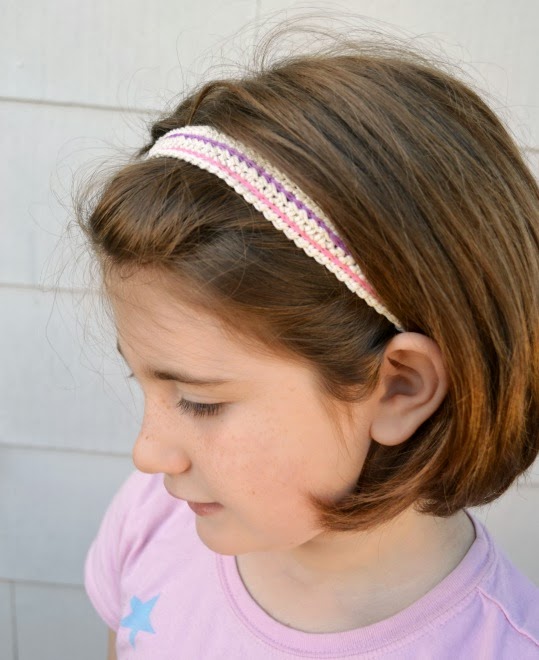
BIRTHDAY PRINCESS HEADBAND
to fit beautiful girls of all ages from 5-105
Supplies:
Loops & Threads Payette in Sterling Silver - approximately 25 yards (you can substitute Vanna's Glamour by Lion Brand Glittery in Platninum, but it won't be quite as sparkly because it doesn't have the sequins)
Size G crochet hook
Yarn needle
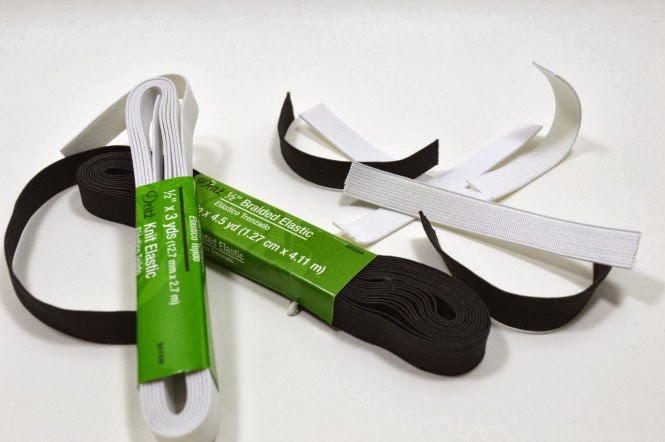
1/8" elastic - approximately 13"
Straight pins
Sewing thread
Sewing machine (optional, you could also hand sew these)

ch 71
R1: hdc in 2nd ch from hook, hdc in each ch across (70 st)
R2: ch 1, hdc in each st across (70 st)
R3: ch 1, (sc, ch 2, skip next 2 st, 2 sc) 14 times (70 st)
R4: ch 1, [sc, skip next st, (hdc, dc, ch 3, dc, hdc) in ch space, skip next st] 14 times, sc in last st
Fasten off.  Weave in ends.

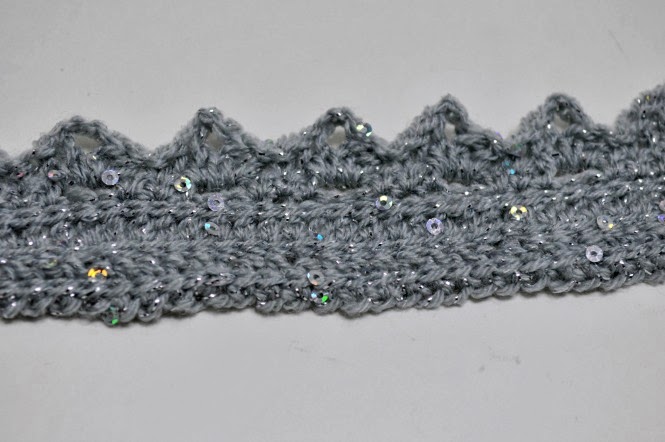
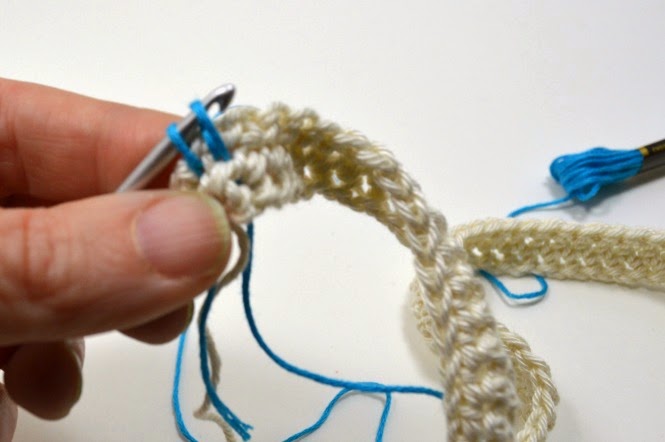
This is what it should look like at this point.
Attach yarn at end, and make a row of 70 slip stitches in between the stitches of R1. Fasten off.
Make another row of 70 slip stitches in the holes created between R1 and R2. Fasten off.
Make a third row of 70 slip stitches in the holes created between R2 and R3.  Fasten off.
Weave in all the ends.  The finished crocheted crown piece should measure approximately 13 1/2".

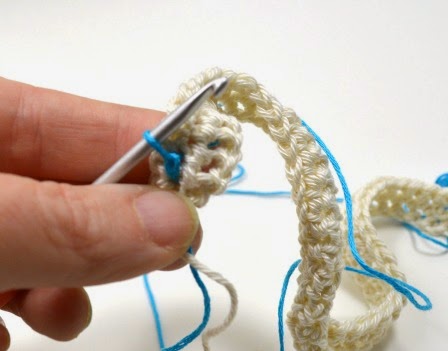
It should now look like this, with the 3 additional rows of slip stitches
It won't be as long, and it will be MUCH less floppy and stretchy
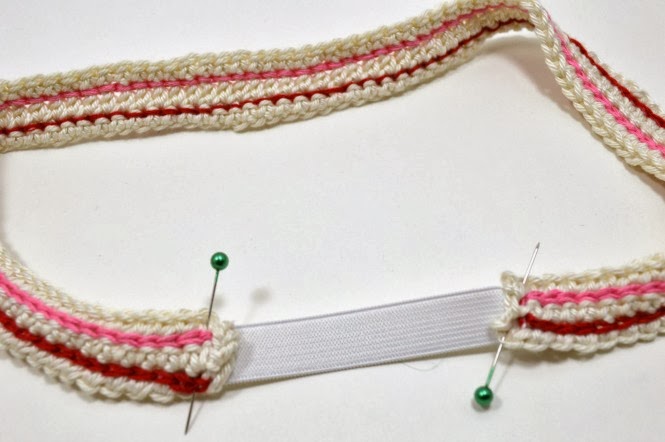
Cut the elastic in half to make two 6 1/2" pieces.
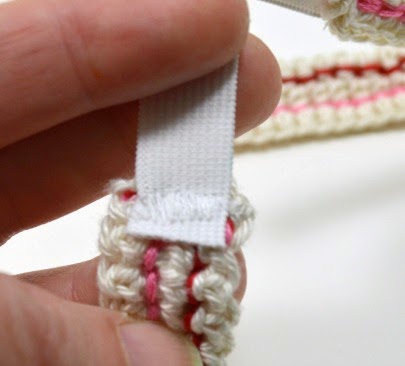
Pin the two pieces to the ends of the crown, one at R1, and the other at R3.
Sew in place. Trim elastic ends if needed (to minimize headband related headaches! :P)
Try that sucker on!  Everyone is beautiful in a crown!


(If you wanted to make one to fit the smaller heads of toddlers, I would make the crocheted part exactly the same, but make the elastic 5" long.  I don't think I would recommend making this version for a baby...)

Because of the elastic in it, this headband fits my daughter perfectly, and it also fits me comfortably.  I have several adult friends that will LOVE being birthday QUEENS this year! Even if you're not a headband-type, who doesn't love a sparkly crown?!  

xoxo

Thursday, February 27, 2014

Happy 7th Birthday to Mims!

Today my daughter, Mimsey, turns SEVEN!!!!  It seems like only yesterday she was this:


and now she's THIS!!!!


And yes, I had to make her a headband so that she could wear her birthday crown all day!  LOL!!!


Happy Birthday to you, Little Love!!!


These are my girls, together this morning!

xoxo


Tuesday, February 25, 2014

Academy Awards clutch!

Hello Beautiful Dynamos!

So, for the last couple of weeks I've been working on secret projects.  I've still got one more set of secret projects to finish up, but I'm so excited that I can finally tell you about one of them.

I made a purse that will be going to the Oscars!  OMG, right?!

I can hear you wondering now, "How in the world did THAT happen. Jaime?"

Well, it just so happens that my bestie, E, is a member of The Academy of Motion Picture Arts and Sciences, and thus gets to go to the awards ceremony every year. And it also happens that the last time that she and her totes adorable son, S, were over, I showed her some of the bags I am working on for my new book (and one of those secret projects that I mentioned before, shh!).  A few days later she had a dream about asking me to make her a bag to carry to this year's Oscars, so of course, she sent me an email right away asking if I was even interested.

Was I interested?!!!  Oh my gosh, pinch me! I said yes immediately!

And then immediately realized that I've never made anything like that before. I'd never even TRIED to make a purse like that before. I don't have a go-to clutch pattern, and I haven't worked in bridal/formal crochet, like, ever!  Aaaaaaah!  But, after a lot of back and forth, 3 mandatory re-starts (and about 15 non-mandatory do-overs!) I finally created something that we both love.


It's about 7" long and about 4" high and it's just the right size for her to stash a lipstick, some cash and a couple of granola bars (you never know, it's a looong ceremony, folks! LOL!!!).


I've been pioneering this new way of lining crochet bags, and this was a great opportunity for me to really refine the process.  I re-did the lining several times, because I'm a perfectionist (and what's the point if it's not as close to perfect as you can make it). It really pushed my sewing and design skills to their limits (I know, it looks so simple, but it wasn't for me).  But the good part is that I will be able to roll all of that trial-and-error into some pretty cool tutorials so you don't have to make the same mistakes that I did.  Yay!!

I'm hoping that E will be able to snap some quick phone pics of herself on the red carpet, but even if she can't I'm still excited to tune in next Sunday to watch the show.

xoxo!!!

Saturday, February 15, 2014

Lace Hoop Earrings

Yesterday we made some Beaded Hoop Earrings, and today I'm going to continue the hoop earring love and show you how to make some awesome lace earrings!  They're so ridiculously quick and easy, you'll want to make a bunch for all of your besties,or your MOM!

Mom Dynamite, reigning president of the Official Crochet Dynamite Fan Club since 1975...
LACE HOOP EARRINGS
** a quick note about hoop earrings -- I picked up a giant package of nickel-free hoop earrings by Bead Landing (I got them from my local Michaels).  I expected that there would only be one size of earrings in the package, but there were TWO different sizes.  This pattern is for the RED earrings, and is designed to fit the larger size hoop.)**


Supplies:
One pair of plain hoop earrings - approximately 1.5" across
Embroidery floss in your favorite color - approximately 6 yards
Size B crochet hook
Tapestry needle (or other yarn needle of appropriate size)
Scissors
Small jewelry pliers (only necessary if you purchase the bead landing hoop earrings)


To Make The Earrings:
(make 2)
Pull a loop up around the hoop earring and ch 1. 
R1: (work all single crochet stitches around the hoop) 24 sc, turn (24 st)
R2: (ch 3, skip 3 st, sc) 6 times, turn (24 st)
R3: ch 1, 3 sc in first ch space, ([sc, 3 hdc, sc] in next ch space) 4 times, 3 sc in last ch space (26 st)
Fasten off.  Weave in ends.

If you purchased the Bead Landing Nickel-Free Hoop Earrings, please go HERE where I explain how to finish the earrings so that they don't fall off while you're wearing them (totes important, right?!).

Have a wonderful day, Dynamos!!!

xoxo

Hey Dynamos! A quick request:  If you Pin this project onto Pinterest, would you pin the picture of my mom?  There is nothing funnier to me than the idea that my mom would be searching for DIY projects on Pinterest and find her own face... LOL!!  xo Jaime 

Friday, February 14, 2014

Beaded Hoop Earrings!

Happy Valentine's Day, Dynamos!  Will you be mine forever?  No?  Okay, I had to ask. LOL!!!

So this year I wanted to make my mom some earrings for national lovey-dovey day, 'cause I'm sappy that way.  And they turned out so cute and so easy, I ended up making a whole bunch of them.

And I'm posting the pattern as a token of my love for all of you!!!

BEADED HOOP EARRINGS

** a quick note about hoop earrings -- I picked up a giant package of nickel-free hoop earrings from Bead Landing (I got them from my local Michaels).  I expected that there would only be one size of earrings in the package, but there were TWO different sizes.  This pattern is for the GREEN earrings, and is designed to fit the smaller size hoop. You can add more beads and adjust the pattern to fit the larger hoops if you prefer)**


Supplies:
One pair of plain hoop earrings - approximately 1" across
Embroidery floss in your favorite color - approximately 5 yards
Size B crochet hook
12 Size E glass beads - I used TOHO glass seed beads because they're so sparkley!
Tapestry needle (or other yarn needle of appropriate size)
Scissors
Small jewelry pliers (only necessary if you purchase the bead landing hoop earrings)


To Make The Earrings:
(make 2)
Pull an end loose from your skein of embroidery floss.  Load 6 beads onto the loose end of the floss.  
Pull a loop up around the hoop earring and ch 1. 
R1: (work all single crochet stitches around the hoop) 2 sc, (slide bead up and ch around it, 2 sc) 6 times 
Fasten off.  Weave in ends.

To Finish the Earrings (Bead Landing ONLY!):

So, the Bead Landing hoop earrings need to be adjusted a little before they can be worn.  You need to make a little bend in the straight side (non-eyed?) of the earring so that it won't fall out of your ear while you're wearing them.


Put the straight part (front of the earring) through the eye (back of the earring).


Use a pair of small jewelry pliers to make a 90 degree bend in the wire.


Admire your clever handiwork!  Impressive!


Now, repeat that process on the other earring, dah-ling! 


Once the "flip" is complete, adjust the hoop if it's gotten a little squashed and misshapen in the crocheting/flipping process.  It doesn't have to be perfectly round, but you want it to be close (especially if you're making them for gifts!).


Make an extra pair for yourself!  Wear them with glee because they look so awesome!  Make a bunch for your gift closet (Wouldn't they make amazing birthday gifts, thank you gifts, teacher gifts, and cheer up gifts?  No one could be un-cheered by a cute pair of handmade earrings!)

(Did you love the red earrings in the first picture?  I'll post the pattern for those tomorrow!)

Have a wonderful day, Lovelies!

xoxo

Monday, February 3, 2014

Basic Striped Headband

Happy February, Dynamos!  

About six weeks ago, Mims decided she wanted a dramatic new haircut (first graders are funny!).  Her stylist auntie cut her hair over the winter break so that she could have an awesome "reveal" on the first day back to class.  It was adorable.

I like it because her new short style makes it easy for her to do her own hair, freeing me up considerably in the mornings!  She likes to wear headbands, since her new style doesn't tuck back quite as easily as before, and she doesn't like her hair in her face while she's at school.  Easy peasy!  The only thing is, the plastic kind give her headaches, so we have to get her the soft stretchy kind.  And anyone who has bought the soft stretchy kind of headbands know that those things are pricey, even for the plain, boring headbands! Don't even get me started on the glitter ribbon ones that I paid $15 bucks for (designer headbands are a RACKET! LOL!!).

So I started making her headbands from those inkle bands I wove last month.  Cute and cheap!  I wanted to make her some crochet headbands too, but the headbands I have made in the past always stretch out and become useless after a couple of uses.  It got me to thinking, though.  What if I could make the crochet part less stretchy, like a ribbon?  

And the Basic Striped Headband was born! Ta-da!


By crocheting along the length (instead of short, stretchy rows across the width), and then adding stabilizing (and decorative!) slip stitches between the rows, the crochet fabric loses it's stretchability and becomes a perfect headband ribbon.  Then add some soft elastic and VOILA! A headband that will keep your hair out of your face all day long, without giving you a headache!

BASIC STRIPED HEADBAND
(The crocheted ribbon is about 16" long, so the finished headband will fit 20"-22" heads.  My 6-year-old daughter and I can both wear these.)
Supplies:
Patons Grace 100% Mercerized Cotton in Natural - approximately 20 yards (or other light weight yarn)
2 colors of embroidery floss or craft thread - approximately 4 yards each 
Size D crochet hook
Scissors
Yarn needle
1/2" knit elastic - approximately 4" per headband 
Sewing thread
Sewing machine (or needle to hand sew)
Straight pins

Using yarn, ch 86
R1: sc in 2nd ch from hook, sc in each chain across (85 st)
R2: ch 1, 20 sc, 45 hdc, 20 sc (85 st)
R3: ch 1, sc in each st across (85 st)
Fasten off. 

To add the slip stitch stripes, use the floss to crochet into the holes between  rows. 


Using your first color, and starting at the end of the strip, pull a loop through the first hole between Row 1 and Row 2.  The pull a second loop through the next hole.


Pull the second loop through the first loop to create the slip stitch.  Keep slip stitching until you reach the end of the piece.  Then use your second floss color to slip stitch into the holes between Row 2 and Row 3.
Weave in all of the ends.


They don't take very long, so go ahead a make a whole bunch of them while you're at it!


Cut your elastic strips four inches long!


Pin your headband to the elastic, making sure that it's not twisted.  Try it on (don't poke yourself!) to make sure it's a good fit.  Adjust the elastic if necessary.


Sew the elastic to the crochet ribbon!  I used a lot of zig-zag stitches with my machine, but you could easily hand sew it into place.  Trim the ends of the elastic if needed so that they lie flat against the crochet part of the headband.


Admire your handiwork!  Well done!  Aren't we going to look adorable at the gym tomorrow? Oh who am I kidding?  The kid working the register at Target is going to be impressed I'm sure, even if he doesn't actually say anything beyond, "Here's your change, ma'am."


Now, go finish up the other headbands while you're on a roll.  When you're done, you can put them all on your wrist and swing them around because it's fun.  Or is that just me? It's just me? Okay, I'm weird.

One more thing...
My daughter has gotten really into Legos lately.  She got an awesome Rapunzel set for Christmas that had a blue "jewel" (ie: clear blue lego head) in the set.  Her dad suggested that she should use it as a ghost face.  She said no, she wanted to use it as a water tank.

We had no idea what she was talking about until she created THIS SCENE:


Ba-hahahaha!!!  My kid is weird too!  Happy Monday!

xoxo
Related Posts Plugin for WordPress, Blogger...