Google+
Showing posts with label Hair Accessories. Show all posts

Monday, February 3, 2014

Basic Striped Headband

Happy February, Dynamos!  

About six weeks ago, Mims decided she wanted a dramatic new haircut (first graders are funny!).  Her stylist auntie cut her hair over the winter break so that she could have an awesome "reveal" on the first day back to class.  It was adorable.

I like it because her new short style makes it easy for her to do her own hair, freeing me up considerably in the mornings!  She likes to wear headbands, since her new style doesn't tuck back quite as easily as before, and she doesn't like her hair in her face while she's at school.  Easy peasy!  The only thing is, the plastic kind give her headaches, so we have to get her the soft stretchy kind.  And anyone who has bought the soft stretchy kind of headbands know that those things are pricey, even for the plain, boring headbands! Don't even get me started on the glitter ribbon ones that I paid $15 bucks for (designer headbands are a RACKET! LOL!!).

So I started making her headbands from those inkle bands I wove last month.  Cute and cheap!  I wanted to make her some crochet headbands too, but the headbands I have made in the past always stretch out and become useless after a couple of uses.  It got me to thinking, though.  What if I could make the crochet part less stretchy, like a ribbon?  

And the Basic Striped Headband was born! Ta-da!
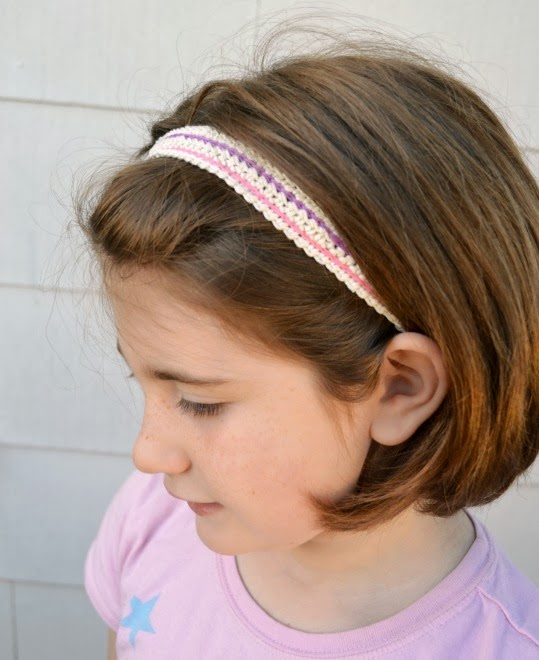

By crocheting along the length (instead of short, stretchy rows across the width), and then adding stabilizing (and decorative!) slip stitches between the rows, the crochet fabric loses it's stretchability and becomes a perfect headband ribbon.  Then add some soft elastic and VOILA! A headband that will keep your hair out of your face all day long, without giving you a headache!

BASIC STRIPED HEADBAND
(The crocheted ribbon is about 16" long, so the finished headband will fit 20"-22" heads.  My 6-year-old daughter and I can both wear these.)
Supplies:
Patons Grace 100% Mercerized Cotton in Natural - approximately 20 yards (or other light weight yarn)
2 colors of embroidery floss or craft thread - approximately 4 yards each 
Size D crochet hook
Scissors
Yarn needle
1/2" knit elastic - approximately 4" per headband 
Sewing thread
Sewing machine (or needle to hand sew)
Straight pins

Using yarn, ch 86
R1: sc in 2nd ch from hook, sc in each chain across (85 st)
R2: ch 1, 20 sc, 45 hdc, 20 sc (85 st)
R3: ch 1, sc in each st across (85 st)
Fasten off. 

To add the slip stitch stripes, use the floss to crochet into the holes between  rows. 
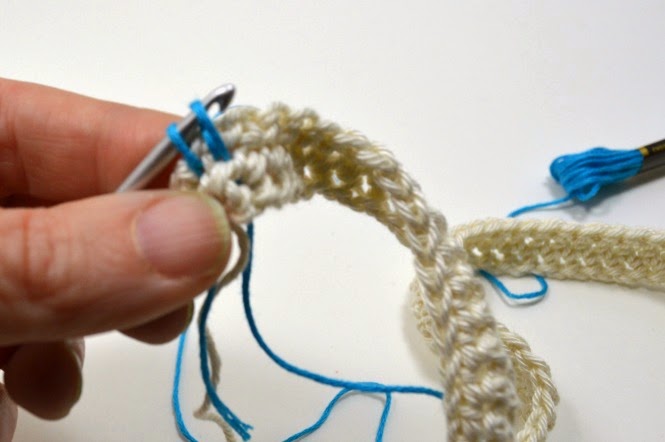

Using your first color, and starting at the end of the strip, pull a loop through the first hole between Row 1 and Row 2.  The pull a second loop through the next hole.
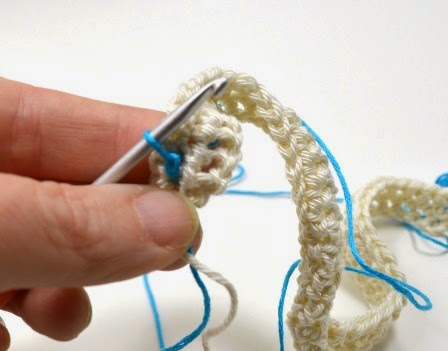

Pull the second loop through the first loop to create the slip stitch.  Keep slip stitching until you reach the end of the piece.  Then use your second floss color to slip stitch into the holes between Row 2 and Row 3.
Weave in all of the ends.


They don't take very long, so go ahead a make a whole bunch of them while you're at it!
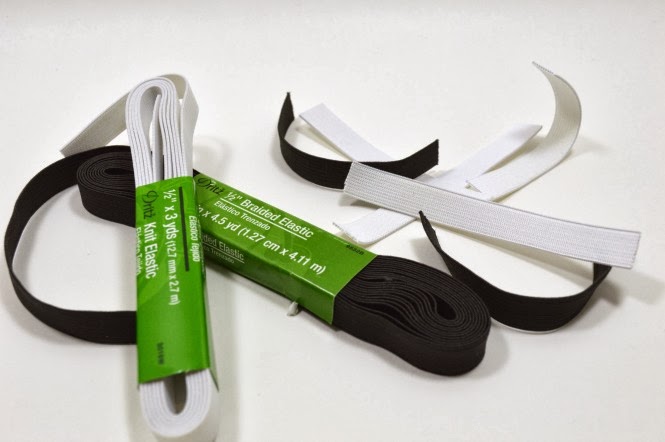

Cut your elastic strips four inches long!
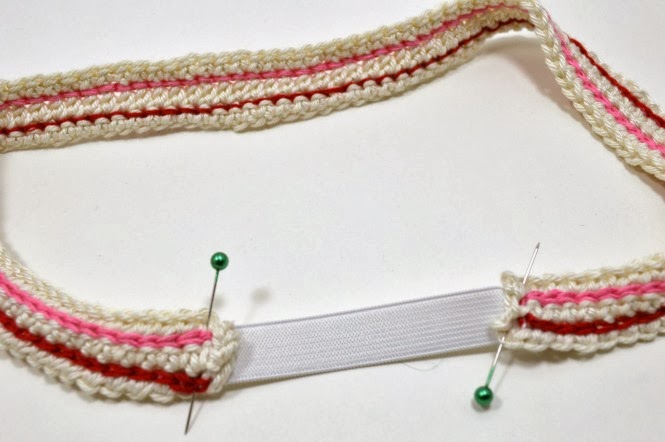

Pin your headband to the elastic, making sure that it's not twisted.  Try it on (don't poke yourself!) to make sure it's a good fit.  Adjust the elastic if necessary.
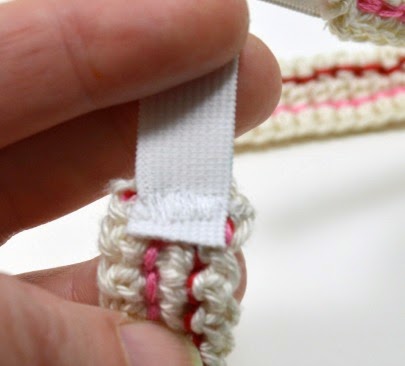

Sew the elastic to the crochet ribbon!  I used a lot of zig-zag stitches with my machine, but you could easily hand sew it into place.  Trim the ends of the elastic if needed so that they lie flat against the crochet part of the headband.


Admire your handiwork!  Well done!  Aren't we going to look adorable at the gym tomorrow? Oh who am I kidding?  The kid working the register at Target is going to be impressed I'm sure, even if he doesn't actually say anything beyond, "Here's your change, ma'am."
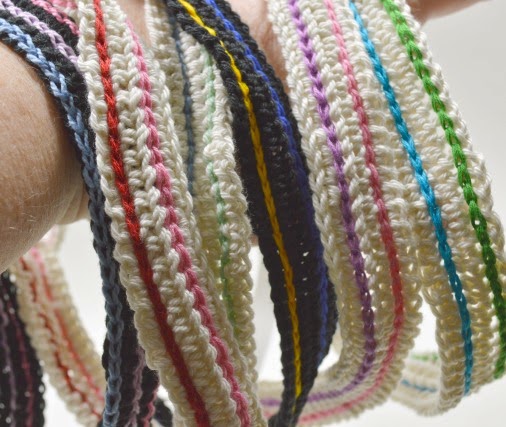

Now, go finish up the other headbands while you're on a roll.  When you're done, you can put them all on your wrist and swing them around because it's fun.  Or is that just me? It's just me? Okay, I'm weird.

One more thing...
My daughter has gotten really into Legos lately.  She got an awesome Rapunzel set for Christmas that had a blue "jewel" (ie: clear blue lego head) in the set.  Her dad suggested that she should use it as a ghost face.  She said no, she wanted to use it as a water tank.

We had no idea what she was talking about until she created THIS SCENE:
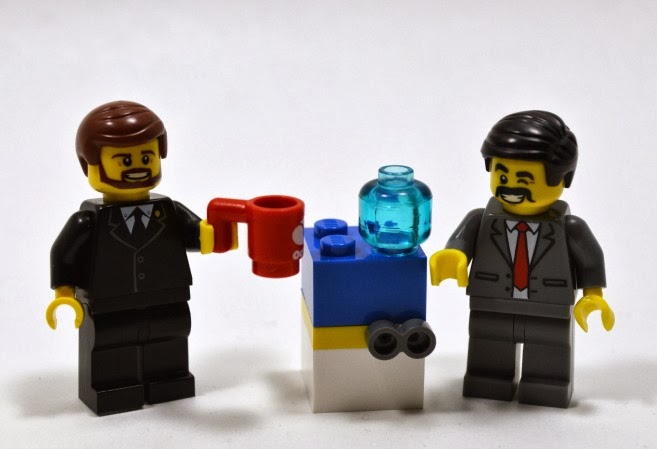

Ba-hahahaha!!!  My kid is weird too!  Happy Monday!

xoxo

Thursday, September 6, 2012

The Hook Makes the Project!

Good Morning Dynamos!  Today is Mims' first day of Kindergarten.  It is a very big deal in our household.  It required a special hair style...


I know what you're thinking: 'Jaime, why did you go an muck up a beautiful crochet butterfly with those gaudy rhinestones??!' and honestly, I agree with you, but I do have a good reason.  Mims is five.  Beautiful, subtle crochet anything doesn't interest her, but slap some rhinestones on it and suddenly it becomes so precious that it's like the butterfly was made out of gold.  There is no accounting for taste when it comes to kindergarteners...


As for the butterflies, they remind me of my childhood.  I got my first paying gig as a crochet artisan when I was nine.  My grandma (yes, Mema, who I live with) and I had been at a holiday craft fair and saw some adorable crochet butterfly pins for sale.  They were, like, $1 each (which was crazy huge money at the time, at least to my 9 year-old brain), but my grandma bought me one anyway.  Being the original Junior Crochet Dynamo that I was, the first thing I did when I got home was try to figure out how it was made.  I didn't actually take it apart, but I came close.  It took me a couple of days to make a pattern that looked virtually identical to the butterfly pin.

It was at this point that my grandma, being the savvy Christmas shopper that she is, offered me a job.  If I made enough crochet butterfly pins for all of the women that she worked with, she would pay me a quarter each.  EACH!!!  It was like the greatest deal of all time.  I got to crochet a dozen butterflies, they would go to good homes, and I was getting paid for it!  Best. Christmas. Ever!  LOL!!!

Well, I made her the dozen butterfly pins that she had ordered, and I threw in an extra, just for her.  She ended up hanging it in the kitchen, where it hung for nearly 25 years, until a plumbing disaster forced a kitchen remodel (don't even get me started on THAT drama! Yikes!) about 2 years ago.  Which meant that when I wanted to do a cute butterfly when I first started Crochet Dynamite, I had no idea where my prototype butterfly was.

I was certain that the internet would hold the key to my happiness.  I searched and searched and couldn't find any crochet butterflies that looked like MY butterfly.  Finally, I found a pattern via my friend Mariel's website http://haakmaaraan.blogspot.com/ (which is an amazing source of inspiration, btw!  Have you checked it out yet?) that I thought might be right.  It sure looked similar.

The butterfly pattern over at Marie's Making (http://blog.mariesmaking.com/2011/05/crochet-butterfly-pattern.html) was very close, but when I made it, it was enormous!  Okay, it's not that big, but it's larger than I expected it to be.  It's about 2 1/2 inches across.  I remembered that MY butterflies were simple, and I am sure I hadn't done more than 2 rounds because they were fast to make even then (before I became the record-breaking-speed-crocheter that I am now).  Also, my butterflies had larger top wings, and smaller bottom wings, instead of them all being the same size, so clearly, I was going to have to 'wing' (ahahahahaha!  I crack myself up!) a new pattern in order to get what I wanted.  So, thank you for bearing through this terribly long post, here is your reward:  The Butterfly Pattern I Wish I Remembered From My Childhood... Hmm... Let's just call it, Jaime's Butterfly from now on, okay? ;D


Jaime's Butterfly
approximately 1 1/2 inches across
Supplies:
Embroidery Floss in butterfly colors (You can make 1.5 butterflies from one skein of floss)
Black Embroider Floss (for body and antennae)
Size C hook (Normally I don't care what kind of a hook you use, and being a huge Boye fan, that is the brand I normally do my projects with, but I was making a mess of the butterfly until I switched my hook to a Susan Bates hook.  Suddenly, the floss didn't split, I was able to put the stitches where I wanted them to go, and my butterfly looked perfect.  If I was ever certain of anything, it's this: The Hook Makes the Project!  ...You can quote me on that, btw... So, if for some reason you are getting crazy frustrated with this project, switch your hook out for a different one...)
Tapestry Needle
Scissors
Gaudy Stick-on Rhinestones and Bobby Pins (if you need to make hair pins for your favorite little Kindergartener...)

R1: in a magic loop, ch 2 (counts as first dc), 2 dc, ch, (3 dc, ch) 7 times, sl st to the ch 2 to close round, there is no need to pull the loop tight, just pull it so that the stitches sit snugly next to each other (there will be eight 3 dc clusters, and eight ch spaces)
R2: (change color if you wish) DO NOT ch, 6 dc in next ch sp, sl st in center st of next dc cluster, (5 dc in next ch sp, sl st in center st of next dc cluster) 2 times, (6 dc in next ch sp, sl st in center st of next dc cluster) 2 times, (5 dc in next ch sp, sl st in center st of next dc cluster) 2 times, 6 dc in next ch sp, sl st in center st of next dc (this will kind of be over the top of the very first dc of the round)
Fasten off.  Weave in ends.


Fold butterfly in half.  Using an 8 inch length of black embroidery floss, tie the butterfly together, using a square knot at the top for a head.  Leave about an inch of floss to be the antennas when you trim the extra off.


Now, if you're a normal person, you can use these butterflies for anything.  I'm thinking they would make a sweet mobile for in a nursery... Or, do what I did, and just run a bobby pin through a few of the stitches on the back of the butterfly.


If you really want to crazy glam them up, the self adhesive iridescent rhinestones are awesome, and you don't ruin the butterfly forever if you decide you don't adore the crystals anymore...  I just slapped them onto the wings, but you could get really fancy-schmancy and add them onto the body as well.  Very glamorous! ;D


xoxo

Monday, May 28, 2012

Star Spangled Everything!

Happy Memorial Day!

It took me a while to figure out a cool star pattern for my Wonder Woman Running Tiara pattern, and it seemed like such a waste to only use it once, so I've been busy crocheting stars like crazy trying to come up with something (else) awesome to do with them.

I know it was only yesterday, but I'm going to repeat the pattern here now, just for the sake of keeping all the starry stuff in one place.  I promise, you will thank me later when you don't have to bounce between posts to make your cute stars...

Star Pattern:
Use size 3 crochet thread and a size D hook thread for a larger star
Use size 10 crochet thread and a size 8 steel hook for a smaller star
(make 2)
R1: 10 sc in magic loop, sl st to first sc to close round (10 st) 
R2: ch 1, (2sc in next st, sc) 5 times, sl st to first sc to close round (15 st)
R3: sl st,[(hdc, dc, trc, dc, hdc) in next st, 2 sl st] 4 times, 
(hdc, dc, trc, dc, hdc) in next st, sl st.
Fasten off. Leave a long tail to sew star together.


I discovered that, while a single flatty piece, they have cute rounded points, but if you sew two of them together the points become sharp and pokey and they look really good.  Just like a star should look!  It made me feel patriotic!  I wanted to star spangle my world!!!

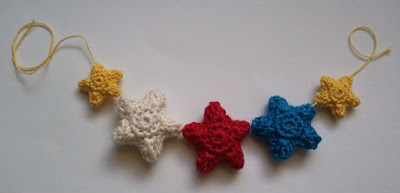
Of course I had to do a red-white-and-blue garland.  I used size 3 crochet thread and a size d hook for the larger stars, and size 10 crochet thread and a size 8 steel hook for the yellow stars.  I stuffed them lightly to give them a little more shape.  I think these would make a super cute decoration for your year-round tree, or if you really went crazy you could decorate for 4th of July with a garland around your patio... You still have enough time if you start right now!

I sewed some stars together, leaving the bottom open, so that I could use them as pencil toppers.  I am thinking about cute stuff for Mims when she starts kindergarten in the fall, and I think these would be a hit.  I have been informed by my mom, who is a public school teacher, that perhaps these would be better 'at home' pencils, since the toppers can be removed and played with.  I will defer to her great wisdom, and plan a birthday party that needs princess and/or fairy wands for Mims next year... Ooh! If you cover the pencils with a fancy scrapbook paper, I think they would look extra cool (and less school-y).  These would also be cool for an end-of-the-year magic test-taking pencil... I hear that they only know how to write correct answers...

I used some size 10 crochet thread (made of bamboo fibers, yo!) and a size 8 steel crochet hook to make the star for this necklace.  I sewed it right onto the ball chain, stuffing it lightly to make it a little puffy and cute.  It doesn't slide easily, so if you try this, make sure you center it!  The bamboo thread is so soft, and the star weighs practically nothing, so I forget that I'm even wearing it.  I adore it.  Mims has requested several, so that she can have them in all her favorite colors.
I attached some bobby pins through the stars to decorate Mims's bun today.  It looked so festive and fun, I'm a little jealous of her long hair...

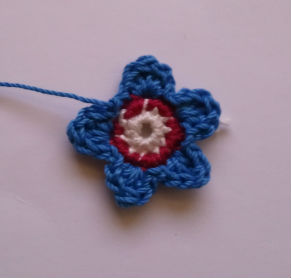
What I would not recommend is doing more than 2 colors per star.  This tri-colored experiment was a disaster.  I was sure you wouldn't believe that it was possible for me to make anything that was this awful, so I am posting a picture as proof that I screw up all the time... But seriously, if you want to do a two colored star, it think it could look cool, but the way the increases on the 2nd row go, it just doesn't look good with a third color.  Heed my cautionary tale... Don't do it! LOL!!!

The stars themselves are really appealing, just on their own.  When I was a kid I used to make origami wishing stars, and I think that a collection of these little crochet stars would be just as beautiful in a jar to tell someone how much you love them.  I could also see making these as keepsakes for a special occasion, you could even put a loop on them to use as a Christmas ornament.  I might even hang one in the car for Jake, to remind him that Mims and I love him.  Aww, so sappy today.  But, the stars are really cute, and once you start making them, your rational brain will justify making more and more to give away.

Fill your world with stars today, Dynamos, and share them with the people you love!

xoxo


Related Posts Plugin for WordPress, Blogger...