Google+
Showing posts with label Stuffed Toys. Show all posts

Wednesday, July 25, 2012

A Giveaway and My New Cards

They're here!  They're here!  They're here!!!!  My new business cards arrived, and I am so excited!

Okay, so you might remember this post where I talked about how unnecessary business cards were for someone like me, and they were, back then.  But times have changed!  Increasingly I am finding opportunities that an actual real business card would be so handy to share my information.  (In particular I am thinking about an especially embarrassing exchange I had with the owner of a shop that I would love to teach classes/workshops for... Oh well.)

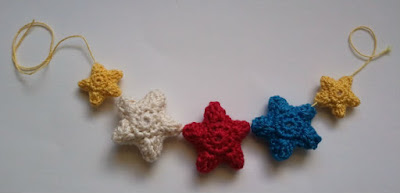
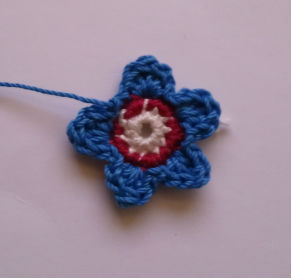
I really wanted a card that would stand out, and would have value of some kind. I wanted a card that you wouldn't want to throw away, or stash in the bottom of a desk drawer (to throw out later).  I wanted a card you'd want to USE... Ideally, I wanted to put a pattern on the card.  I played around with that idea for a while, but it wasn't until I had streamlined my mini wishing star pattern that I knew what I was going to do...  So (drum roll, please) here are my cards.


It has the pattern for the Wishing Stars on it and a QR code!  Rad right?!  I am so excited!

I needed a business card holder.  I wanted something pretty.  It had to be crocheted, because it's so important to me to represent my brand in public!  And even if it was simple, I didn't want it to look too simple.  So I made a holder in shell stitch.  I did it in the round, which created some 'how am I going to write this as a pattern' problems.  So I made a second one.  My questions were still not answered.  So I made one flat, which was easy and beautiful and fit just perfectly!  Awesome!  But now I wanted to make another one in case I needed to show how I stitched it together...  So I made another one.


I got inspired and made a different design, thinking that you might like the option of choosing a different look, if the shells weren't your thing.  So I made one with bars...


Then I got it in my head that I wanted to make a shell-stitch business card holder out of size 3 crochet thread, since the weights of the yarns weren't THAT different.  Ahahahaha!!!  Yeah, I had to re-do the case three times, but I'm putting the pattern on too, since crochet thread is cheap and comes in tons of colors.  I mean, why WOULDN'T you want to have one in every color?!


This has left me with a ridiculous quantity of business card holders that all look the same. I will never use them all.  So I'm going to have a giveaway!

I've got 5 business card holders, which each contain a set of 4 of my new fancy-schmancy business cards, available for the giveaway!  But here's the catch, if you win, you have to promise to give 3 of the cards away to crochet-crafty friends to share the love, Dynamo.  Sound like a deal?  Cool!


You have to be a Dynamo (which means you follow me!) to enter.  Leave a comment on this post telling me how you follow: Google Friend Connect or email** and I will enter you to win one of the business card holders!  There will be five (5!) winners!!!  (Everyone is welcome to enter, I'm happy to ship internationally!)

** You may have noticed I've got a new following option now.  I've gotten some sad lamentations from friends that they wished I would offer a follow-by-email option, since they keep missing posts, so I've now included that in my side bar.  So, if you check in regularly, but haven't wanted to use Google Friend Connect, this is your chance to become a full-fledged Dynamo, with all the rights and privileges!**

The giveaway is going to be open until 11:59 pm Tuesday, July 31st.  If you follow by email AND Google Friend Connect, feel free to enter twice, just let me know you're following both ways.  I will pick winners from a random drawing on August 1st!  Good luck!!

(Whew, this post got LONG!!! I'm putting the patterns up tomorrow!)

xoxo

Update 7/31/12:  Comments are closed now.  Thanks for playing!  I will announce winners on Wednesday, August 2nd.

Tuesday, July 17, 2012

Mini Wishing Stars!

I was making several dozen stars to fill a jar for Mims.  Okay, that's a lie.  I was making several dozen stars for the front of my new business cards, and then I was going to give them to Mims when I was done shooting pictures.  I think that still makes me a good mom...


I thought I was making my regular stars, but they were turning out so small, I went back to the pattern to see what I was doing wrong.  Turns out, I was starting out with too few stitches.  Still, the stars are adorable.  I like them better for this purpose.  So now I've got two different, but very similar, star patterns...


This is the pattern I used for the star on the front of the blue Softsoap dispenser cover and the Star Towel from my SOAP DISPENSER WEEK 2012.  But that was just the instructions for a single star.  This is the instructions for a two-sided puffy star.  The big difference between the patterns, you'll see, is the cleverly parenthesized 'make 2'...


Wishing Stars (aka Mini Stars):
You can use  any size yarn, with an appropriately sized hook, to make these stars.  They also need a small amount fiberfill, if you'd like them to be puffy.
(make 2)
R1: 5 sc in magic loop, sl st to first sc to close round (5 st)
R2: ch 1, (2sc in next st) 5 times, sl st to first sc to close round (10 st)
R3: [(hdc, dc, trc, dc, hdc) in next st, sl st] 5 times
Fasten off.  Leave a long tail for sewing sides together.   Weave in center tail.  Sew sides together.  Add stuffing before sewing last 1/2 inch, if a puffy star is desired.


When I was in a speech class in college, one of my classmates gave a speech on how to make origami wishing stars.  I thought they were absolutely adorable, and I liked the idea behind them, that they bring good luck when they are made and then given away. No, I don't think that they are magic.  I do think that they are really sweet, and that the time and energy that you put into making a jar full of them for a special present would be a beautiful expression of love.  I would give these.  I would also be excited to receive a jar of them.  (and, okay, I'd hope that they'd bring me good luck... Kinda the way I always hope that my fortune cookie fortune will come true...)


I spent a couple of days crocheting and putting these little stars together.   They have completely grown on me, and I've been inspired to do a couple of other projects with them.  So, while it's not a theme week, I hope you'll be as excited as I am to spend a couple of days Crocheting With The Stars!


If you'd like to fill your own jar with wishing stars, it took about 30 stars to fill the jar.  I made mine out of size 3 crochet thread, and used a size D crochet hook.


xoxo

Wednesday, May 30, 2012

Drawing Horses and Stuffing Them...

Mims and Jake were drawing the other day, and Mims drew this cute horse.  I've read online about people turning their kid's drawings into stuffed toys, so I thought it would be a fun challenge to try myself.

I am really happy with it.  I think it turned out close enough to the drawing that it's recognizable.  And Mims adores it, which is really all I cared about.  She named it Elizabeth.

Also, this is what Mims dressed herself in this morning.  Jake had to take a picture.
It was the Halloween costume that I made her last year.  Although, we are such a super-hero-lovin' household, we let her wear it all day.  The fine folks at Target were amused...

xoxo

Monday, May 28, 2012

Star Spangled Everything!

Happy Memorial Day!

It took me a while to figure out a cool star pattern for my Wonder Woman Running Tiara pattern, and it seemed like such a waste to only use it once, so I've been busy crocheting stars like crazy trying to come up with something (else) awesome to do with them.

I know it was only yesterday, but I'm going to repeat the pattern here now, just for the sake of keeping all the starry stuff in one place.  I promise, you will thank me later when you don't have to bounce between posts to make your cute stars...

Star Pattern:
Use size 3 crochet thread and a size D hook thread for a larger star
Use size 10 crochet thread and a size 8 steel hook for a smaller star
(make 2)
R1: 10 sc in magic loop, sl st to first sc to close round (10 st) 
R2: ch 1, (2sc in next st, sc) 5 times, sl st to first sc to close round (15 st)
R3: sl st,[(hdc, dc, trc, dc, hdc) in next st, 2 sl st] 4 times, 
(hdc, dc, trc, dc, hdc) in next st, sl st.
Fasten off. Leave a long tail to sew star together.


I discovered that, while a single flatty piece, they have cute rounded points, but if you sew two of them together the points become sharp and pokey and they look really good.  Just like a star should look!  It made me feel patriotic!  I wanted to star spangle my world!!!

Of course I had to do a red-white-and-blue garland.  I used size 3 crochet thread and a size d hook for the larger stars, and size 10 crochet thread and a size 8 steel hook for the yellow stars.  I stuffed them lightly to give them a little more shape.  I think these would make a super cute decoration for your year-round tree, or if you really went crazy you could decorate for 4th of July with a garland around your patio... You still have enough time if you start right now!

I sewed some stars together, leaving the bottom open, so that I could use them as pencil toppers.  I am thinking about cute stuff for Mims when she starts kindergarten in the fall, and I think these would be a hit.  I have been informed by my mom, who is a public school teacher, that perhaps these would be better 'at home' pencils, since the toppers can be removed and played with.  I will defer to her great wisdom, and plan a birthday party that needs princess and/or fairy wands for Mims next year... Ooh! If you cover the pencils with a fancy scrapbook paper, I think they would look extra cool (and less school-y).  These would also be cool for an end-of-the-year magic test-taking pencil... I hear that they only know how to write correct answers...

I used some size 10 crochet thread (made of bamboo fibers, yo!) and a size 8 steel crochet hook to make the star for this necklace.  I sewed it right onto the ball chain, stuffing it lightly to make it a little puffy and cute.  It doesn't slide easily, so if you try this, make sure you center it!  The bamboo thread is so soft, and the star weighs practically nothing, so I forget that I'm even wearing it.  I adore it.  Mims has requested several, so that she can have them in all her favorite colors.
I attached some bobby pins through the stars to decorate Mims's bun today.  It looked so festive and fun, I'm a little jealous of her long hair...

What I would not recommend is doing more than 2 colors per star.  This tri-colored experiment was a disaster.  I was sure you wouldn't believe that it was possible for me to make anything that was this awful, so I am posting a picture as proof that I screw up all the time... But seriously, if you want to do a two colored star, it think it could look cool, but the way the increases on the 2nd row go, it just doesn't look good with a third color.  Heed my cautionary tale... Don't do it! LOL!!!

The stars themselves are really appealing, just on their own.  When I was a kid I used to make origami wishing stars, and I think that a collection of these little crochet stars would be just as beautiful in a jar to tell someone how much you love them.  I could also see making these as keepsakes for a special occasion, you could even put a loop on them to use as a Christmas ornament.  I might even hang one in the car for Jake, to remind him that Mims and I love him.  Aww, so sappy today.  But, the stars are really cute, and once you start making them, your rational brain will justify making more and more to give away.

Fill your world with stars today, Dynamos, and share them with the people you love!

xoxo


Related Posts Plugin for WordPress, Blogger...