Google+
Showing posts with label Crochet Cotton. Show all posts

Tuesday, July 17, 2012

Mini Wishing Stars!

I was making several dozen stars to fill a jar for Mims.  Okay, that's a lie.  I was making several dozen stars for the front of my new business cards, and then I was going to give them to Mims when I was done shooting pictures.  I think that still makes me a good mom...


I thought I was making my regular stars, but they were turning out so small, I went back to the pattern to see what I was doing wrong.  Turns out, I was starting out with too few stitches.  Still, the stars are adorable.  I like them better for this purpose.  So now I've got two different, but very similar, star patterns...


This is the pattern I used for the star on the front of the blue Softsoap dispenser cover and the Star Towel from my SOAP DISPENSER WEEK 2012.  But that was just the instructions for a single star.  This is the instructions for a two-sided puffy star.  The big difference between the patterns, you'll see, is the cleverly parenthesized 'make 2'...


Wishing Stars (aka Mini Stars):
You can use  any size yarn, with an appropriately sized hook, to make these stars.  They also need a small amount fiberfill, if you'd like them to be puffy.
(make 2)
R1: 5 sc in magic loop, sl st to first sc to close round (5 st)
R2: ch 1, (2sc in next st) 5 times, sl st to first sc to close round (10 st)
R3: [(hdc, dc, trc, dc, hdc) in next st, sl st] 5 times
Fasten off.  Leave a long tail for sewing sides together.   Weave in center tail.  Sew sides together.  Add stuffing before sewing last 1/2 inch, if a puffy star is desired.


When I was in a speech class in college, one of my classmates gave a speech on how to make origami wishing stars.  I thought they were absolutely adorable, and I liked the idea behind them, that they bring good luck when they are made and then given away. No, I don't think that they are magic.  I do think that they are really sweet, and that the time and energy that you put into making a jar full of them for a special present would be a beautiful expression of love.  I would give these.  I would also be excited to receive a jar of them.  (and, okay, I'd hope that they'd bring me good luck... Kinda the way I always hope that my fortune cookie fortune will come true...)


I spent a couple of days crocheting and putting these little stars together.   They have completely grown on me, and I've been inspired to do a couple of other projects with them.  So, while it's not a theme week, I hope you'll be as excited as I am to spend a couple of days Crocheting With The Stars!


If you'd like to fill your own jar with wishing stars, it took about 30 stars to fill the jar.  I made mine out of size 3 crochet thread, and used a size D crochet hook.


xoxo

Thursday, July 12, 2012

Blue Pearls

I can hardly believe that we're already on day FOUR of my Soap-tacular SOAP DISPENSER WEEK!!!


Mimsey is participating in our library's summer reading program.  Jake and I have been putting her in it since the first year she was eligible.  I like it, because it makes us prioritize library trips, and we read waaay more books to Mims (says her mom, hanging her head in shame).


The last time we were at the library, Jake wanted to get some books on shed construction, so we all walked over to the adult section of the library.  Mims and I wandered into the crafty section where I made a shocking discovery.  There were 3 books on crochet in my local library.  3!  Now, perhaps the library had just had a massive run on crochet books and these were the only 3 left, but I doubt it.  There were 3 large stacks (the bookcase kind) of craft books, and at least 4 shelves devoted to knitting books. Yet, there were only 3 crochet books?!  What's up with that?!
** to be fair, our library is part of a very large library system, and they do have a large selection of crochet books, they're just spread out between 40 different library locations, but I can order them to be delivered to my local library for a quarter** <-- That weakened my argument a little.  But I wanted to browse, so I say my argument is still valid...


So, I grabbed a DIY wedding book, since there were bound to be some fun and different ideas in there, and a book on jewelry making, and we went on our merry way.  Much later, when I finally got around to looking through my borrowed books, I found that while there wasn't anything in them that directly appealed to me, I did find myself inspired to create something wholly new based on some of the ideas in the books.


Particularly, I found myself drawn to the idea of handcrafted wedding favors.  There's just something so precious and intimate about creating something that you know your guests will treasure as much as you treasure their participation in your special day.  For days I've been dreaming about what I might create for my guests if I was planning a wedding (which I am not).  What I came up with was an idea for an ornament.  Certainly it could be hung on a tree at Christmastime, but I think it would be pretty hung in the home as well.  I was going to make one to hang from the glass knob of the medicine cabinet in my bathroom, and then I realized that I could use it to decorate the front of one of my hand soap covers!  Two birds, one stone!  


I still am planning on making my wedding favor ornaments, but I'm glad that I got a chance to try one out before I committed to making a dozen of them.  I think the cover turned out really pretty.  If you'd like to make one too, here's the pattern:


Softsoap Hand Soap Cover
Supplies:
100% cotton worsted weight yarn, approx. 40 yards (I used Peaches & Creme in Bright Blue)
Size G hook
Yarn needle

ch 25, sl st to first ch to join round (25 st)
R1: ch 1, sc in each ch around, sl st to first sc to join round (25 st)
R2-7: ch 1, sc in each sc around, sl st to first sc to join round (25 st)
R8: ch 1,(2 sc in next st, 4 sc) 5 times, sl st to first sc to join round (30 st)
R9-14: ch 1, sc in each sc around, sl st to first sc to join round (30 st)
R15: ch 1, (4 sc, sc 2 st tog) 5 times, sl st to first sc to join round (25 st)
R16: ch 1, sc in each sc around, sl st to first sc to join round (25 st)
R17: ch 1, (3 sc, sc 2 st tog) 5 times, sl st to first sc to join round (20 st)
R18: ch 1, (2 sc, sc 2 st tog) 5 times, sl st to first sc to join round (15 st)
R19: ch 1, sc in each sc around, sl st to first sc to join round (15 st)
Fasten off.  Weave in ends.


To add the fancy-schmancy star on the front, I crocheted a mini version of my star pattern out of white worsted weight cotton yarn.  I sewed two layers of tulle and some plastic pearls and glass beads in the center.  Then I used white cotton yarn and stitched it on the front of the cover.  If you turn it wrong side out, I think it will go through the wash with no problems, but I wouldn't recommend putting it in the dryer.


Mini Star Pattern:
You can use any weight yarn, with an appropriately sized hook.  It also looks really cute in size 3 crochet thread... I made my star out of worsted weight yarn and a size G hook.


R1: 5 sc in magic loop, sl st to first sc to close round (5 st) 
R2: ch 1, (2sc in next st) 5 times, sl st to first sc to close round (10 st)
R3: [(hdc, dc, trc, dc, hdc) in next st, sl st] 5 times
Fasten off.  Weave in ends.


Come back tomorrow for some more good clean fun!!!  (Ahahahaha, I know it's dumb, but I crack myself up!)


xoxo


Sorry about the all white text background today on this post.  I can't for the life of me figure out how to make it go back to normal... LOL!!!!

Thursday, July 5, 2012

Sprite Bangles!


I've got a fun project today that uses strips from 2 liter bottles to make super awesome bangle bracelets.  I used the 3/4" strips that were left over from when I made my Recycled Yarn Holders.  You could just cut strips from a 2 liter bottle, if you didn't need another yarn holder (Who am I kidding?!  Everyone needs another yarn holder!).

Sprite Bangles
Supplies needed:
3/4" strips cut from a Sprite (or any other) 2 liter bottle - cut around the bottle, not top to bottom.
Small amount of size 3 crochet thread (I used Aunt Lydia's Fashion Crochet Cotton)
Size D hook
Yarn needle
Scissors

Use your scissors to make sure that your strip of plastic has smooth edges.  You don't have to get crazy and sand them, just make sure that there aren't any jagged edges that might scratch you.  Trim the short ends of the plastic strip so that they're straight, if yours are cut wonky.

Sprite Bangle Cover
(make 2)
ch 7
R1: sc in 2nd ch from hook, sc in each ch sp across (6 st)
R2-60: ch 1, sc in each sc across (6 st)
Fasten off.  Weave in ends.  Being careful not to twist the cover, whipstitch the short ends together to make a ring.

Place one cover around the outside of the plastic strip.  Place the other cover into the center of the strip. There will probably be an inch or so of overlap on the ends of the plastic bottle strip.  This is a really good thing.  It will allow your bracelet to slightly stretch when you put it on and take it off.  Whipstitch the sides of the cover together to fully encase the plastic.

If you'd like to make the Hostess Cupcake Bangle use the color Coffee for the outer cover and use the color Natural for the inner cover.  Whipstitch the covers together using Coffee.  Using Natural, make a chain of 75 stitches.  Using the photo (or a cupcake!) for reference, stitch chain to the top of the bangle in loops.  ** note: The loops will not go all the way around the bangle, it's just a top covering, like on the cupcake.  If you'd like the loops to continue around the bracelet, make your chain longer.**

What I really like about these bracelets is that they're a great project for using up scraps from other yarn projects. Recycling at its best.  And they're PRETTY!!!!  I couldn't help myself, I had to make a bunch.  In the interest of full disclosure, you might not be able to stop either.  It's pretty addictive.  But, they would make great gifts, and your niece and girlfriends are going to want a bunch when they see you wearing them!!!  So maybe it's good that you're going to want to make a ton of them... LOL!!!

xoxo

Friday, June 29, 2012

Summer Stripes...

I was working on this striped bag, thinking that it would be perfect for pretty much everything I want to do this summer.  It's completely made of cotton, and it's not so big that I feel like I'm going to give myself back problems if a quick trip to Target ends up in a crazy adventure at Disneyland, or the beach, or detours into a fishing trip.
It measures 14" across, 8" high, and 5" deep.  The strap drop is 14".

I was almost done with it, and then I sold it.  Crazy!  My sister was watching me finish up the strap and then offered me designer-purse money for it.  She could buy Coach for the price she offered me.  She is a handbag snob.  That was when I knew that I should write it up as a pattern.  The purse is really that cute.

Hmm... Guess I'm going to have to make another one for my summer adventures... LOL!!!!


(Do you need one for your summer adventures?  The pattern is available on Craftsy and Ravelry, for the bargain price of a single buck.  Designer bags have never been more affordable!)

I wanted to throw in a little cute bonus for her, so I made a matching case for her sunglasses and iPhone.
I thought you might enjoy the bonus too! Here's the pattern:

Summer Stripes Cell Phone/Sunglasses Case
Finished measurements: 6.75" x 4.5"

Supplies:

100% Cotton Worsted Weight Yarn, approx. 40 yards (I used Bernat Handicrafter 100% Cotton yarn in Strawberry and Mango) or any other worsted weight yarn
Size G crochet hook
Yarn needle
Sewing needle
Scissors

Main Case:
Stripes are created by changing color every two rows.  This gives a bolder stripe, and it allows you to work continuously without having to cut your yarn when you switch color.  You can just carry the yarn up the side of the work as you go.  You will only have to weave in four ends on the main piece if you use two colors.
Or, alternately, you can make the case from a single color.


ch 16
R1: sc in 2nd ch from hook, sc in each ch sp across, ch 1, turn (15 st)
R2-49: sc in each sc across, ch 1, turn (15 st)
R50: sc in each sc across.
Fasten off, weave in ends.

Front Pocket:
Continue in stripe pattern, beginning with the color that you started the main case with.

ch 16
R1: sc in 2nd ch from hook, sc in each ch sp across, ch 1, turn (15 st)
R2-19: sc in each sc across, ch 1, turn (15 st)
R20: sc in each sc across.
Fasten off, weave in ends.

Sew the stitch loops of  R20 of the Front pocket to R14 of the Main Case piece, matching the stripes.

Single crochet both sides of the case closed, using one stitch per each row, going through all three layers when  necessary.   Fasten off.  Weave in ends.  Enjoy your new double pocketed case!!


You could even use it to hold two pairs of sunglasses!

*ed. side note:  In an effort to show you how useful the Cell Phone/Sunglasses Case is, I have shown it with my sunglasses and phone sticking out of it.  In reality, the sunglasses and phone tuck neatly inside the case, so they won't get scratched and beat up while they're being carried around.  I just wanted to clarify, in case anyone was wondering why you would only want to protect ONE of the lenses of your pricey sunglasses... ;D


xoxo

Friday, June 22, 2012

Life at the Old Farmhouse

I live in an old farmhouse.  My grandparents moved it onto this property in the 1950's.  It was built in the 1920's though, and moved here when they realized that their smaller house was not going to have enough room for their growing family.  It was quite a hassle, apparently, since the city that the house originally was from only allowed houses to be moved during the night, and the city that the house was moved to only allowed houses to be moved during the day.  So they split the house in half, put it on wheels, and towed it to the city limit, on a bridge over the riverbed, where they waited for daybreak.  Then they got it moving again and towed it to it's new home.

I love the house, but it's nearly 100 years old, which means it's drafty and quirky.  My grandparents remodeled the kitchen by removing walls between several rooms to make one big room.  Which is really great, but they didn't add any extra counter space, so there's not enough room for two people to prep food for parties, despite the fact that twenty people could sit around in the kitchen and watch.  And there are three interior doors that lead to the kitchen, and a back door, which means that there's a door on every wall.  Did I mention that it's drafty?  It's really drafty, and the air pressure makes the doors slam shut when winds blow.

We put a spongy foam door stopper on the swinging door, in an effort to protect Mims when she was a toddler.  My sister and I consider getting our fingers smashed in that door a rite of passage, but Jake and I felt like we'd be happier if Mims waited until she was older to have that experience.  The foamy stopper has worked like a charm, so we've just left it on, even though she's probably old enough/responsible enough to handle the door now.

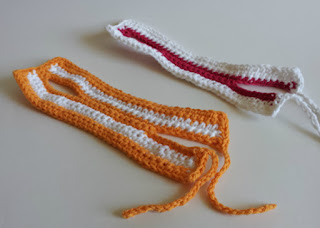
But the other doors are being constantly banged around, even when the wind isn't blowing.  Mims slams them, Mema slams them when she pushes them out of the way to get into the cupboards (quirky detail!), and   the back door is on a spring, so it slams anytime we come in or go out.  I wanted something that would stop all the banging.  Maybe not keep the door from shutting entirely, the way the foam stopper does, so I needed another idea.  Maybe just a bumper, something that could be removed easily, something that would look cute...


Kitchen Door Bumper - version 1
Supplies:
Small amount of worsted weight yarn (I used Bernat Handicrafter 100% cotton, and the pink smelled like fruit punch, very summery!)
Size G crochet hook
Yarn needle

Chain 35
R1: sc in 2nd ch from hook, sc in each ch sp across, ch 1, turn (34 st)
R2-4: sc in each sc across, ch 1, turn (34 st)
R5: 2 sc, ch 9, skip 9 sc, 14 sc, ch 10, turn (35 st)
R6: sc in 2nd ch from hook, sc in each ch sp, 14 sc, sc in each ch sp, 2 sc (34 st)
R7-9: sc in each sc across, ch 1, turn (34 st)
R10: 33 sc, 3 sc in next st, turn and 8 sc evenly across short side, 3 sc in corner, turn and 32 sc across long side, 3 sc in the corner, 4 sc across very short end, chain 20.  Fasten off.
R12: (continued) With a new piece of yarn, chain 20, 4 sc across remaining very short end, fasten off.
Weave in ends.

(The white stripes were done on rows 2-3 and on 7-8)

I looped the closed side of the kitchen bumper around the door knob and then tied the open side around the door knob on the other side of the door.  It fit! It would keep Mims from slamming the door as she runs through the house!  I took pictures.  I showed it to Jake.  My parents came by.  I showed them too.  But, I wasn't sure it was spunky and cute enough.  

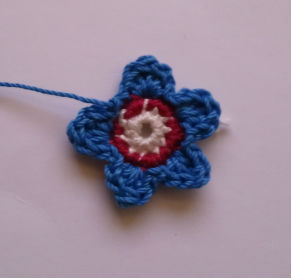
I've been admiring the colorful projects over at Attic 24, so I decided that the bumper needed some flowers.  I grabbed a hook and some size 3 crochet cotton and whipped some out.

Ah! Fun!  I love it now!

So, I think that I learned a bunch on this project.  The next time I make one of these, I think I'm going to swap out rows 5-6 with this:

R5: 2 sc, ch 9, skip 9 sc, 12 sc, ch 9, skip 9 sc, 2 sc, ch 1, turn (34 st)
R6: 2 sc, 9 sc across the chain, 12 sc, 9 sc across the chain, 2 sc, ch 1, turn (34 st)

I discovered that it isn't stretched too tightly when it's on the door, and I won't have to untie it to remove it, so I don't see any reason to go to the extra effort to do the ties.  

If you're thinking you'd like to make some too (whether your house is quirky and drafty and old, or not!) I would highly recommend that you measure the space between your door knobs, and adjust the pattern accordingly, so that you get a perfect fit.  

xoxo

Saturday, June 16, 2012

It was all fun and games, until a bird pooped on it...

Good Morning Dynamos!  Happy Saturday!

As you know, I am just smitten with tiny crochet lately.  I love the tiny hooks, I love the tiny thread.  I love the tiny projects.  When I die, I want my tombstone to read "Here lies Jaime Maraia.  Champion of Size 3 Crochet Thread Endeavors". That is how much I am into it right now.

I am having difficulty finding just the right colors in my tiny thread.  I wanted to do some tiny dolls, but I haven't been able to find a peachy skin color that made me happy.  Plus, even if I could find one shade of peach, beautiful little girls come in loads of colors that wouldn't be represented by that single color... if it existed... which I doubt... because I can't find it...

So, inspired by the awesome podcast and blog of Stacey Trock over at FreshStitches.com, I thought I might be able to use Kool Aid to over-dye some natural colored size 3 crochet cotton and make my own peachy range of colors.  (By the way, if you haven't heard Stacey's podcast, Crochet Chat, you should download it immediately!  I'm serious! Go do it now, we'll still be here when you get back...)

These yarns don't look very diverse in this picture. In person, they are multi-hued and gorgeous, instead of, as Mims refered to them "Meat Colored".  
I mixed up my own custom blend of Kool Aid, vinegar and water and gave it a go.  I was surprised that the cotton dyed so easily and quickly.  The lighter colors were made by dying and then washing the yarn with dishsoap under running water.  The darker colors were just rinsed.  Also, since I was just experimenting, I tea dyed some of it, and then tea dyed over the top of the Kool Aid over-dye.  Whew.  Luckily, I had bundled little mini-skeins of 23-25 yards before I started, so I wasn't too worried about snarls and knots.

From Top: Kool Aid dyed (washed), Kool Aid dyed (rinsed), Tea dyed, Kool Aid dyed (washed) + Tea dyed, Kool Aid dyed (rinsed) + Tea dyed
Then I had to figure out what I was going to do with my freshly dyed yarn.  I opted to wind it around the back of one of our patio chairs, since I thought it would have excellent air-flow and would dry quicker.  I was right.  I neglected to remember that these chairs seem to have been claimed by our neighborhood birds, and that they frequently visit the chairs to rest and poop.  Ugh.  The good news is, only ONE of the yarns got pooped on.  The bad news is, ONE of my beautiful new peachy yarns got pooped on!!  I wound the rest of them up into little pull-skeins, and then took my bird-poop yarn inside to scrub.  I used scalding hot water and a ton of dishsoap and the poop came out.  Some of the color lifted as well, but I had expected that.  It still is a lovely shade of peach, just not the darker, more interesting shade I had hoped for.  I wound it around an empty paper towel tube to dry overnight in the kitchen, safely away from nature.  I brought the rest of my yarn upstairs to admire...

I couldn't help it.  I had to see how it would work, if it would look right, how it would feel! I got out my size C hook and grabbed my new yarn and began crocheting!  My yarn is a little less soft then it was before I dyed it, but I think that's because I roughed up the surface a little when I scrubbed it in dishsoap.  Also, it's a little stiff, which I think might be because of the soap.  It is just the shade I had hoped for.  Twenty yards was just about right for my project, so I'm looking forward to making more dollies to go with the one I made last night.


Overall, this was an incredible success.  There was some question, out in the internet, as to whether cotton could be dyed with Kool Aid.  I am thrilled that my experience was that cotton can be dyed very nicely with Kool Aid.  I am looking forward to see what else I can do with it in future dying adventures!  

Have a great weekend, Dynamos!
xoxo

Thursday, June 14, 2012

Designing a pillow...

Good Morning, Dynamos!

I've got a project to share today, but it's not exactly a pattern.  It's an idea for a pattern.  I shot pictures as I went along, thinking that I was going to write it up, but now that it's complete, I'm a little iffy on it.  So I thought, instead, I'd show you a little about my design process.

I saw a cute idea on Pinterest for a pillow that wrapped around a car seat belt, for kids on long car trips.  I thought, "Cute idea!  I should make one of those for Mims."  Alas, the link was for a company that was selling the actual finished pillows.  They were a little pricey for a whim, so I then thought, "Still, it's a cute idea.  I can figure out how to make one for Mims."

Meanwhile, I had just made an Ikea run and had brought home several "naked" pillow forms to crochet covers for.  My favorite were the ninety-nine cent stomach-sleeper pillows.  I had made some throw pillows last year out of them, so I knew I could sew and cut them to whatever size I wanted. Besides, if I screwed it up, I was only out a buck!

I thought I wanted my car pillow to be made up of two 4" pillow sides, so I measured out 8" columns which I sharpied onto my pillow.  I sewed along the marker lines, and then cut my pillows apart.  I was able to get three 8"x19" pillows out of one stomach-sleeper pillow.  Score! Then I sewed a seam down the center of the pillow, to crease it so that it would fold around the seat belt.

Then I used a piece of scrap fabric (9"x40") to make a pillowcase for my new pillow.  I sewed the fabric, right sides together, along both of the long cut ends. Then I turned it right side out and poked the corner out so that they were sharp.  I would have ironed the pillowcase, but I knew that it was going to be encased in crochet, and the day was too hot to bother.  Besides, I was making it for Mims, not a private client. So I slid my pillow into the case, tucked the open end inside around the pillow and sewed the case closed.

Next I got to crochet my cover.  It took an entire skein of Lion Brand Cotton 100% Cotton worsted weight yarn.  I used a size G hook. I made my piece 70 stitches long, and just went back and forth using hdc stitches until the skein was gone.  I was left with about 18" of yarn for a tail.

I sewed my covered custom-sized pillow onto my crocheted piece, leaving about an inch of crochet as an edge I could use later for installing the pillow into my car.  I wasn't sure at that point how I was going to do it, and I wanted plenty of room in case I decided velcro was the best way to go.  I also discovered at that point that 70 stitches was about 5 stitches too long for my pillow form.  So I folded the bottom edge over the pillow and stitched it down.  I then stitched the pillow down on the other side, catching the folded edge in that seam too.   That left me with a poufy pillow part and a long flat blanket-y piece to wrap around the seat belt.

I thought about buttons and velcro to close my car pillow, but ultimately, I was worried about choking (buttons) and about scratching little faces (velcro).  I needed to come up with something else.  Something soft, something easy, something removable since I wasn't sure how many people would be into sewing the pillow into their car permanently. I finally decided that weaving a doubled-over length of ribbon through both sides would be easy enough to remove if it got gross, but not easy for a little guy (or gal) to pull off in the middle of a car trip.  I tied a bow at the top because it looked cute that way.  For a little boy, I might tie a small knot at the base of the pillow instead.  I suppose it would depend on the kid...


Mims likes her new cover a lot.  She has always hated seat belts, ever since the one horrible incident where I pulled her belt out too quickly and she got a rope burn from it.  Would that be a belt burn?  Anyway, I still feel awful about it, and this in no way makes up for my accident, but it does make it so that she will allow the belt to be next to her neck, which is much safer than her holding it away from her body.

The pillow didn't fold around the belt like I had hoped.  I would make it even narrower next time, I think.  Maybe 6".  And I would save myself the crochet and only use 65 stitches for the length of the cover.  I love the ribbon closure.


Do you have an opinion?  Should I have waited until this idea was perfected before I shared it?  Or does this spark your own ideas on how to improve upon my design?  I would love to hear what you think.

xoxo

Tuesday, June 12, 2012

More Stars!

Another commission, for the end of the school year.

Mims really, really wanted to keep this one! 

The free pattern is here!

xoxo

Saturday, June 9, 2012

For The Sake Of The Blog, I Baked Brownies

I spent a year and a half going to cooking school to become a pastry chef.  I adored every minute of it.  I can talk gluten windows, and hydroscopic properties of sweeteners, and mallard browning effect for HOURS.  Literally.  I love, love, love that it takes science and art and math to create deliciousness.

My best friend at cooking school, Amy, gave me the raddest (yes, that's a word I actually use) potholders for Christmas one year.  She had found a company that made these huge potholders that were amazing.  I wore those things OUT!!!  Because, although it's a rite of passage to get burned so badly it scars, it's not fun to actually do it.  Amy and I were lucky, we never made it into the "stitched my finger back on" crew (shout out to Christian!!).

So, when I say I make the best brownies in the world, you have to know that it's no joke.  They are the best brownies in the world.  You also have to know that I am desperate to share my recipes with the world, but I had to figure out a way to combine my passion for cooking with my passion for crochet.  Otherwise, I should have named this, Jaime Bakes (and crafts a little).

But, no, dear Dynamos, a day without crochet is like a day without sunshine! I couldn't betray my blog with a post that had nothing to do with crochet.  So, I set out to make my own version of those awesome huge potholders.  That way, I would have to bake my brownies to show off how well they worked! Win, win!!


Here is where I ran into a bit of a problem, though.  See, Jake has homemade potholder rules.  To be fair, they have come from actual experiences that have led to him getting burned/maimed/dropping hot pans of food on the floor.  Homemade potholders don't bother me, but Jake doesn't have what he lovingly refers to as "my asbestos fingers." I had to make sure that any potholders I made would pass the Jake test...

Jake's Homemade Potholder Rules:
1. No holes. No spaces that a finger can poke through, get caught, and then get burned.
2. Use appropriate fire resistant materials. Nothing that could melt as he's pulling a pan out of the oven.
3. It must use as many layers as needed to keep the heat away from his hand. Two pieces of quilting fabric, with a thin layer of batting between them, has fooled him often enough that he now makes me use potholders on their inaugural run.
4. It must be large enough to actually fit his hand. This one is a little ridiculous to me, since he's got the hands of a giant (he's 6'5"), but I go with it.

I was pretty sure that I could create a potholder that would meet Jake's specifications, yet satisfy my own design requirements.  Oversized, cotton, heavy duty, cooking-school-worthy!  This one will keep you out of the "burn scar club," but I will give you points towards your Crochet Cooking Badge!!


The Cooking School Potholder

Supplies:
1 skein Lion Brand Cotton (or other 100% cotton worsted weight yarn)
Size G crochet hook
Yarn Needle
100% cotton batting - 9"x11"

Potholder Sides:
(make 2)
ch 41
R1: sc in 2nd ch from hook, sc in each ch space across, ch 1, turn (40 st)
R2-31: sc in each st across, ch 1, turn (40 st)
R32: sc in each st across (40 st) 
Fasten off. Weave in ends. Or don't weave in ends and just crochet over them in the final step. 

Potholder Tab:
(just make 1)
ch 10
R1: sc in 2nd ch from hook, sc in each ch space across
Fasten off. Don't bother weaving in ends. Lazy crochet at its finest!

Match potholder sides so that the stitches line up with each other. Attach yarn into one of the corners that will make it so you can crochet along one of the long sides first. 40 sc along the first side, add 2 more sc into the corner (3 all together), 30 sc evenly spaced along the short side, slip the tab piece into corner and sl st it into place (tucking in any loose ends as you go), 38 sc along the other long side (matching stitches together), now pause:

Slide the piece of cotton quilter's batting inside the potholder. Cut it down if it's too big or it doesn't fit right.  Flatten it out and make sure that it's not lumpy.

Now: put 2 more sc in the corner, 30 sc across bottom of potholder to close it, 2 sc in the final/beginning corner. Fasten off. Weave in ends. Hang your potholder up to admire it!  Doesn't it look good?!  Heck yeah it does!  You should pre-heat the oven to 325 degrees to test that baby out!  Seriously, pre-heat the oven.  My world famous brownie recipe is coming...


The World's Best Brownies
(disclaimer: These are the world's best brownies.  You will want to eat the whole pan. Have a plan in place for what you're going to tell your family when that happens.  Good lies include: Dropped the pan on the floor, gave them to the homeless, although perhaps the it's-none-of-your-business-where-the-brownies-are approach is better.  Keep it simple.)
(Also, using box mixes is not a cooking school technique.  It's a super busy mom technique.  I apologize to any cooking purists who are disappointed in this recipe, and I will refer them to the Cooks Illustrated website to find a homemade brownie recipe more to their sensibilities. The rest of us will be enjoying our brownies in peace now.)

Get a box of Ghiradelli's Chocolate Supreme brownie mix (you'll know it's the right one because it's got the packet of chocolate syrup inside)
Now, look at the back of the box.  Where it says 1/4 c Water, actually get out 1/4 c Whole Milk.  Where it says 1/3 c Oil, actually get out 1/3 c Melted Butter.  Okay, get out a stick of butter, cut it to the 1/3 c measurement, unwrap it and put it into a microwave safe bowl. Then melt it in the microwave.  It's okay.  We'll wait... In fact, get out a bowl and a whisk and an egg while you're waiting around.  Look in the cupboard for the vanilla you use for your Christmas cookies.  Get that out too.

Now that you've got all your stuff ready (nice mise en place, btw!), crack the egg into your mixing bowl.  Whisk it around until it's nice and scrambled. Add the milk and whisk it in too.  Add about 1 Tbsp Vanilla to the egg/milk mixture.  While you're at it, whisk the contents of that chocolate sauce packet into your mixture as well.  It will NOT be chocolate milk smooth.  That's okay.  

Now add about 1/4 of the dry brownie mix to the wet mixture.  Whisk it a little.  This is mostly to keep your hot melted butter from scrambling the egg when you add it next.  Go ahead, add the melted butter now.  Whisk it around.  Now add the rest of the dry brownie mix.  Do Not Whisk It!  Grab a fork and slowly mix it into the wet ingredients.  Don't stir it any more than you absolutely have to.  There may still be some dry lumps when you are done.  That's good.  It means you did it right.  Now set your bowl aside for a moment.

Line a baking pan (I use a 9x9) with parchment paper.  Use plenty of it so that it comes up over the sides, so you don't have to scrub dry, crusty brownie off your pan later. Pour your brownie mix into the pan and smooth it out with a spatula. Pop it into the oven and set your timer.

A note about brownie baking times:
My dear sister-in-law is an excellent brownie baker.  She uses a formula that has worked for her for years, which is, prepare the brownies the way they say on the box, but under-cook them by about 5 minutes.  This creates moist, fudgy brownies that are very delicious.  But we're not going for merely very delicious brownies here!  We're going for WORLD WIDE FAME!!!!! Yes, I yelled it, and it echoed dramatically.  So here's the deal, with the extra substitutions that we've made to modify our brownie mix, you can't under-cook them and have them turn out like brownies.  I've tried.  They turn out like hot, fudgy goo.  Delicious, but goo.  They will set up in the fridge, but they will taste more like fudge than like a brownie.  So, bake the brownie the full time recommended on the back of the box for your pan size.  I bake mine for 40 minutes.

When they come out of the oven you need to let them sit and rest for at least 15 minutes.  This will let them cool a little and allow the structure of the brownie to set up.  Trust me, it's worth the wait. Then you can slice them up and serve them!  Your mouth can send me a thank you note after it's done chewing... LOL!!!!

xoxo

Tuesday, June 5, 2012

Lip Balm Keychain!


I used to work for a soap store.  They sold all sorts of bath products, lotions, and fresh facial masks.  The perfume scents were overwhelming, especially in the back, where I counted out registers and wrote up reports.  I know, it sounds like I didn't enjoy it, but I did.  I love working retail.  I love helping customers.  It was delightful.

Our shop was in a high-profile area, and all of the products had to be reviewed and approved by the management company that ran the shopping, uh, district.  I'm purposefully trying to be vague, by the way.  For the purposes of this story, you just need to know that everything that we sold had to be labeled with our company's brand.  Which meant that we re-wrapped several products from very well known companies.

My favorite was "our" lip balm. Actually, it was a lot of people's favorite product in our store.  It was super expensive, but it always sold out so quickly we couldn't keep it in stock.  Jake and I became obsessed.  But we knew that when the little soap shop was out of stock, we could just go to Target and pick up a two-pack of Burt's Bees lip balm for the same price.  And, truthfully, "our" lip balm was just a re-wrap of the Burt's Bees product anyway.

Anyhoo, we're still obsessed with that lip balm (it's the only one that Jake will use), although I've come back around to the Bonne Bell Lip Smackers, since the fun flavors are Mims Motivators (meaning: she will listen to me and do what I ask when I barter with letting her wear lip balm...).  We don't go through enough of it to get those big honkin' tubes of it (but maybe as a Christmas present... Hmm..) but it's nice to have it handy, especially now since the weather is getting warm and we're spending more time outside.

So, I made a key ring lip balm holder.  I've seen other patterns around, but I wanted something that didn't need a button closure.  I really wanted to put a zipper in it, and I even cut one down to sew into the project, but it just didn't need it.  Simple, in this case, really was best.  And this case is simple, but it is made of win!  I am smitten!  I am enchanted!  I am really, really, really happy with how this turned out!


I made this project two different ways: 'Fancy-Schmancy' and 'Quick and Easy'. I'm going to post the Quick and Easy version here, and offer the 'Fancy-Schmancy' version as a free download on Craftsy.

So, what are you waiting for? Go get your stuff and let's make some keychains!!


The Lip Balm Keychain - Quick and Easy

Supplies:
Size 3 crochet cotton (I used red, white and blue, but you can use any color that makes your heart sing!)
Size D crochet hook
Yarn needle
Key ring

The Holder:
ch 13
R1:  sc in 2nd ch from hook, sc in each ch sp across, ch 1, turn (12 st)
R2-24: sc in each sc across, ch 1, turn (12 st)
R25: sc in each sc across (12 st)
Fasten off.  Weave in ends.
Re-attach yarn at corner and make 2 rows of sc along each long side (25 st)

The Tab:
ch 13
R1: sc in 2nd ch from hook, sc in each ch sp across, ch 1, turn (12 st)
R2-4: sc in each sc across, ch 1, turn (12 st)
R5: sc in each sc across  (12 st)
Fasten off.  Weave in ends.


Assembling the Keychain:

Slide the key ring onto the tab piece.  Whipstitch the bottom edges of the tab together. 

Whipstitch the lower 2" of the holder together, matching stitches along the front to keep the seam even.  Center the stitching, and whipstitch the bottom of the holder closed.


Center the tab piece slightly inside the holder at the top.  Make sure that your whipstitched edge is inside the top edge of the holder piece, so that it will get firmly sewn into place, and it will cover your stitches.  Stitch across the top of the holder, using a running stitch.  Whipstitch the top 1/2" of the holder closed.

Weave in any loose ends that you might have.  Twirl it around on your finger.  Put a tube of lip balm inside it. Take it out. Put it back in again. Nifty!  See, wasn't that fast?  And easy?  Make 5 more, so that you can give them to your girlfriends before you guys set out on your summer-fling-road-trip! Fill them with Lip Smackers and reminisce about your first boyfriend!  Okay, now, seriously, stop fooling around and go put it on your keyring.  Now, young lady, before you lose it, or your daughter absconds with it, and you never see it again.


And send me a post-card from your road-trip travels!

xoxo


Friday, June 1, 2012

Ruffled Socks for Mims

I have a love/hate relationship with socks.  I love their cushion-y softness, and their ability to keep my sneakers from getting too stinky.  I hate that they make my feet slippery when I'm not wearing shoes, and that society frowns upon those of us who enjoy free-range sock wearing, you know, without the constraints of actually matching them... So, mostly I wear flip flops. I have an impressive strap tan-line

Mims has inherited my dislike of foot coverings, and so she only wears shoes and socks for the absolute minimum of time required.  She removes her shoes and socks in the car trip to the supermarket, just to have to put them back on when we arrive (total time in car: 3 minutes).  She wears Uggs a lot.  It's just easier.

But this Crocheting Dynamo is refusing to be deterred by the fact that Mims loses more socks than she even owns (you have to know that occasionally her dad will put my socks on her accidentally). I wanted to make fancy ruffle socks for my girly-girl!  When you expect them to be single use socks, it's less heartbreaking when you never see them again...

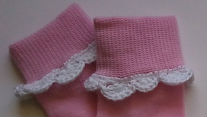
I bought a giant bag of socks from Target and grabbed my sharp crochet hook and some crochet thread in various weights.  To my surprise, the knit fabric of the sock was really easy to snag with the sharp hook, but a plain size D hook worked like a charm.  I pulled the knit apart slightly, and was able to make smooth even stitches without any extra effort.  I used about 60 stitches to go around the sock when I was working with the size 3 crochet thread.  The size 10 crochet thread needed about 90 stitches to go all the way around.  (The single crochet band of pink was size 10 crochet thread, the white and turquoise were size 3 crochet thread)

If you'd like to make a pair of ruffled socks for your girly-girl, I used a really simple shell pattern that I think looks great, but isn't so much work that I will be heartbroken when I can only find one of them in the dryer.

xoxo

Ruffle Sock Edging:
Use a size D crochet hook with size 3 crochet thread
Use a size 8 steel crochet hook with size 10 crochet thread

R1: sc around edge of sock, aiming for a multiple of 14 stitches.  You can fudge this a little, so don't worry about it too much. Just get close. Sl st the round closed.
R2: ch 1, sc in same space, *skip 3 stitches, 7 trc, skip 3 stitches, sc, skip 2 st, 5 dc, skip 2 st, sc* around to create the shell border.  Sl st the round closed.  Fasten off. Weave in ends.

Wednesday, May 30, 2012

Drawing Horses and Stuffing Them...

Mims and Jake were drawing the other day, and Mims drew this cute horse.  I've read online about people turning their kid's drawings into stuffed toys, so I thought it would be a fun challenge to try myself.

I am really happy with it.  I think it turned out close enough to the drawing that it's recognizable.  And Mims adores it, which is really all I cared about.  She named it Elizabeth.

Also, this is what Mims dressed herself in this morning.  Jake had to take a picture.
It was the Halloween costume that I made her last year.  Although, we are such a super-hero-lovin' household, we let her wear it all day.  The fine folks at Target were amused...

xoxo

Monday, May 28, 2012

Star Spangled Everything!

Happy Memorial Day!

It took me a while to figure out a cool star pattern for my Wonder Woman Running Tiara pattern, and it seemed like such a waste to only use it once, so I've been busy crocheting stars like crazy trying to come up with something (else) awesome to do with them.

I know it was only yesterday, but I'm going to repeat the pattern here now, just for the sake of keeping all the starry stuff in one place.  I promise, you will thank me later when you don't have to bounce between posts to make your cute stars...

Star Pattern:
Use size 3 crochet thread and a size D hook thread for a larger star
Use size 10 crochet thread and a size 8 steel hook for a smaller star
(make 2)
R1: 10 sc in magic loop, sl st to first sc to close round (10 st) 
R2: ch 1, (2sc in next st, sc) 5 times, sl st to first sc to close round (15 st)
R3: sl st,[(hdc, dc, trc, dc, hdc) in next st, 2 sl st] 4 times, 
(hdc, dc, trc, dc, hdc) in next st, sl st.
Fasten off. Leave a long tail to sew star together.


I discovered that, while a single flatty piece, they have cute rounded points, but if you sew two of them together the points become sharp and pokey and they look really good.  Just like a star should look!  It made me feel patriotic!  I wanted to star spangle my world!!!

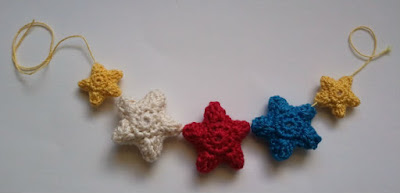
Of course I had to do a red-white-and-blue garland.  I used size 3 crochet thread and a size d hook for the larger stars, and size 10 crochet thread and a size 8 steel hook for the yellow stars.  I stuffed them lightly to give them a little more shape.  I think these would make a super cute decoration for your year-round tree, or if you really went crazy you could decorate for 4th of July with a garland around your patio... You still have enough time if you start right now!

I sewed some stars together, leaving the bottom open, so that I could use them as pencil toppers.  I am thinking about cute stuff for Mims when she starts kindergarten in the fall, and I think these would be a hit.  I have been informed by my mom, who is a public school teacher, that perhaps these would be better 'at home' pencils, since the toppers can be removed and played with.  I will defer to her great wisdom, and plan a birthday party that needs princess and/or fairy wands for Mims next year... Ooh! If you cover the pencils with a fancy scrapbook paper, I think they would look extra cool (and less school-y).  These would also be cool for an end-of-the-year magic test-taking pencil... I hear that they only know how to write correct answers...

I used some size 10 crochet thread (made of bamboo fibers, yo!) and a size 8 steel crochet hook to make the star for this necklace.  I sewed it right onto the ball chain, stuffing it lightly to make it a little puffy and cute.  It doesn't slide easily, so if you try this, make sure you center it!  The bamboo thread is so soft, and the star weighs practically nothing, so I forget that I'm even wearing it.  I adore it.  Mims has requested several, so that she can have them in all her favorite colors.
I attached some bobby pins through the stars to decorate Mims's bun today.  It looked so festive and fun, I'm a little jealous of her long hair...

What I would not recommend is doing more than 2 colors per star.  This tri-colored experiment was a disaster.  I was sure you wouldn't believe that it was possible for me to make anything that was this awful, so I am posting a picture as proof that I screw up all the time... But seriously, if you want to do a two colored star, it think it could look cool, but the way the increases on the 2nd row go, it just doesn't look good with a third color.  Heed my cautionary tale... Don't do it! LOL!!!

The stars themselves are really appealing, just on their own.  When I was a kid I used to make origami wishing stars, and I think that a collection of these little crochet stars would be just as beautiful in a jar to tell someone how much you love them.  I could also see making these as keepsakes for a special occasion, you could even put a loop on them to use as a Christmas ornament.  I might even hang one in the car for Jake, to remind him that Mims and I love him.  Aww, so sappy today.  But, the stars are really cute, and once you start making them, your rational brain will justify making more and more to give away.

Fill your world with stars today, Dynamos, and share them with the people you love!

xoxo


Sunday, May 27, 2012

All Runner Girls need Wonder Woman Tiaras...


I am a runner.  I am a slow, chunky runner, but a runner none the less.  I know this because last year Jake and I did a 5k turkey trot.  And even though I got passed by some very fit octogenarians and a lot of people pushing strollers, I finished.  Therefore, I am a runner. I have a picture to prove it.  I wish it showed my race number...

While I was training for this event I got very into the runner headband scene.  There are several companies that make specialized running headbands that supposedly don't slip and help keep the sweat out of your eyes.  My experience is that all headbands slip, unless they are so tight around your noggin that it gives you a headache.  But a headband that helps keep sweat and sunblock out of your eyes is worth it's weight in gold.

So, it's about time to start training for this year's turkey trot.  I need some new headbands because of my awkward length hair, and also to keep general yucky-ness out of my eyes.  I wanted something cotton and washable, but something that would be fun.

I love Wonder Woman.  Jake reads the comic books, apparently Brian Azzarello is doing a good job on this current run, but my heart belongs to the Linda Carter version from tv.  I watched re-runs of The New Adventures of Wonder Woman after school.  I adored her.

Aha!  I needed a Wonder Woman tiara headband.

I can't guarantee that this headband will give you super powers, but I can guarantee that you will feel like you're running faster.  I think if I had had this tiara last November I would have shaved at least 3 minutes off my (agonizingly slow) time, even if its only because my hair wouldn't have been in my eyes...

Wonder Woman Running Tiara

Size 10 crochet thread in yellow and red
Size 3 crochet thread in black (you only need a little, embroidery floss would work well too)
Size 8 steel crochet hook
Yarn needle
1/8" elastic
Sewing thread to match yellow

Tiara:
With yellow crochet thread ch 166.
R1: hdc in 2nd chain from hook, hdc in each ch space across, ch 1, turn (165 st)
R2: hdc across all stitches, ch 1, turn (165 st)
R3: 50 sc, 32 hdc, 3 hdc in next st, 32 hdc, 50 sc, ch 1, turn (167 st)
R4: 53 sc, 30 hdc, 3 hdc in next st,  30 hdc, 53 sc, ch 1, turn (169 st)
R5: 59 sc, 25 hdc, 3 hdc in next st, 25 hdc, 59 sc, ch 1, turn (171 st)
R6: 62 sc, 23 hdc, 3 hdc, 23 hdc, 62 sc, ch 1, turn (173 st)
R7:86 hdc, 3 hdc, 86 hdc, ch 1, turn (175 st)
R8: 87 hdc, 3 hdc, 87 hdc, ch 1, turn (177 st)
R9: 88 hdc, 5 hdc, 88 hdc (181 st)
Fasten off.  Weave in ends.
 
Star:
Use red crochet thread.
R1: 10 sc in magic loop, sl st to first sc to close round (10 st)
 
R2: ch 1, (2sc in next st, sc) 5 times, sl st to first sc to close round (15 st)
R3: sl st,[(hdc, dc, trc, dc, hdc) in next st, 2 sl st] 4 times, 
(hdc, dc, trc, dc, hdc) in next st, sl st.
Fasten off. Leave a long tail and sew star to the front of the headband.
Use the black crochet cotton, or embroidery floss to outline the star. 
 I used 1/8" elastic to close the back of my tiara.  You could use thicker elastic if you had some on hand.  I pinned one side in place, and then tried it on, holding the elastic tight to get a good fit.  Mine ended up needing about 2" of elastic, but I have kind of a big head.  Try it on and adjust it before you sew it in place.
I sewed mine with the sewing machine, because it was out and I was doing some other sewing for my grandma. You could totally hand stitch the elastic in if you didn't want to bother with a machine.

Jake and Mims want me to point out that this headband is the Sleeping Beauty Tiara if you leave the star off.   

xoxo

Related Posts Plugin for WordPress, Blogger...