Google+
Showing posts with label Project. Show all posts

Tuesday, July 3, 2012

Recycled Yarn Holder

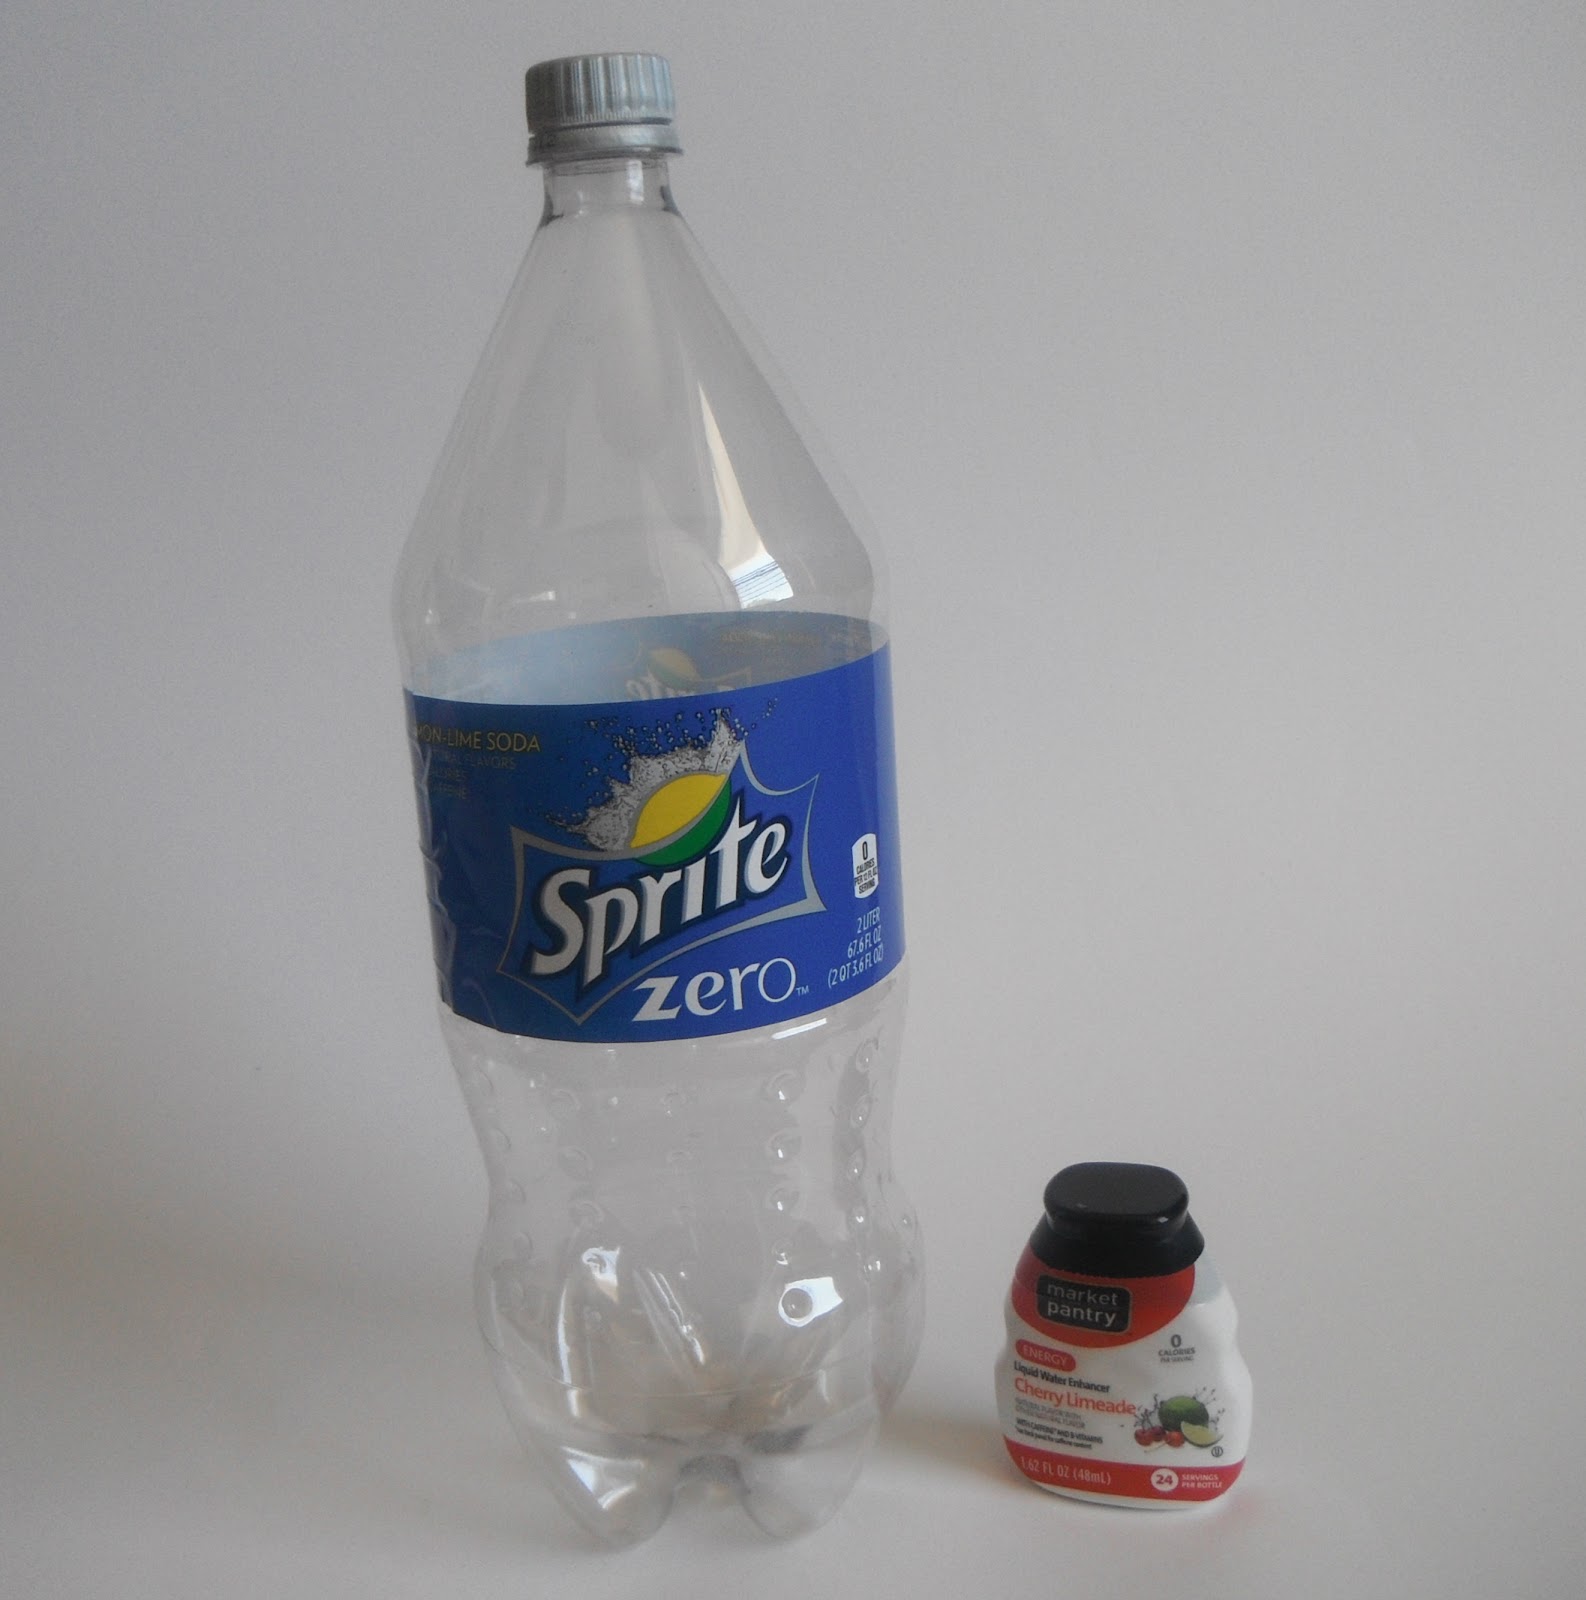
Recently, Jake and I discovered two of the greatest things known to man.  Sprite Zero and the Market Pantry Cherry Limeade water enhancer (Target brand, in the Kool Aid section).  Do you know what combining those two things makes?  A really, really good Sonic Cherry Limeade clone!  And it's sugar-free, but it doesn't taste sugar-free!

Please don't notice that the Sprite bottle is empty... LOL!!!
Here's the 'recipe':
Fill a quart sized mason jar (or any other big ol' summertime cup) with ice.  Pour in Sprite Zero to cover ice. Add two squirts of the Cherry Limeade flavoring.  If you happen to have a wedge of lime, give it a squeeze and then toss it in too, because it's extra awesome with a wedge of lime... Stir with a straw, and then take it outside to enjoy while you watch the kids play in the sprinklers.


This has left us with an abundance of 2-liter bottles that we have to recycle.  There's a little recycling center about five hundred feet from our house (don't ask, it's weird) which we regularly take our cans and bottles to, but there's something that I really like about the Sprite Zero bottles.  They're really clear, and they've got cool texture, and grippy parts.  I can't explain it.  I just dig the design.  So, I thought I could make something crafty and yarn friendly with these cool bottles, and recycle them in a different way.

I am always on the lookout for cheap (but cool?) yarn holders.  So I went on a search to find the best soda bottle yarn holder out there.  I discovered some really great ideas, particularly this article by Teresa Gunderson, but none of the bottles were pretty.  I mean, I don't need it to look like it's not a empty bottle, but I was looking for some flair!  By the way, read Teresa's article, the idea of storing yarn in the bottles to keep it dry and clean is brilliant by itself, but then adding that she throws the bottles into her project bag for on-the-go crafting?!!  Did you hear that noise?!  My brain just exploded.  Why, oh why, has it never occurred to me to use two liter bottles when I'm traveling with my crochet projects?  My spindles are rad, but they are heavy and not appropriate for travel...  Yet my yarn still wants to roll around on the floor.  That cinched it.  Now I had to make a yarn holder.  And I knew just the bottle I wanted to use...


I peeled off the Sprite Zero label and discovered that underneath the bottle was segmented by little ridges. Perfect!!!  I cut the bottle apart, using the ridges as guidelines so that my cuts were straight.  I cut the bottle at the top ridge and at the middle ridge, which gave me three pieces to work with: the top, the bottom, and then a little 3/4" strip from the middle.  I set the middle strip aside and focused on the two big parts.


You're going to need a 14" or longer zipper for this project.  I used an 18" zipper, because that was what I had.  The circumference of the bottle is 13" so we're going to have to customize the zipper, like how I showed you when we made the Work-In-Progress Bag.  But first, we're going to hot glue!

Hot glue the zipper to the bottom section of the bottle (quick reminder, it's really hot! Be careful, Dynamos!).  You want to try to get the teeth fairly near the edge of the bottle, so that it's neat and lined up.  When you get close to the end (beginning!) stop a half an inch or so before you reach the teeth where you started.  Give yourself a little bit of space, maybe a quarter of an inch, and then sew across the zipper teeth to create a new end to your zipper.  Snip off the excess, and melt the edges to keep it from fraying.  If you want to get fancy schmancy, you could crochet a little end cap for this flappy, slightly unsightly, end of the zipper.  Otherwise, let's just move on.

Now you're going to hot glue the other side of the zipper to the top part of the bottle.  This is slightly trickier, since you will have to unzip the zipper to glue it in, and so your zipper to hot glue ratio is going to be a little worse.  Be extra careful.  But on the bright side, it doesn't matter where you start gluing, since you don't have to line up sides or anything.  Yippee!  Try not to get glue on the zipper teeth.  This is important, since the first couple of times you zip/unzip the zipper it's going to be tough anyway. Hot glue on the zipper track just makes it that much harder.  I got one little bonus blob of glue that completely bogged down the works until I snipped it off with some tiny scissors.  Learn from my mistakes, Dynamos!  Take care of your teeth!  LOL!


Hmm.  So we got the bottle together, but now what?  The hot glue and zipper don't look especially good at this point, so I think we should crochet something to cover that part up.  There's not a word, or even a phrase, that I can come up with that adequately describes what that piece is, so I'm kind of at a loss as to what I should call the pattern.  For now, I am going to call it Bottle Flair.  I toyed with Zipper Edging for a few minutes, but Bottle Flair won out.  ** If you have an opinion, feel free to express it in the comments below.  Let your voice be heard!  I will also accept other naming suggestions.  I don't expect that this will be the only time that I make these, and I'd love to have a name that we all agree on.  Dynamo votes count double!** 

Supplies: 
Small amount of worsted weight yarn (I used Lion Cotton in Purple)
Size G hook

Bottle Flair
(make 2)
R1: ch 44, sl st to first ch to join round (44 st)
R2: ch 1, sc in each ch space around, sl st to first sc to join round (44 st)
R3: -do not chain- (skip 1 sc, 5 dc in next sc, skip 1 sc, sl st in next sc) 11 times 
Fasten off.  Weave in ends.

Slip your Bottle Flair onto the bottle with the straight edge towards the zipper.  Hot glue the Bottle Flair in place.  **Bottle Flair feels very fancy, maybe Zipper Edging would have been better... It's not too late, place your votes now!**

This is what your finished Yarn Holder should look like.  Unless you used a different color, in which case, your Yarn Holder is going to look different - but similar - to this.

The Yarn Holder in action!  I am very happy with how it turned out.  I think I'm going to make several more, since they will be perfect for multi-colored work.  And, most importantly, my yarn isn't going to roll around on the floor of the car when I go to the drive-in now. 

xoxo

P.S. Don't throw away that 3/4" strip of plastic from the middle of the Sprite bottle.  I've got a project that uses it coming up on Thursday.  In the meantime, have a happy 4th of July!
xo Jaime


Thursday, June 14, 2012

Designing a pillow...

Good Morning, Dynamos!

I've got a project to share today, but it's not exactly a pattern.  It's an idea for a pattern.  I shot pictures as I went along, thinking that I was going to write it up, but now that it's complete, I'm a little iffy on it.  So I thought, instead, I'd show you a little about my design process.

I saw a cute idea on Pinterest for a pillow that wrapped around a car seat belt, for kids on long car trips.  I thought, "Cute idea!  I should make one of those for Mims."  Alas, the link was for a company that was selling the actual finished pillows.  They were a little pricey for a whim, so I then thought, "Still, it's a cute idea.  I can figure out how to make one for Mims."

Meanwhile, I had just made an Ikea run and had brought home several "naked" pillow forms to crochet covers for.  My favorite were the ninety-nine cent stomach-sleeper pillows.  I had made some throw pillows last year out of them, so I knew I could sew and cut them to whatever size I wanted. Besides, if I screwed it up, I was only out a buck!

I thought I wanted my car pillow to be made up of two 4" pillow sides, so I measured out 8" columns which I sharpied onto my pillow.  I sewed along the marker lines, and then cut my pillows apart.  I was able to get three 8"x19" pillows out of one stomach-sleeper pillow.  Score! Then I sewed a seam down the center of the pillow, to crease it so that it would fold around the seat belt.

Then I used a piece of scrap fabric (9"x40") to make a pillowcase for my new pillow.  I sewed the fabric, right sides together, along both of the long cut ends. Then I turned it right side out and poked the corner out so that they were sharp.  I would have ironed the pillowcase, but I knew that it was going to be encased in crochet, and the day was too hot to bother.  Besides, I was making it for Mims, not a private client. So I slid my pillow into the case, tucked the open end inside around the pillow and sewed the case closed.

Next I got to crochet my cover.  It took an entire skein of Lion Brand Cotton 100% Cotton worsted weight yarn.  I used a size G hook. I made my piece 70 stitches long, and just went back and forth using hdc stitches until the skein was gone.  I was left with about 18" of yarn for a tail.

I sewed my covered custom-sized pillow onto my crocheted piece, leaving about an inch of crochet as an edge I could use later for installing the pillow into my car.  I wasn't sure at that point how I was going to do it, and I wanted plenty of room in case I decided velcro was the best way to go.  I also discovered at that point that 70 stitches was about 5 stitches too long for my pillow form.  So I folded the bottom edge over the pillow and stitched it down.  I then stitched the pillow down on the other side, catching the folded edge in that seam too.   That left me with a poufy pillow part and a long flat blanket-y piece to wrap around the seat belt.

I thought about buttons and velcro to close my car pillow, but ultimately, I was worried about choking (buttons) and about scratching little faces (velcro).  I needed to come up with something else.  Something soft, something easy, something removable since I wasn't sure how many people would be into sewing the pillow into their car permanently. I finally decided that weaving a doubled-over length of ribbon through both sides would be easy enough to remove if it got gross, but not easy for a little guy (or gal) to pull off in the middle of a car trip.  I tied a bow at the top because it looked cute that way.  For a little boy, I might tie a small knot at the base of the pillow instead.  I suppose it would depend on the kid...


Mims likes her new cover a lot.  She has always hated seat belts, ever since the one horrible incident where I pulled her belt out too quickly and she got a rope burn from it.  Would that be a belt burn?  Anyway, I still feel awful about it, and this in no way makes up for my accident, but it does make it so that she will allow the belt to be next to her neck, which is much safer than her holding it away from her body.

The pillow didn't fold around the belt like I had hoped.  I would make it even narrower next time, I think.  Maybe 6".  And I would save myself the crochet and only use 65 stitches for the length of the cover.  I love the ribbon closure.


Do you have an opinion?  Should I have waited until this idea was perfected before I shared it?  Or does this spark your own ideas on how to improve upon my design?  I would love to hear what you think.

xoxo

Wednesday, May 23, 2012

Yarn Spindles

If you've read any of my posts lately, you will know that my current favorite yarn is the Aunt Lydia's Fashion 3 Crochet Cotton.  I am obsessed with it.  I love everything about it: the bright colors, the all cotton-ness, the fact that it's so small so all my projects look hand-crafted and not homemade-y.  Yeah, I make up a lot of words, but you get the point. I am crazy about that yarn.

I am not crazy about the way that that yarn comes.  It comes in balls. Not pull skeins.  I suppose that it would tangle too much if it was in a pull skein, but still.  I spend solidly half of my crocheting time pulling yarn from the ball, chasing the ball across the room when I have pulled too vigorously and it rolls off the couch, and then re-winding the mass of yarn that has come off as it rolled around on the floor.  I am unwilling to crochet from a ball rolling around on the floor, if you're thinking that might be an acceptable solution to my problem.  But I had to do something about it.

I went to Target, thinking that they might have something I could use to keep my yarn from rolling around on the floor.  I looked at paper towel holders, closet organizing systems, and I even toyed with the idea of using one of those free-standing toilet paper holders.  None of them were perfect though, and I knew that I would have to fuss with whatever I brought home to make it work.  I knew that I could come up with something better.

When I was in college I took a sculpting class.  One of our projects required an armature, which we made from plumbing supplies and a block of wood.  Something about that project popped back into my mind to use as a solution to my problem. I took a trip to Home Depot to see if I was right.

I picked up two 1/2" metal floor flanges from the plumbing department.  I got two 1/2" x 5" pipes that were threaded at both ends, and I got two 1/2" caps to seal the ends.  I then went to the paint department and grabbed a can of aqua spray paint and some clear gloss spray.  My grand total at checkout was right around $25. (Pardon my hand and camera shadow in the picture! lol!)

I got my supplies home and went to work.  I threaded the pipe into the floor flange, and then twisted the cap onto the other end of the pipe.  Easy peasy, lemon squeezy!  It took less than a minute.  I grabbed a sheet of paper, so I wouldn't spray paint the lawn, and I went outside.

I put two light coats of the aqua paint on the pieces.  I used a third coat to hold on some glitter, because I love glitter almost as much as I love size 3 crochet cotton.  Then I sprayed the heck out of it with the clear gloss.  I let it dry for about a half hour.  It was a warm sunny day, it might take longer if it was overcast and cold.

My new yarn holders work great!  The spindle parts work like the thread holder on a sewing machine, so I don't have to pull as hard to get the yarn off, and the ball just spins instead of rolling around.  The floor flange is heavy enough that I don't pull it over, and I can see making a bunch of these for when I'm working with lots of colors.  Tres Convenient!!


xoxo

Saturday, May 19, 2012

Birthday Award Button

Yesterday was my sister's birthday.  We all went out to dinner and then came back here and I made brownies for dessert. It was fun.  

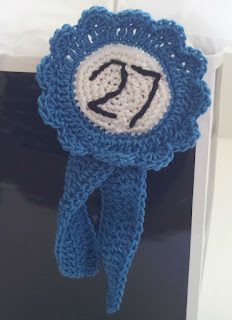
I had put together a The Night Circus themed gift (remember this?) for her, but I wanted to make her something that she could wear to dinner, to let everyone know it was her birthday.  I also wanted to make her something that she would be happy to wear during her birthday festivities...

I've been playing around with the idea of doing a county-fair-style award ribbon, which seemed like a good place to start for my birthday button.  Of course, she would get the blue ribbon, but I wasn't exactly sure what to put in the center.  A miniature birthday cake?  Spell out Happy Birthday?  Her age?!  That got me to thinking about a story from a couple of weeks ago, one that has been cracking me up every time I think of it:

My sister is a teacher, and at her school they have a big birthday party at the beginning of each month for all of the teachers at the school that have birthdays that month.  So, 2 weeks ago, my sister walked in my back door with her arms full of birthday presents, and flowers, and balloons.  My dad asked her what all the stuff was for. She replied,  "It's my birthday presents!"
He looked at her quizzically.  "Is today your birthday?" he asked.
She put her presents down and narrowed her eyes.  "No," she replied.  "Dad? Do you know when my birthday is?"
He paused for a few moments.  "Your sister's is March, so you're May.  It's not the 15th, it's the 18th. May 18th." he said.
She gave him a smile. "You got it right.  But, do you know how old I am?" she teased.
This time he didn't hesitate at all. "You're twenty-seven!" he declared.
My sister, who is now well into her thirties, delightedly replied, "Yep, Dad, you got it right again."

So, when I handed her the present at the restaurant, she delightedly put her birthday award button on.  
"You knew just the right age for it!" she told me.
"Well, of course!  I asked Dad." I replied.

xoxo

Saturday, May 12, 2012

Glamorous Crocheting

Hello Dynamos!
When Mims was about 4 months old, I tripped on my neighbor's front porch step and broke my left pinky.  I am left handed, so it was extra tough.  It won't surprise you that Mims did not seem to take it easy on me because I had a broken finger.  Four-month-olds are selfish like that...

Ahahahahahahahaha!!!

Okay, so my finger was broken at the knuckle, and it still (five years later) doesn't close into a fist all the way.  And it hurts when it rains, but that is not the point I am making.  Where I was going with this story is that I need  to crochet with those ergonomic big-handled crochet hooks or my pinky aches for the rest of the day.  Alas, the big-handled crochet hooks are four times the price of the skinny aluminum ones, and I have a set of the skinny aluminum ones, so OBVIOUSLY I needed to make my own handles.

Yippee! I could make anything I wanted. And I wanted glitter!  I saw a video awhile back that The Crafty Chica did on glittering a floor.  That was what I wanted my crochet hook handles to look like!  Fabulously, glamorously, Zsa Zsa Gabor-worthy glittered!

When I got to the craft store to pick up some polymer clay, I found that the Premo line of polymer clays had glitter colors!  Hooray! My job was half done! I picked up a package of red and blue glitter clay and went on my merry way.

I made my hook handles (1/2 oz is about right for a handle, 30 min at 275 degrees!), and they were glittery and beautiful, in a subtle subdued sparkle sort of way.  A coat of resin helped bring the sparkle out, but it wasn't the fabulous over-the-top blinding-myself-when-I-crochet effect I was looking for.

So, I got out a hook that I had made a handle for in a flat turquoise color, and I got out my micro-glitter.  I gave the handle a thin coat of uv curing resin, and then glittered the heck out of it.  When it had cured, I went for round two, making sure to cover all the spots that weren't sparkly enough!  When the 2nd layer had cured, I gave it a thicker top coating of resin to seal all the glitter inside, so it wouldn't get on me and my projects.  Glitter hook, super awesome. Glitter on my face, not so much.

All in all, this project was super fast and so much fun I would highly recommend you glitter yourself some fabulous hooks.  And my pinky doesn't hurt!

Oh yeah, one last thing, I couldn't help myself.  I crocheted a cover for a green handle with my favorite Aunt Lydia's Size 3 Crochet Cotton.  So soft and squishy, and I like that the green shows through!

xoxo
Related Posts Plugin for WordPress, Blogger...