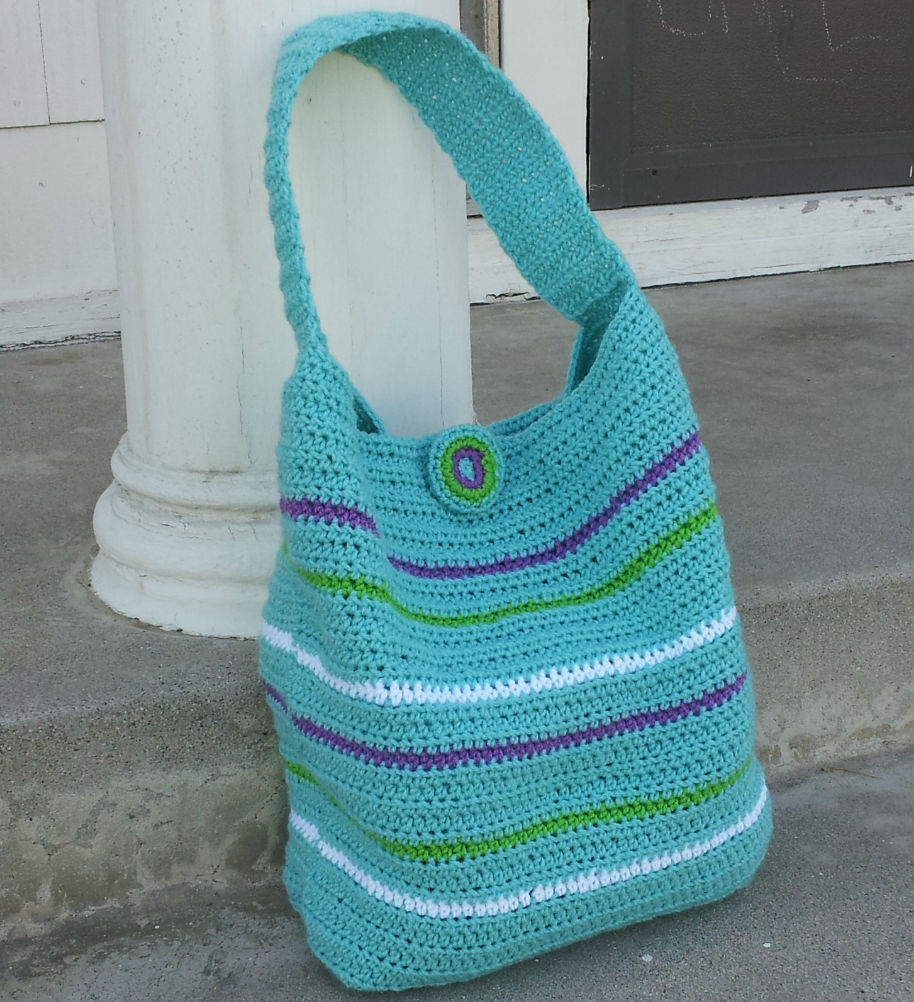
Cheerio! I am not in London, nor have I gotten to crochet in London, but this bag is based on one that my sister-in-law bought the last time that we took a family vacation to London. Thus, it is The London Crochet Bag. It is the inspiration for my fast and easy crochet buttons. In that post, I said that I would write up the pattern if anyone was interested. I got a request for it!!! Yippee!! (I am not going to apologize for being excited, I design and blog in an isolated bubble. You can't comment too much for me!!)
The first one I made used up leftover yarn from two other projects, but I wasn't sure exactly how much yarn I actually used. This one I made with brand spankin' new skeins, so I can say with absolute confidence, you need about two skeins. If you want to use two different colors (or more) please make wider stripes than I did, or you will find yourself running back to the craft store mid-project. Heed my warning, two full skeins!!
Also, use cheap yarn. I used Red Heart Super Saver, because it's not soft, and it makes a dense fabric. You won't need to line it, and it will hold it's shape fairly well. This isn't the project for your beautiful, soft, specialty yarns. This is a workhorse bag, pretty, but more importantly, functional. The bag in the picture is holding the leftover (virtually whole) purple, lime and white skeins from this project. It's a biggie!
If a large project bag sounds like your cup of (English Breakfast) tea, give it a try!
The London Crochet Bag
approx. 16" tall, 11" wide (across front), 6" deep (across side)
Supplies:
2 skeins of Red Heart Super Saver Yarn (or other cheap worsted weight yarn, in a color that makes your heart sing!)
Size G crochet hook
Yarn needle (I use the Chibi needle with the bent tip, you can use whatever works for you)
Main Bag Body:
Ch 61.
R1: hdc in 2nd ch from hook, hdc across all ch, ch 1, turn (60 st)
R2-40: hdc across all st, ch 1, turn. (60 st)
R41: sl st across 10 st, ch 1, 40 hdc, ch 1, turn. (40 hdc st)
R42-50: 40 hdc, fasten off. (40 st)
R51: using the now broken off piece of yarn, ch 10, hdc across the 40 st from row 51, ch 11, turn. (60 st)
R52: hdc in 2nd ch from hook, 9 hdc in ch spaces, 40 hdc, 10 hdc in ch spaces, ch 1, turn. (60 st)
R53-87: hdc across all st, ch 1, turn. (60 st)
R88: (button hole row) 24 hdc, ch 12, 24 hdc, ch 1, turn (60 st)
R89: 24 hdc, 12 hdc across ch space, 24 hdc, ch 1, turn. (60 st)
R90: hdc across all st, fasten off.
Strap:
Ch 11.
R1: hdc in 2nd ch from hook, hdc across all ch, ch 1, turn (10 st)
R2-39: hdc across all st, ch 1, turn. (10 st)
R40: hdc across all st, fasten off.
Button:
R1: using a magic loop, sc 7 st, sl st to first sc to join round. (7 st)
R2: ch 1, 2 sc in each st around, sl st to first sc to join round. (14 st)
R3: ch 1, (2 sc in next st, sc) 7 times, sl st to first sc to join round. (21 st)
R4-6: ch 1, sc in each st around, sl st to first sc to join round. (21 st)
R7: ch 1, (sc 2 st tog, sc) 7 times, sl st to first sc to join round. (14 st)
R8: ch 1 (sc 2 st tog) 7 times, sl st to first sc to join round. (7 st)
Fasten off. Weave in end from magic loop, making sure to tighten and secure it. Flatten button into a disc shape. Using the tail from R8, tack the flattened disc together in a few places, trying to keep your stitches invisible on the front (good side) of the button. Weave in end on the back.
Whipstitch the sides of the bag together, matching stripes if you chose to make any.
When you get the sides sewn, open the bag up and flatten the side along the open area of the bottom of the bag. This is what makes the bag sit flat. Whipstitch the bottom edge together. Weave in ends.
Center the short edge of the strap along the side seams, and whipstitch into place, making sure to put several extra stitches in each edge corner for added strength. Weave in ends.
Using buttonhole as a guide, center and sew on button.
xoxo
ed. 7/10/12: Want to see the bag in more colors? Check out the Dynamo Gallery! Finished a bag and want to show it off? Send me a picture at CrochetDynamite@gmail.com to be featured in the Dynamo Gallery!
xo Jaime
7/11/12: Washed and dryed the bag in my machines. No special settings, just threw it in with a load of Mims's clothes. It came out great! No problems at all. Thank you, Libby, for asking about how to wash it!
7/13/12:
I've gotten 2 emails in 2 days (Hi Ginny and Rebekah!) about R51. This is the general gist of the question:
I got through row 50 and fastened off, but I'm a little confused by what you mean by "using the now broken off piece of yarn." Was I supposed to fasten off leaving a long tail? Or do I make a new foundation chain? I see in the pictures that its' made in like one piece and then sewn together, I'm just not sure how to start making the long sides again from the short one I just finished. Does that question make sense? I'm still a novice crocheter so that's mostly why I'm stuck. Thanks in advance for any help you can give me! (Thanks for letting me use your email, Rebekah! Double Dynamo points to you!)
I figure that if these Dynamos had this question, some others of you might have wondered it too. Here's my answer:
I had you fasten off the yarn at the end of R50 so that you could start R51 by chaining 10 (a new foundation chain to add the 10 stitches back on that I had you drop off during R41). Then with the chain stitches on your hook, you're going to hdc in each stitch across the main bag body piece, and then chain 11 to finish the row. This puts the extra stitches that will become the sides of your bag back on. You shouldn't have to sew any part of the bag together, except the side seams and the handle. R51 ends with 61 stitches (10 chain st, 40 hdc's attached to the main bag piece, and then 11 more chain stitches). That's how you add the long sides back on after the shorter bottom section.
I am super sorry that I wasn't more clear in my instructions. I think that your question was really good, and I hope that I answered it in a way that didn't confuse you more. Please don't hesitate to email me if you need more clarification.
I hope this answers your question too, Dynamos. And that last line pertains to you as well, please don't hesitate to email me if you need more clarification (on this pattern, or any of my other patterns!). I'm still learning how to write patterns, so all the feedback that you give only helps me to produce better work. Love to you all!
xo Jaime